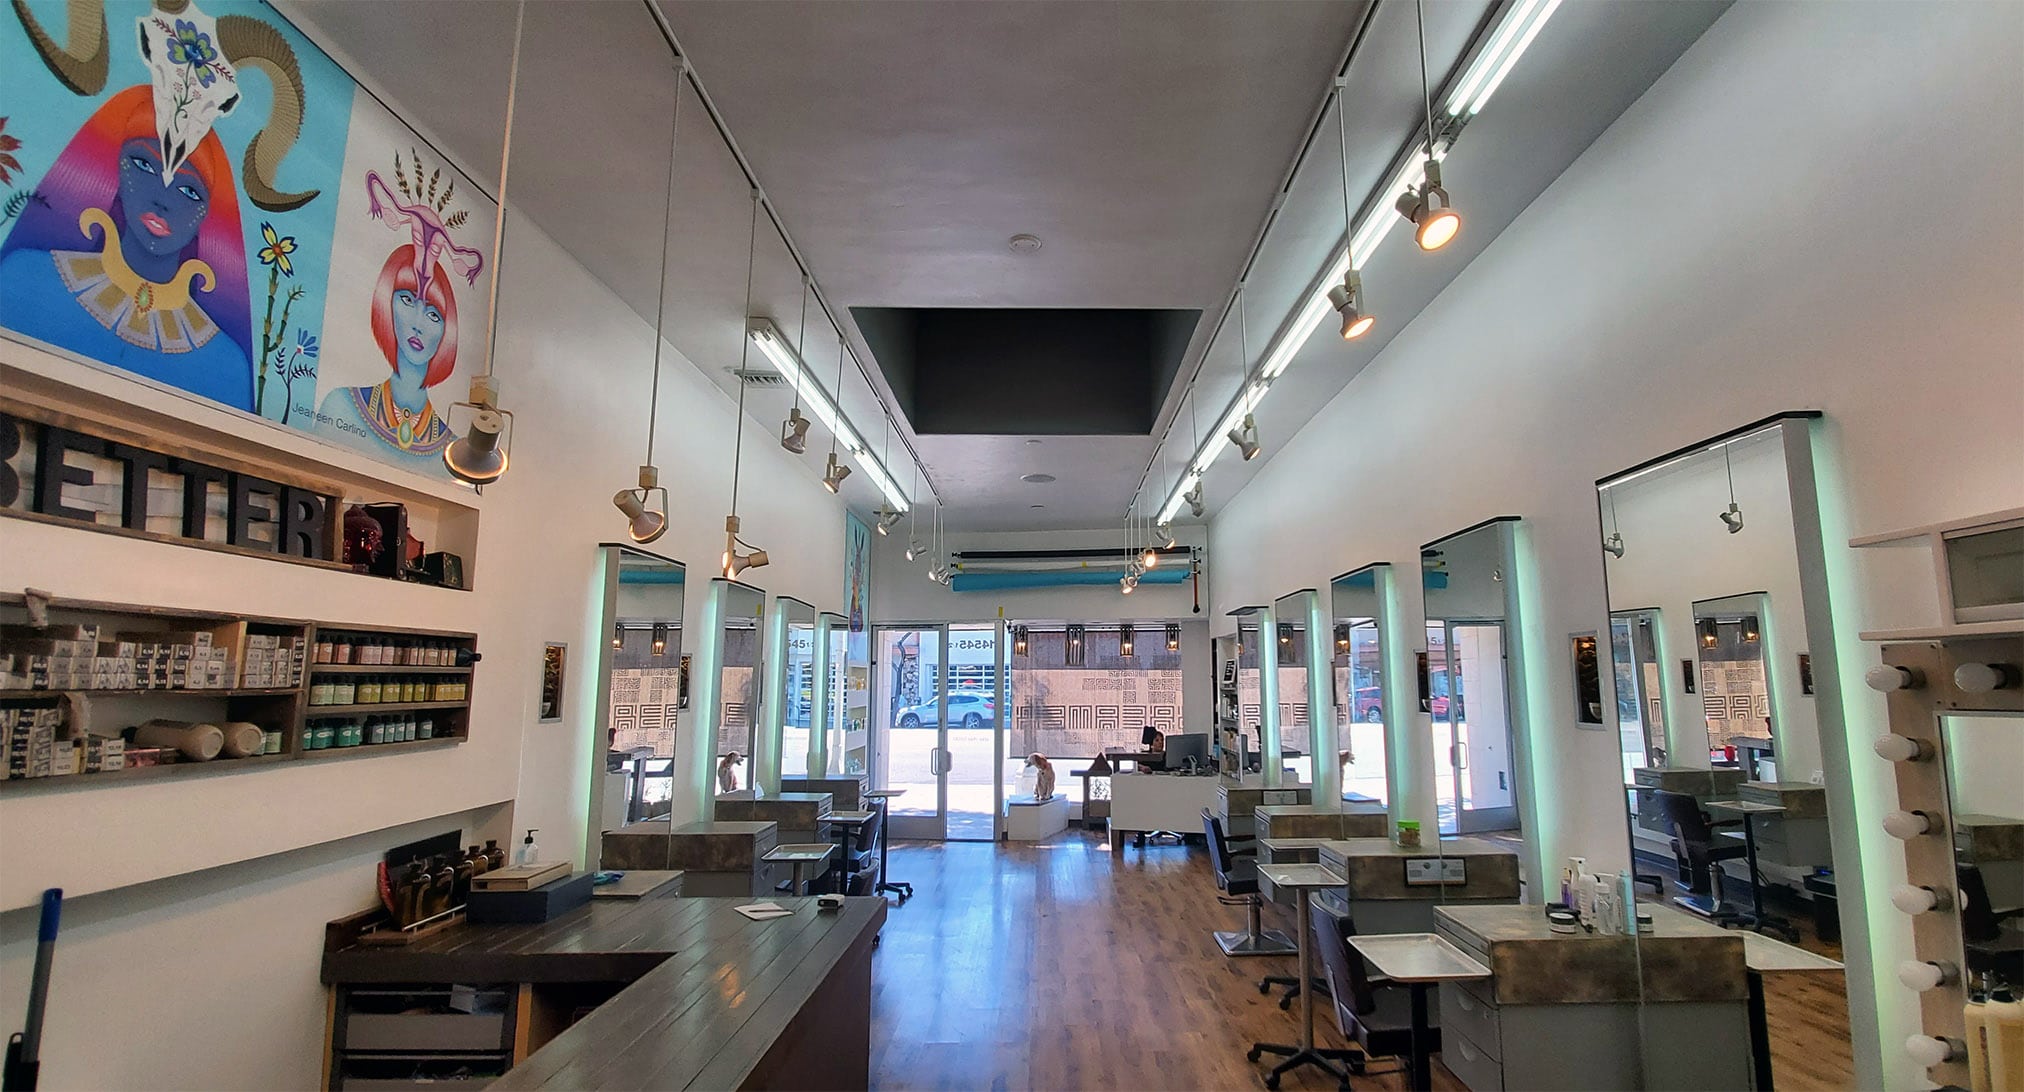
I’m friends with Johnny Ciccone, owner of the Headbetter Salon in L.A. The main floor of the salon had an empty, windowless skylight right in the middle of the ceiling that had, until that point, been the home of a humble fluorescent light.
Johnny had discussed building some type of chandelier or similar illuminated focal point that could fill that spot out. He also, for whatever reason, had a ton of LED bar light fixtures in his possession that he wanted to use as a cost-effective part of the project.
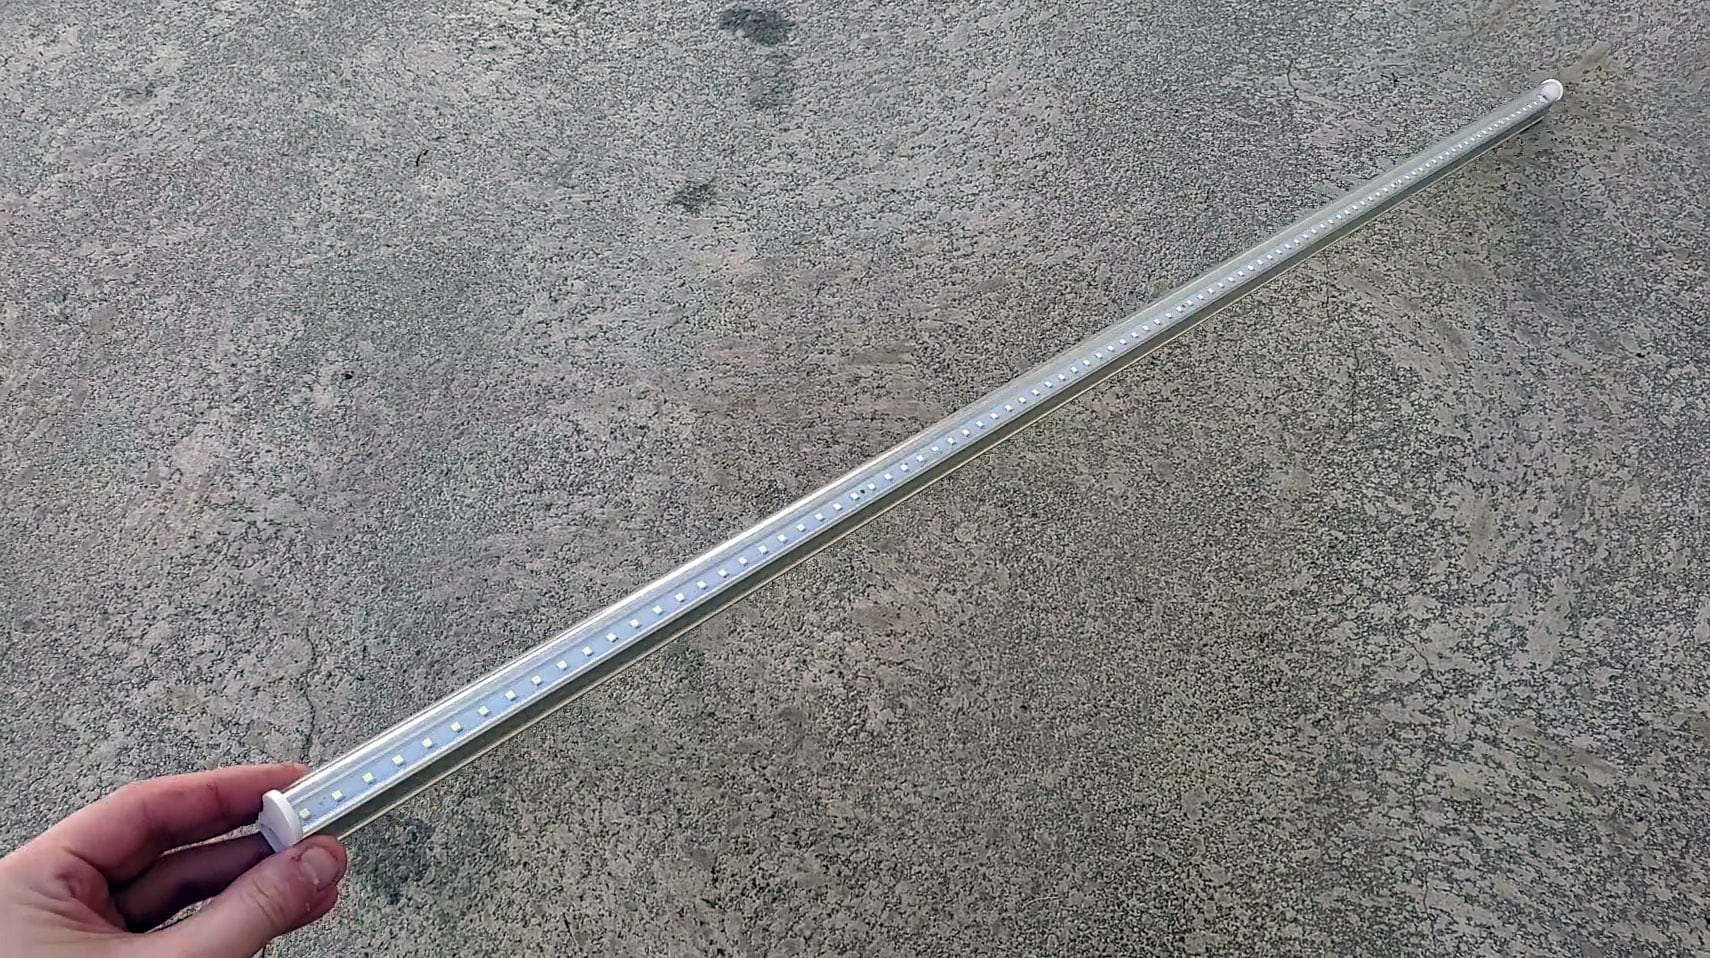
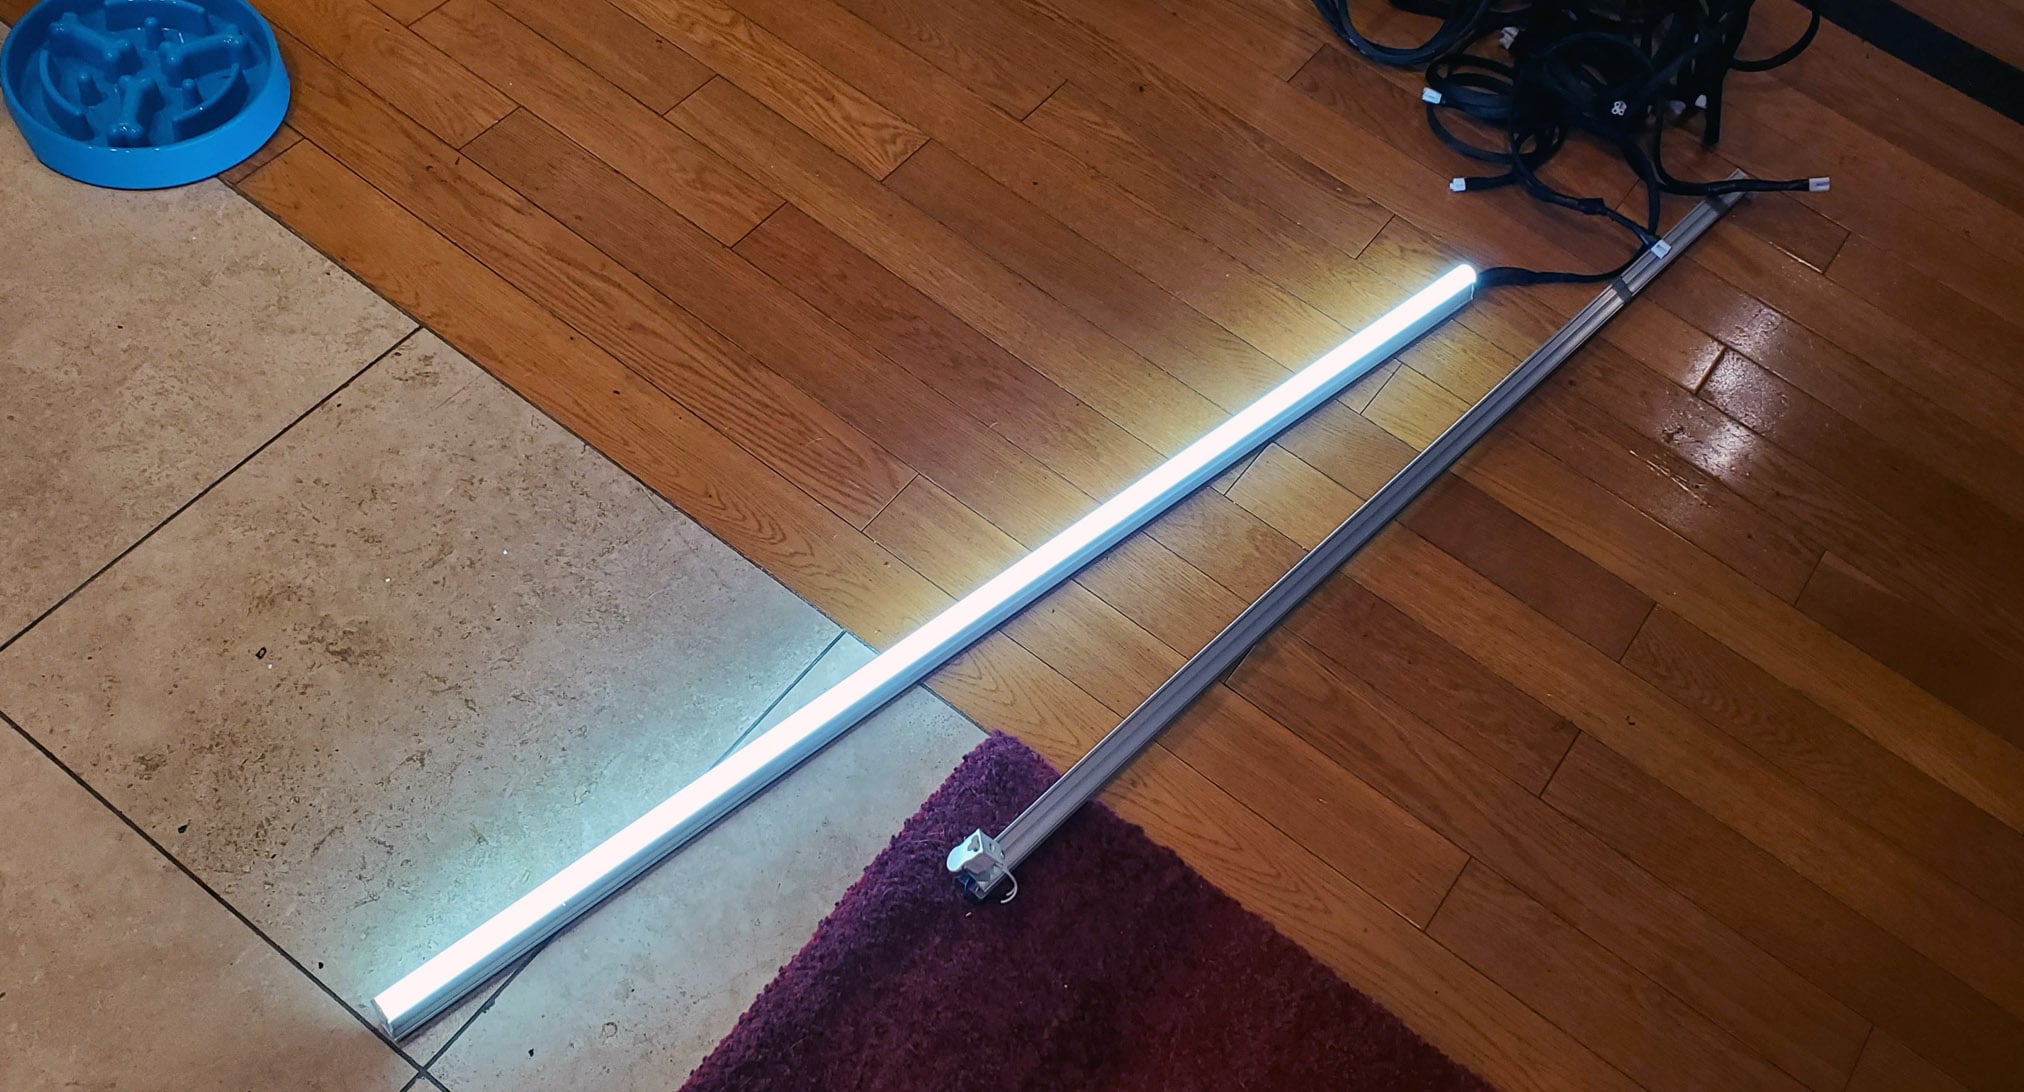
I didn’t know the provenance of these light fixtures, and they didn’t have any identifying markings that I could find. As best I could tell, these bar lights came in at around 46″ long, and seemed pretty close to the specs laid out in this datasheet for the “IT5-120V” series. Unlike your typical LED strips, these light bars did not lend themselves to being cut down or shortened easily. As a result, when time came for me to work up a few conceptual designs, I did my best to make sure they all used the full length of the light bars.
DESIGN TIME
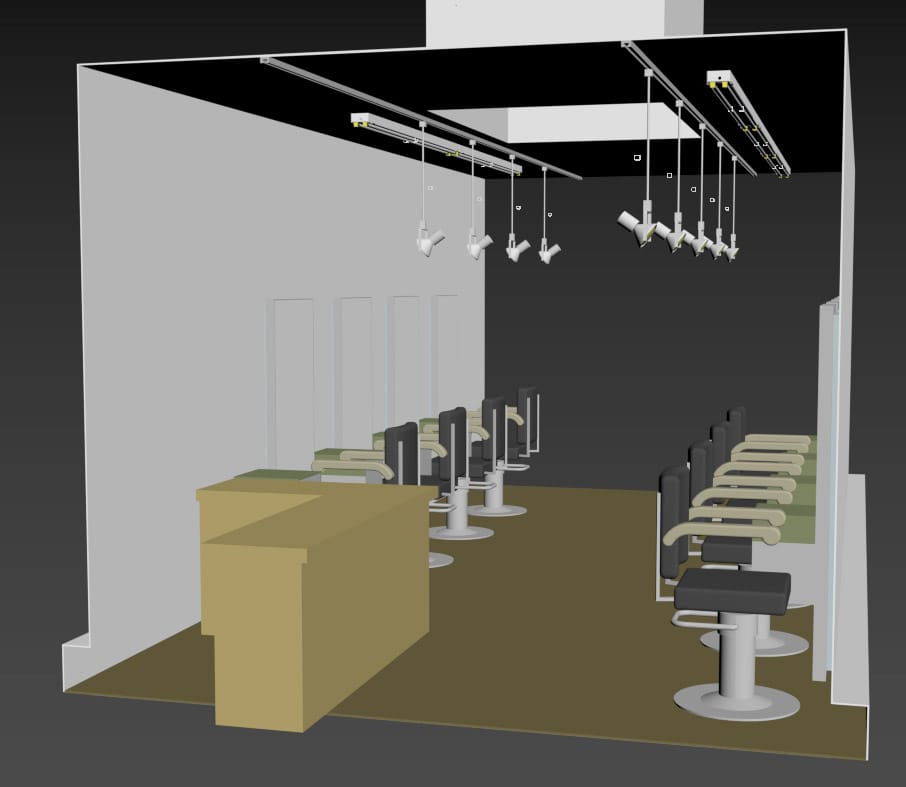
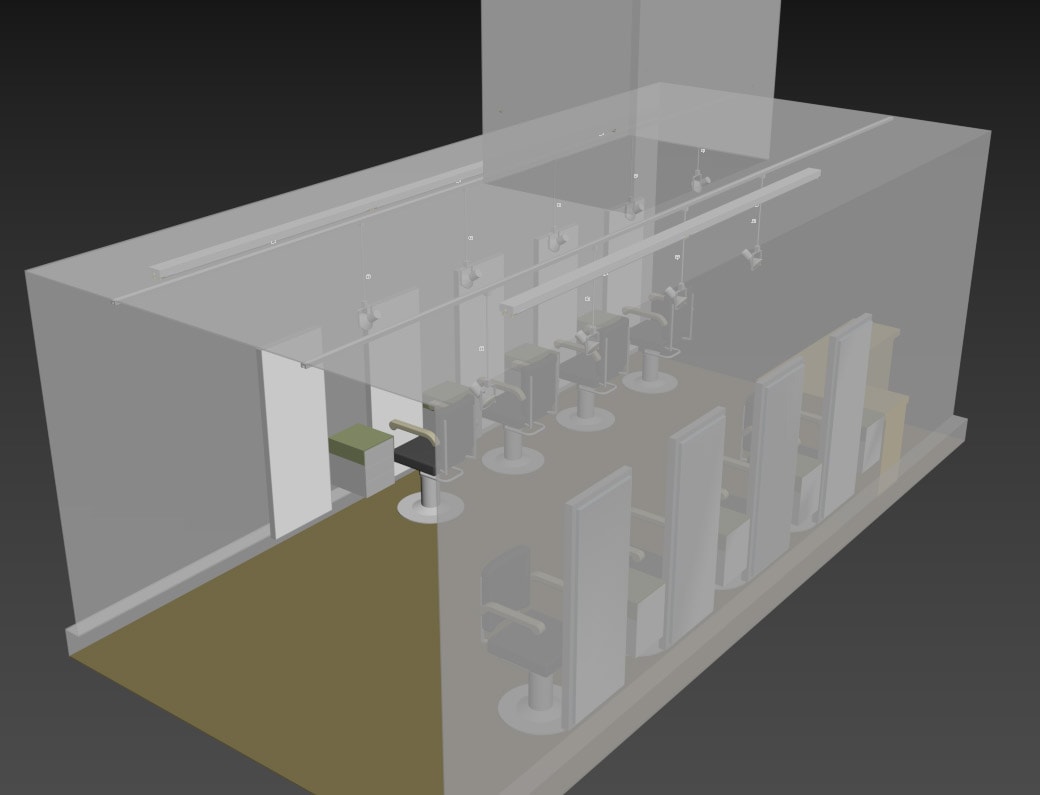
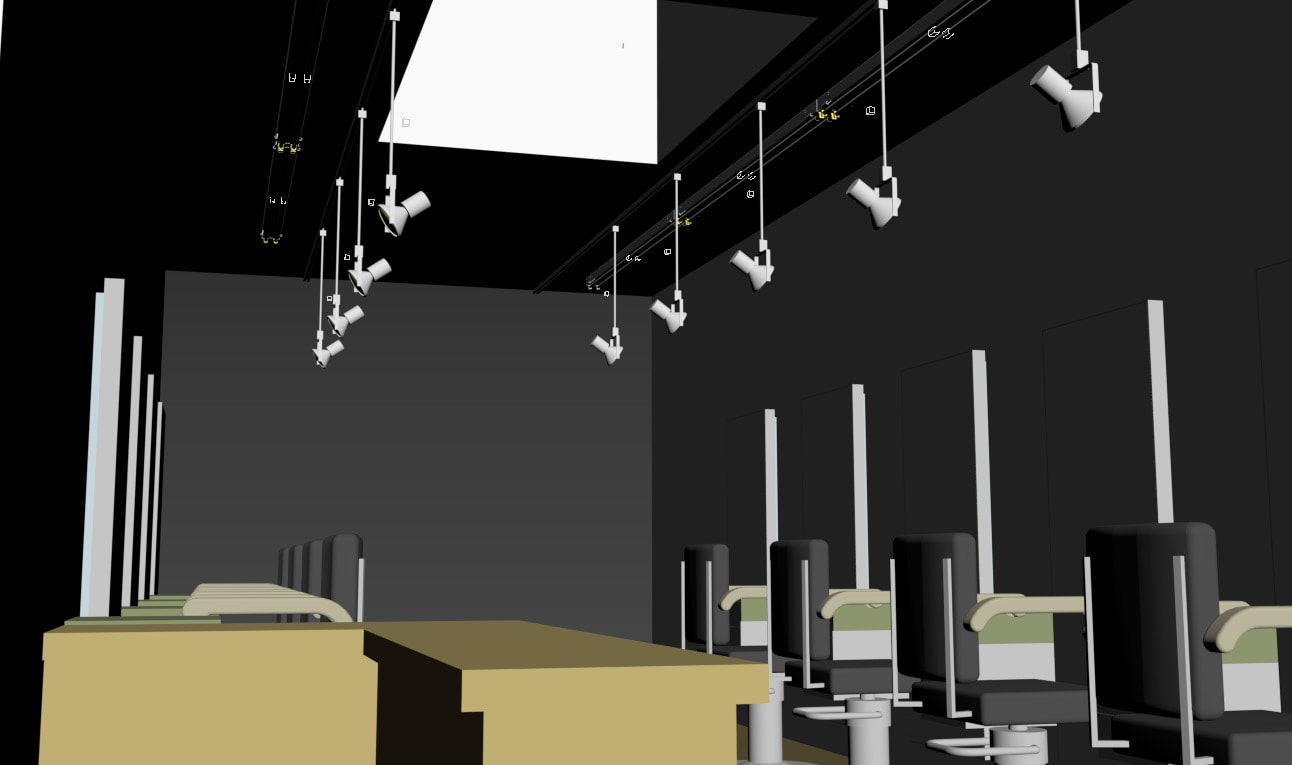
I took measurements of the entire salon space and made an approximation of it in 3D space.
The environment didn’t have to be extremely precise – its primary purpose is to give me an idea of scale, placement, and the way the fixture might end up looking in the space available. Once I had that as a framework to build on, I started roughing out some concept ideas that used the light bars in different ways. I ended up with quite a few design ideas that were provided to my client as interactive 3D views, and which are embedded below here:
After reviewing some of these ideas with the client, I ended up refining a few in a bit more detail so that we could review assembly and mounting options.
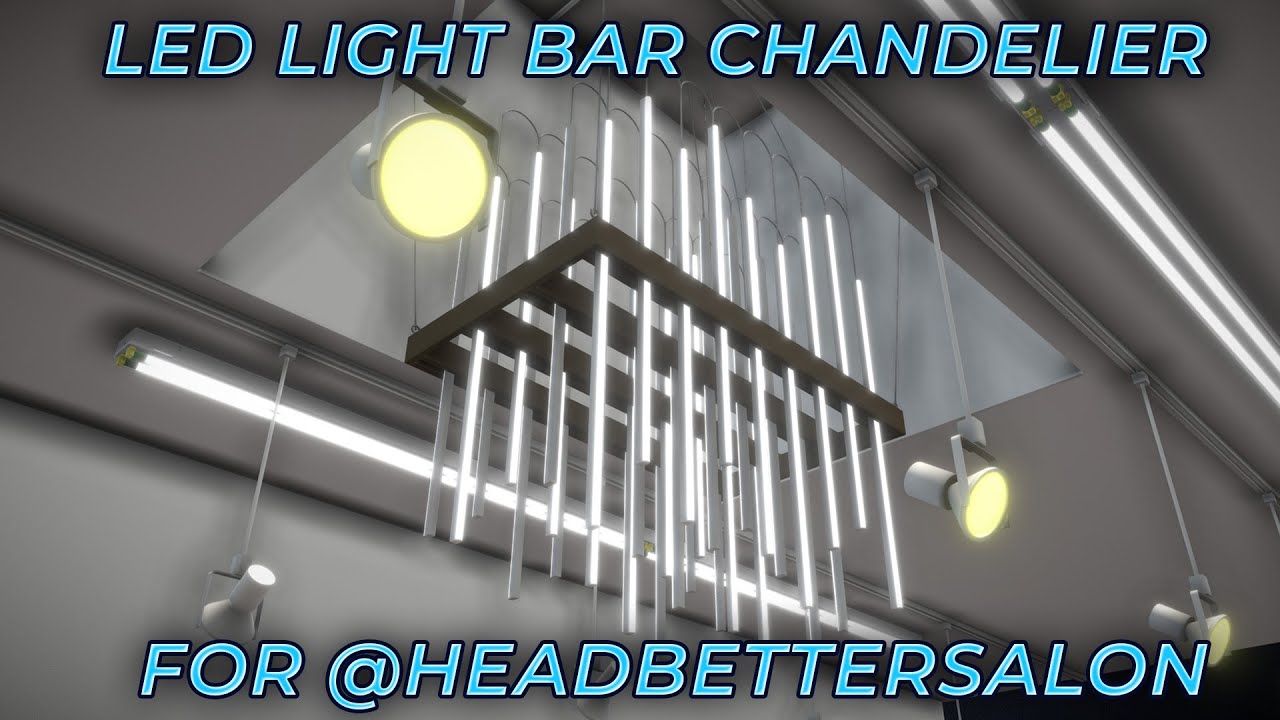
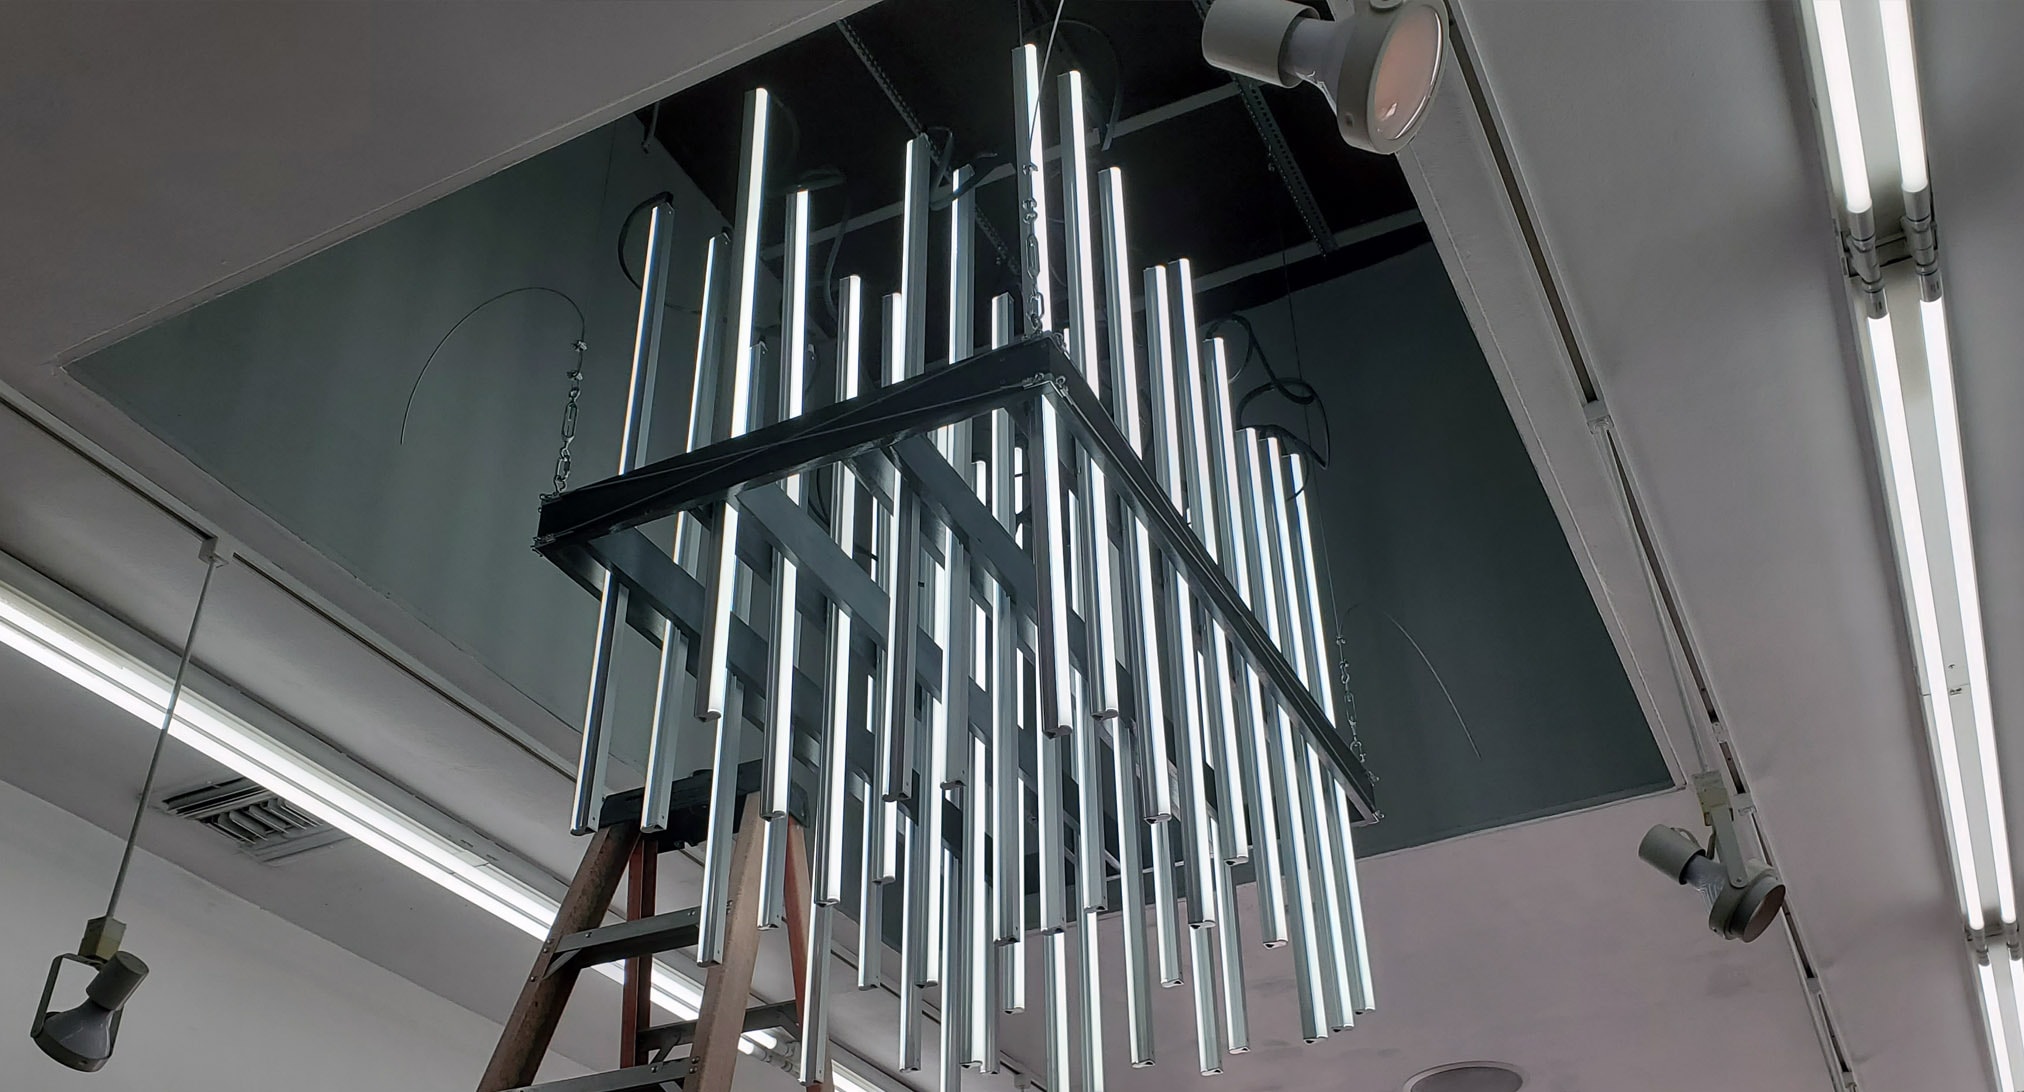
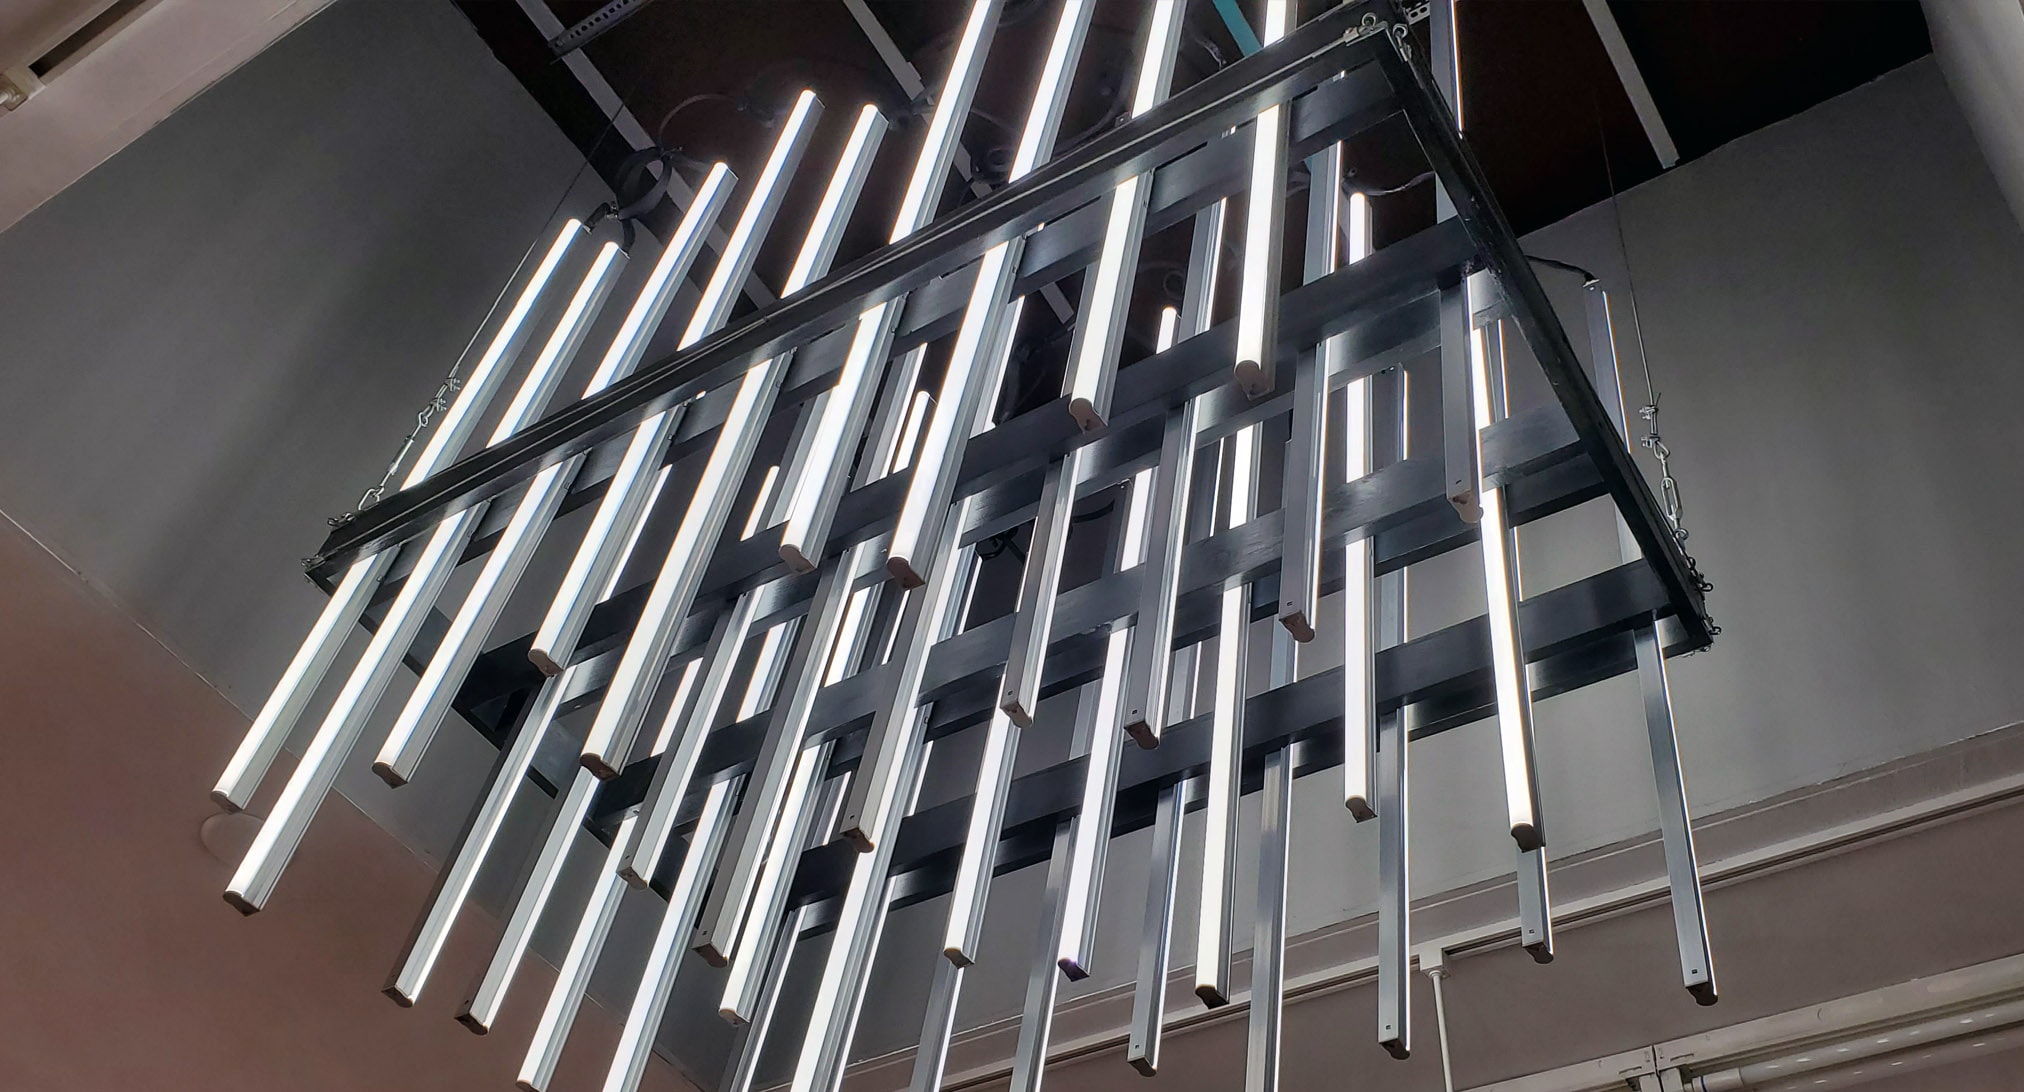
Ultimately, the client decided they liked the ‘Skyline’ design the best of the bunch. I trimmed the number of LED bar fixtures down from 48 to 36 to simplify construction. I also added some industrial-styled detailing on the outside of the chandelier’s frame, utilizing the same steel cabling that would be suspending the lights for a bit of extra visual interest.
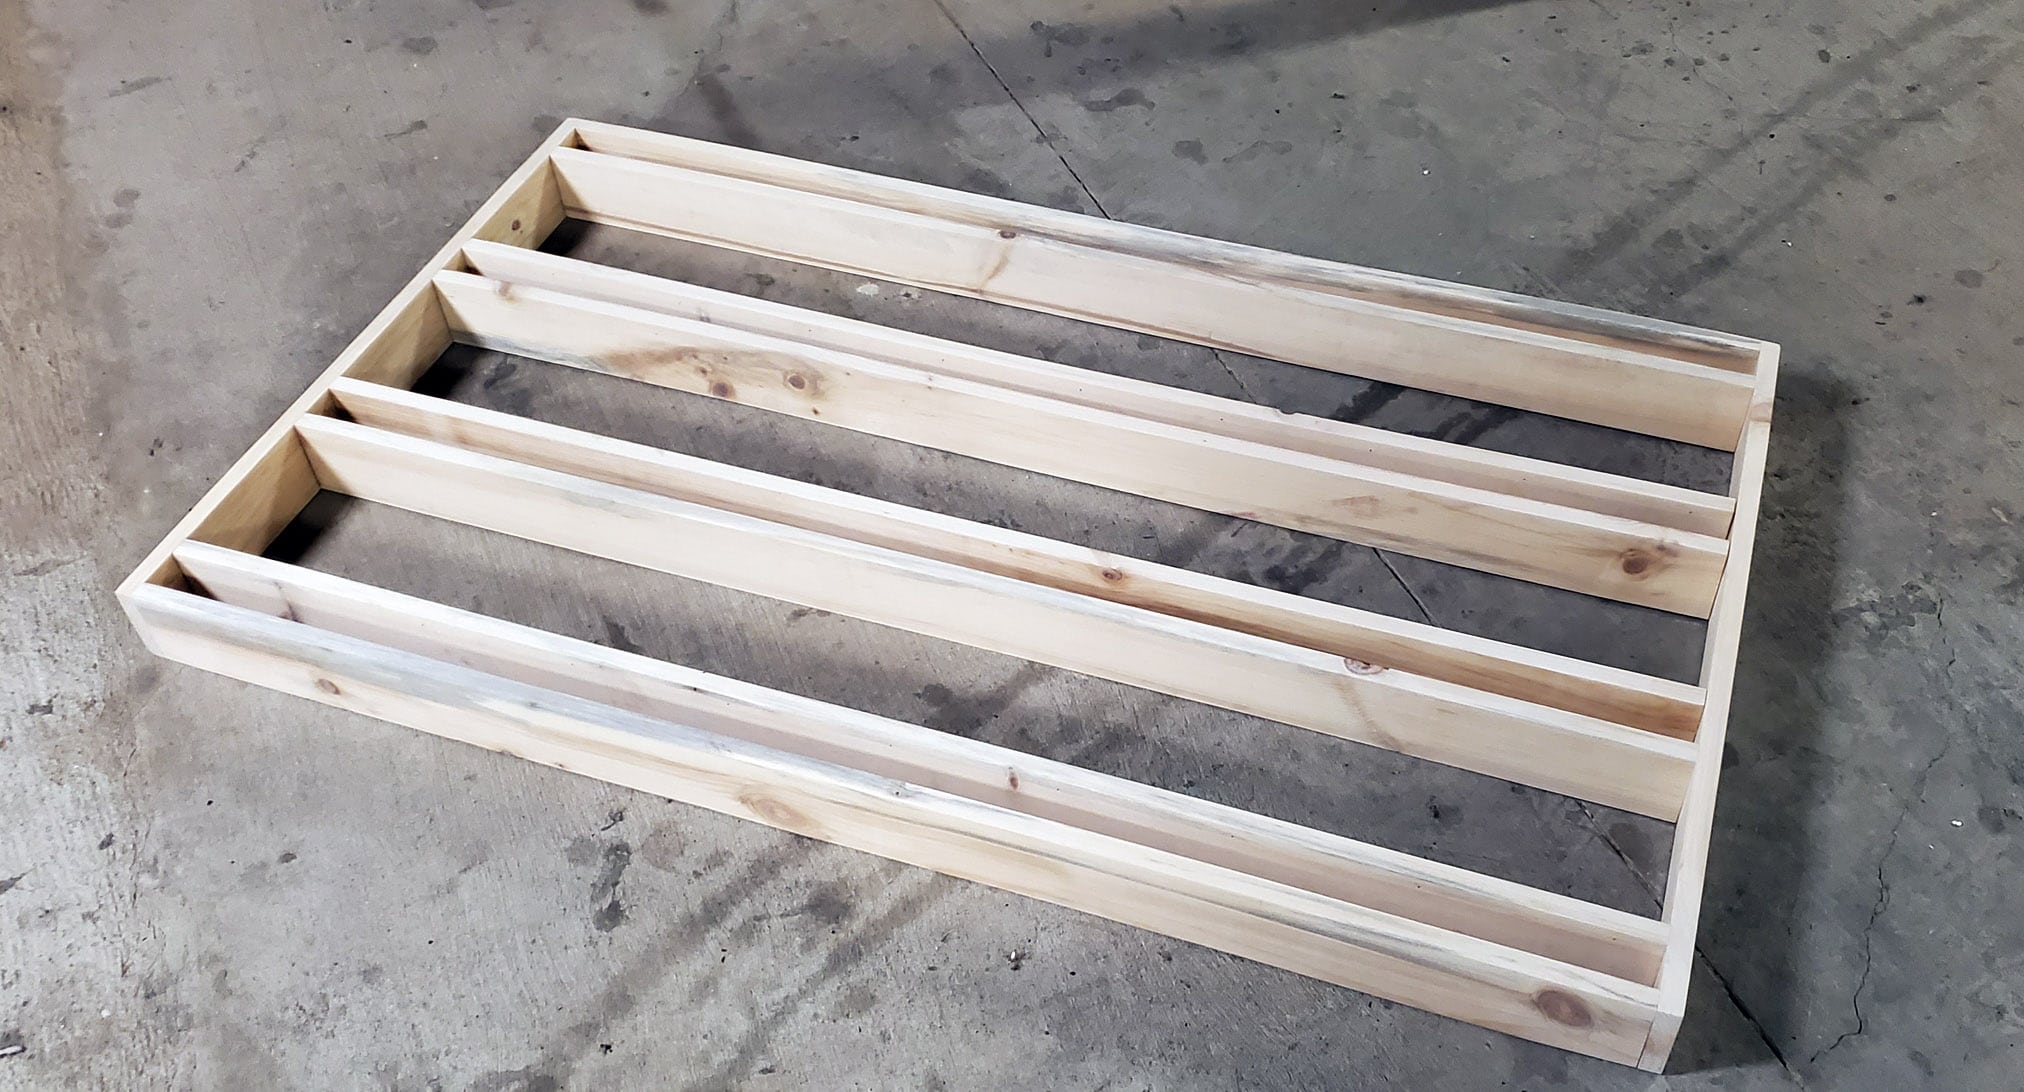
A LITTLE CARPENTRY
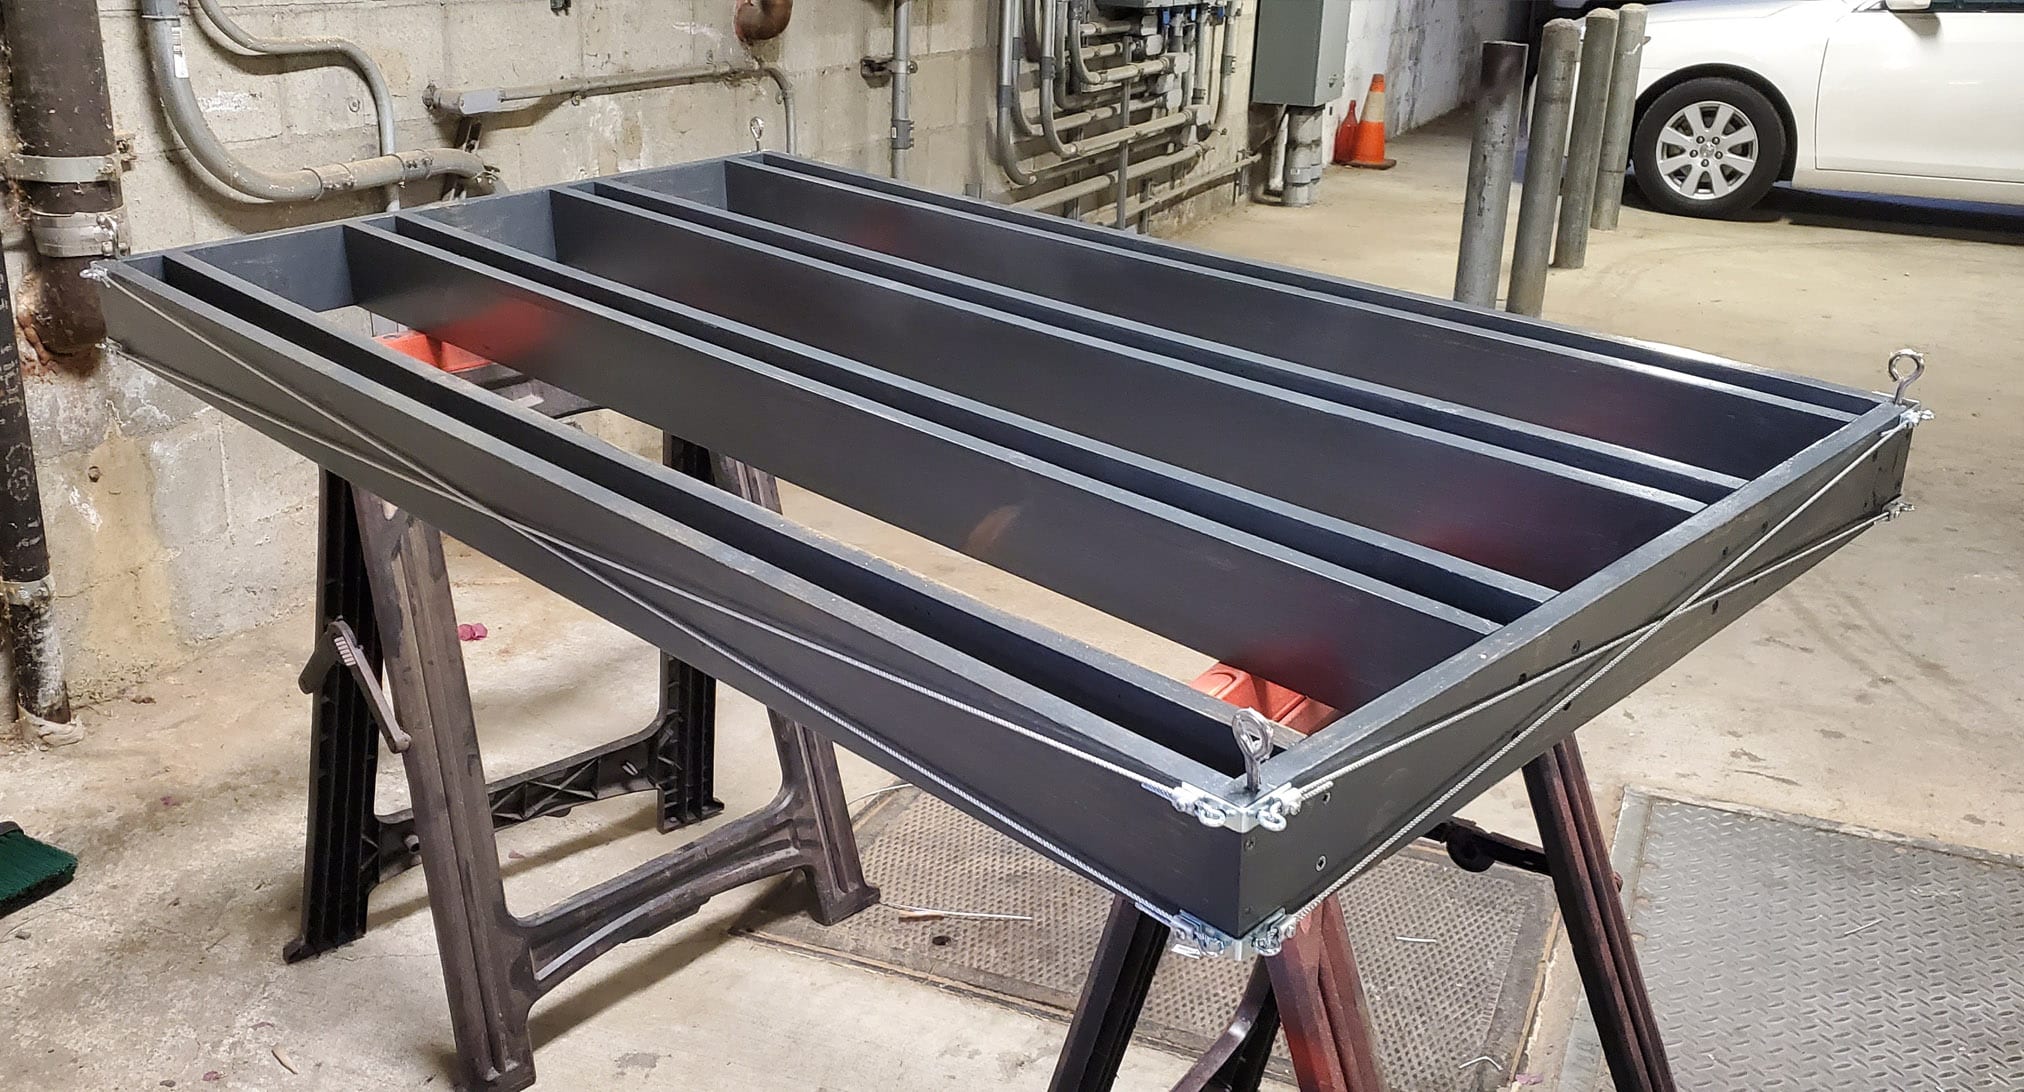
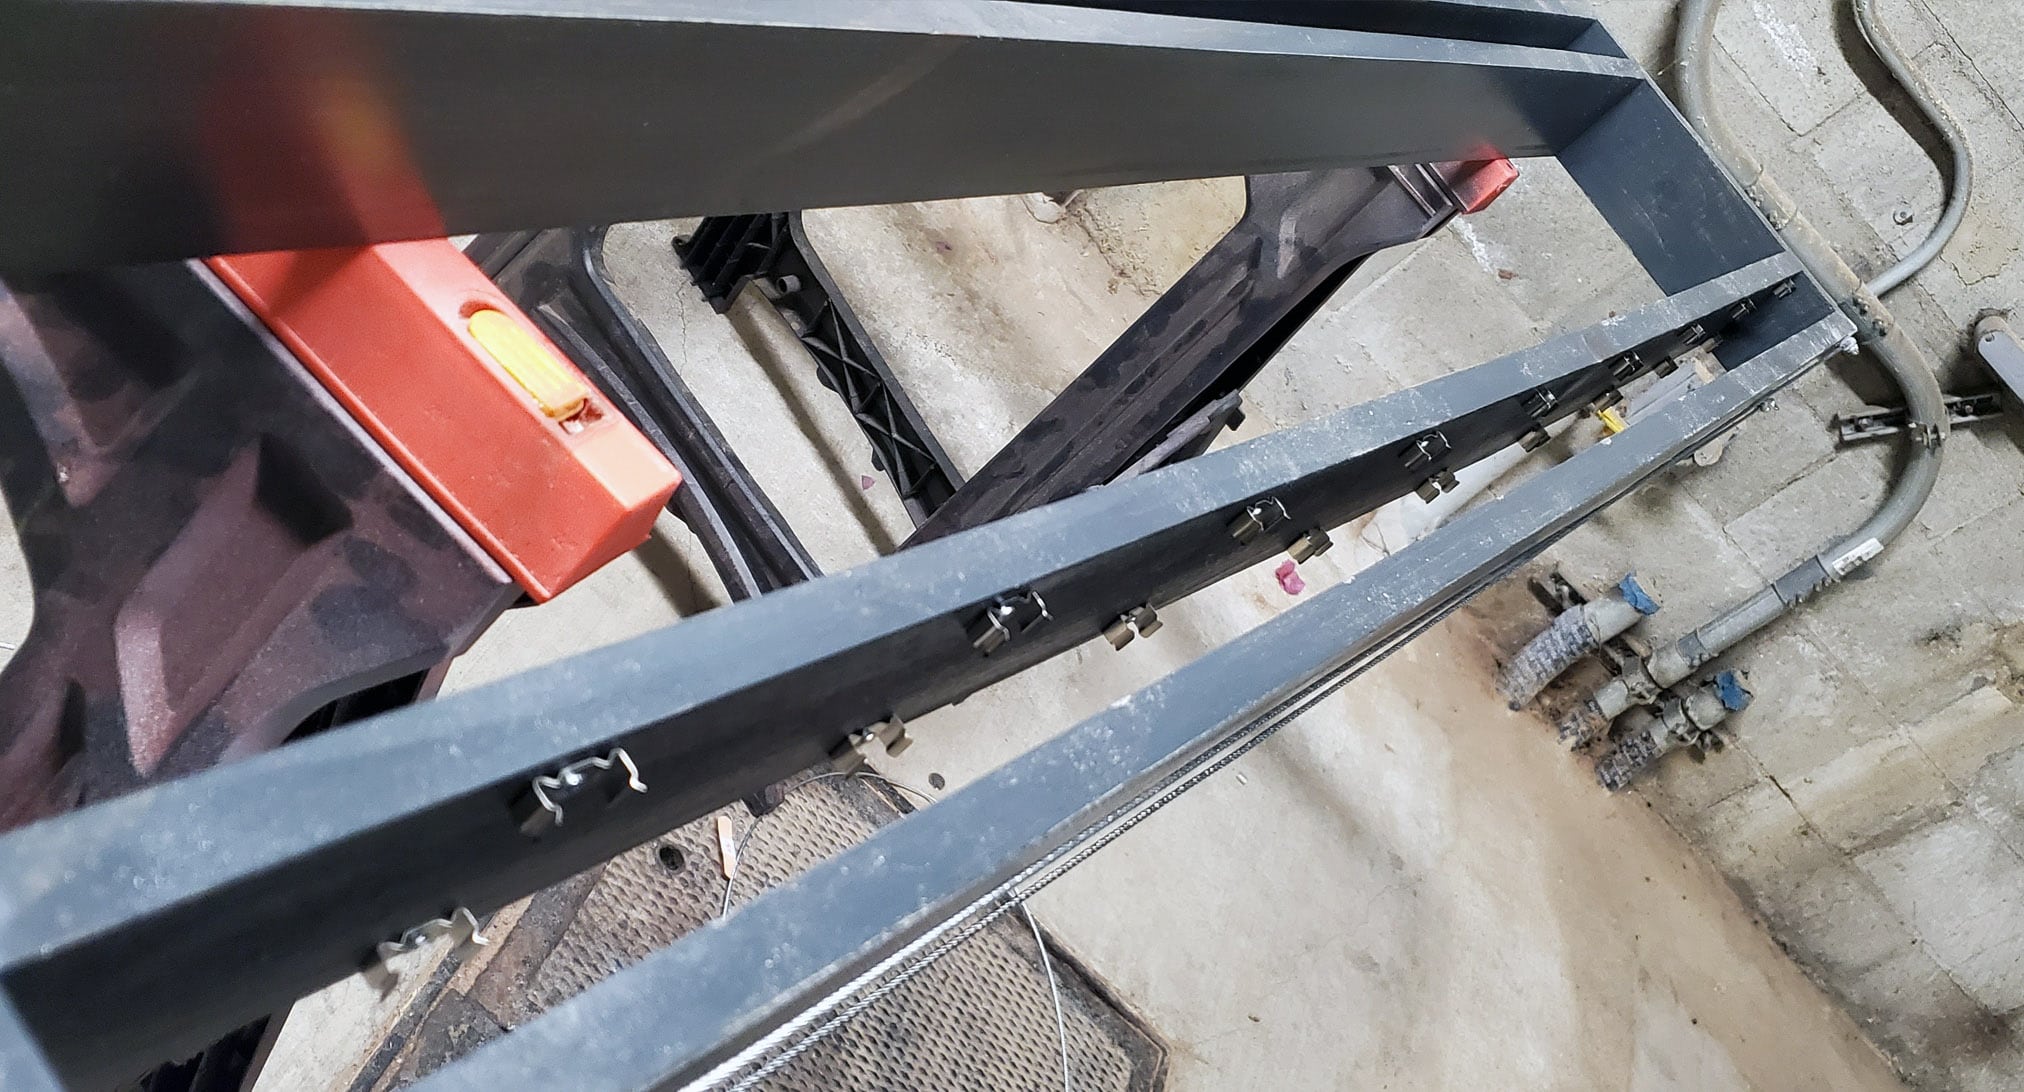
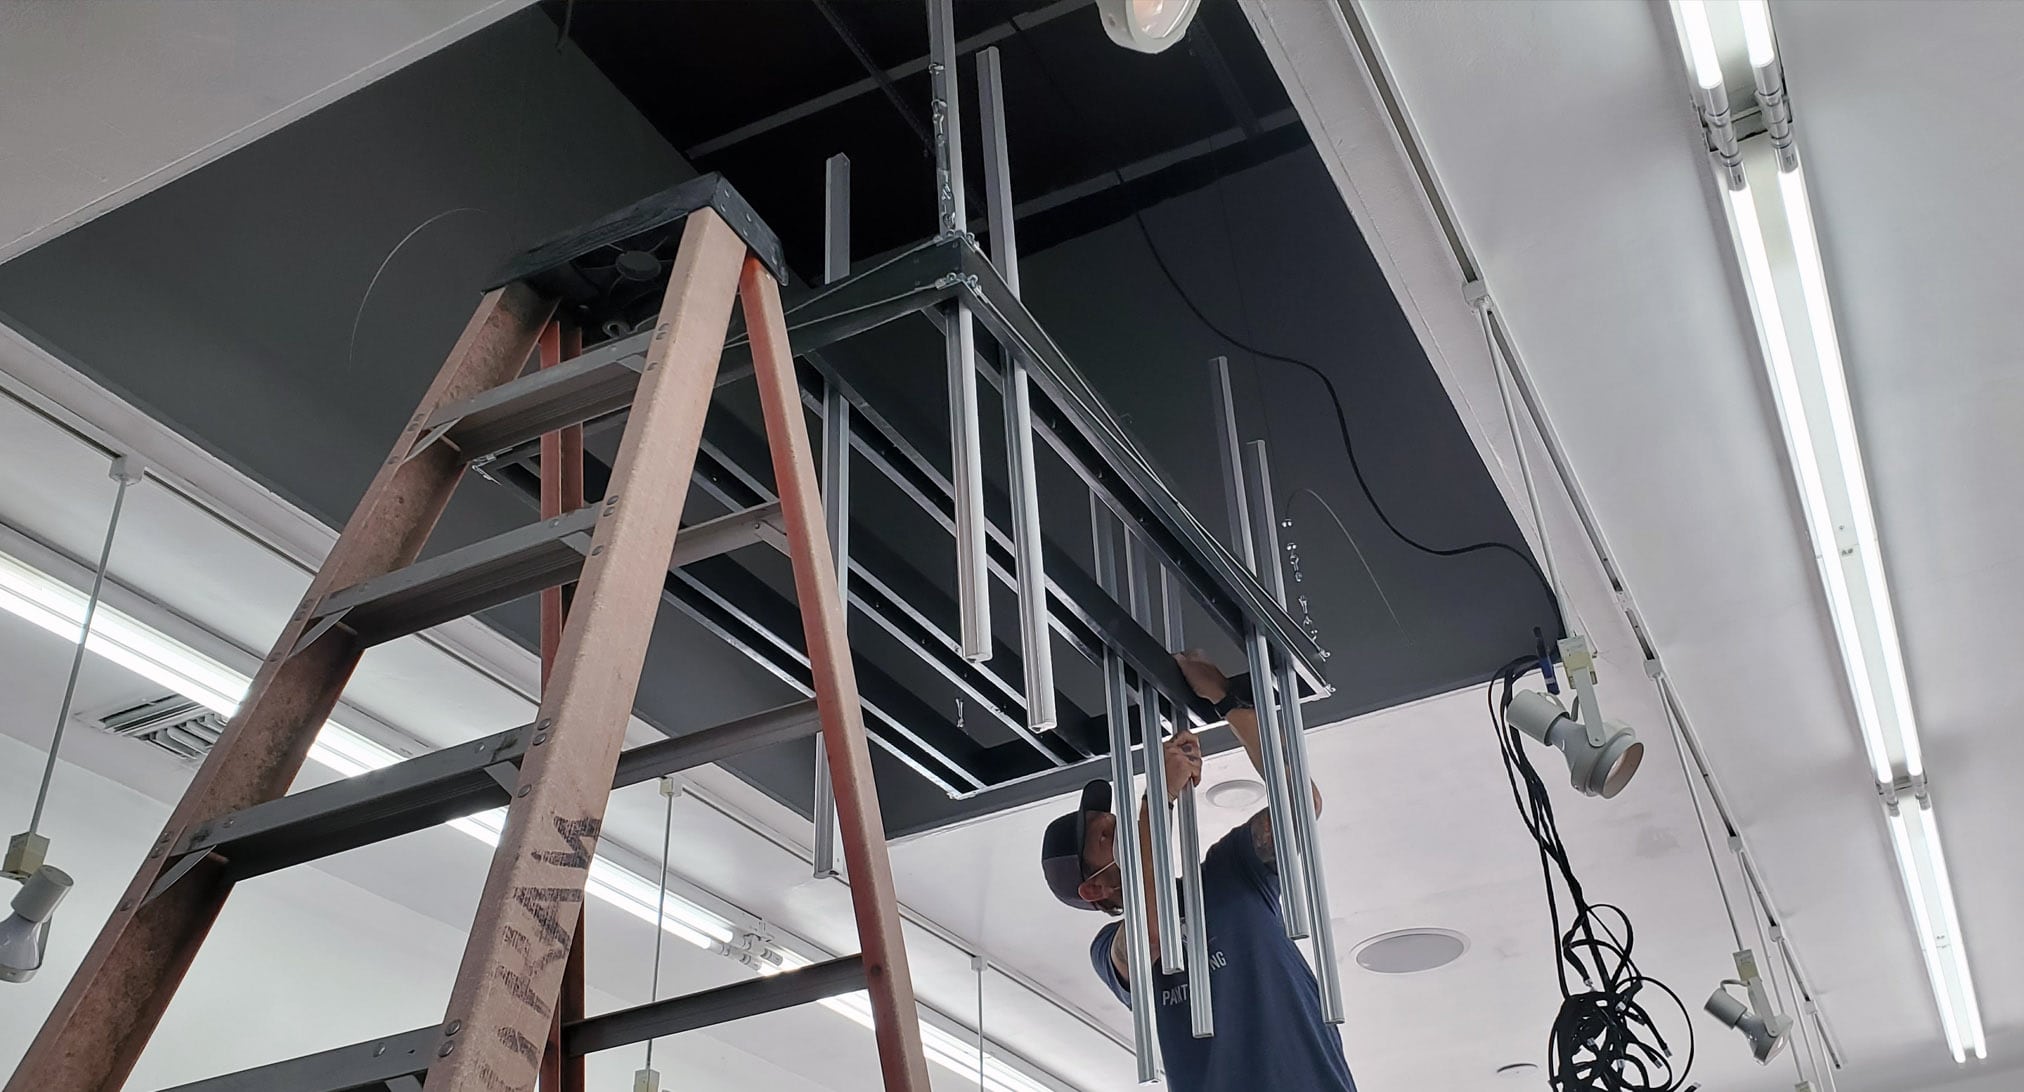
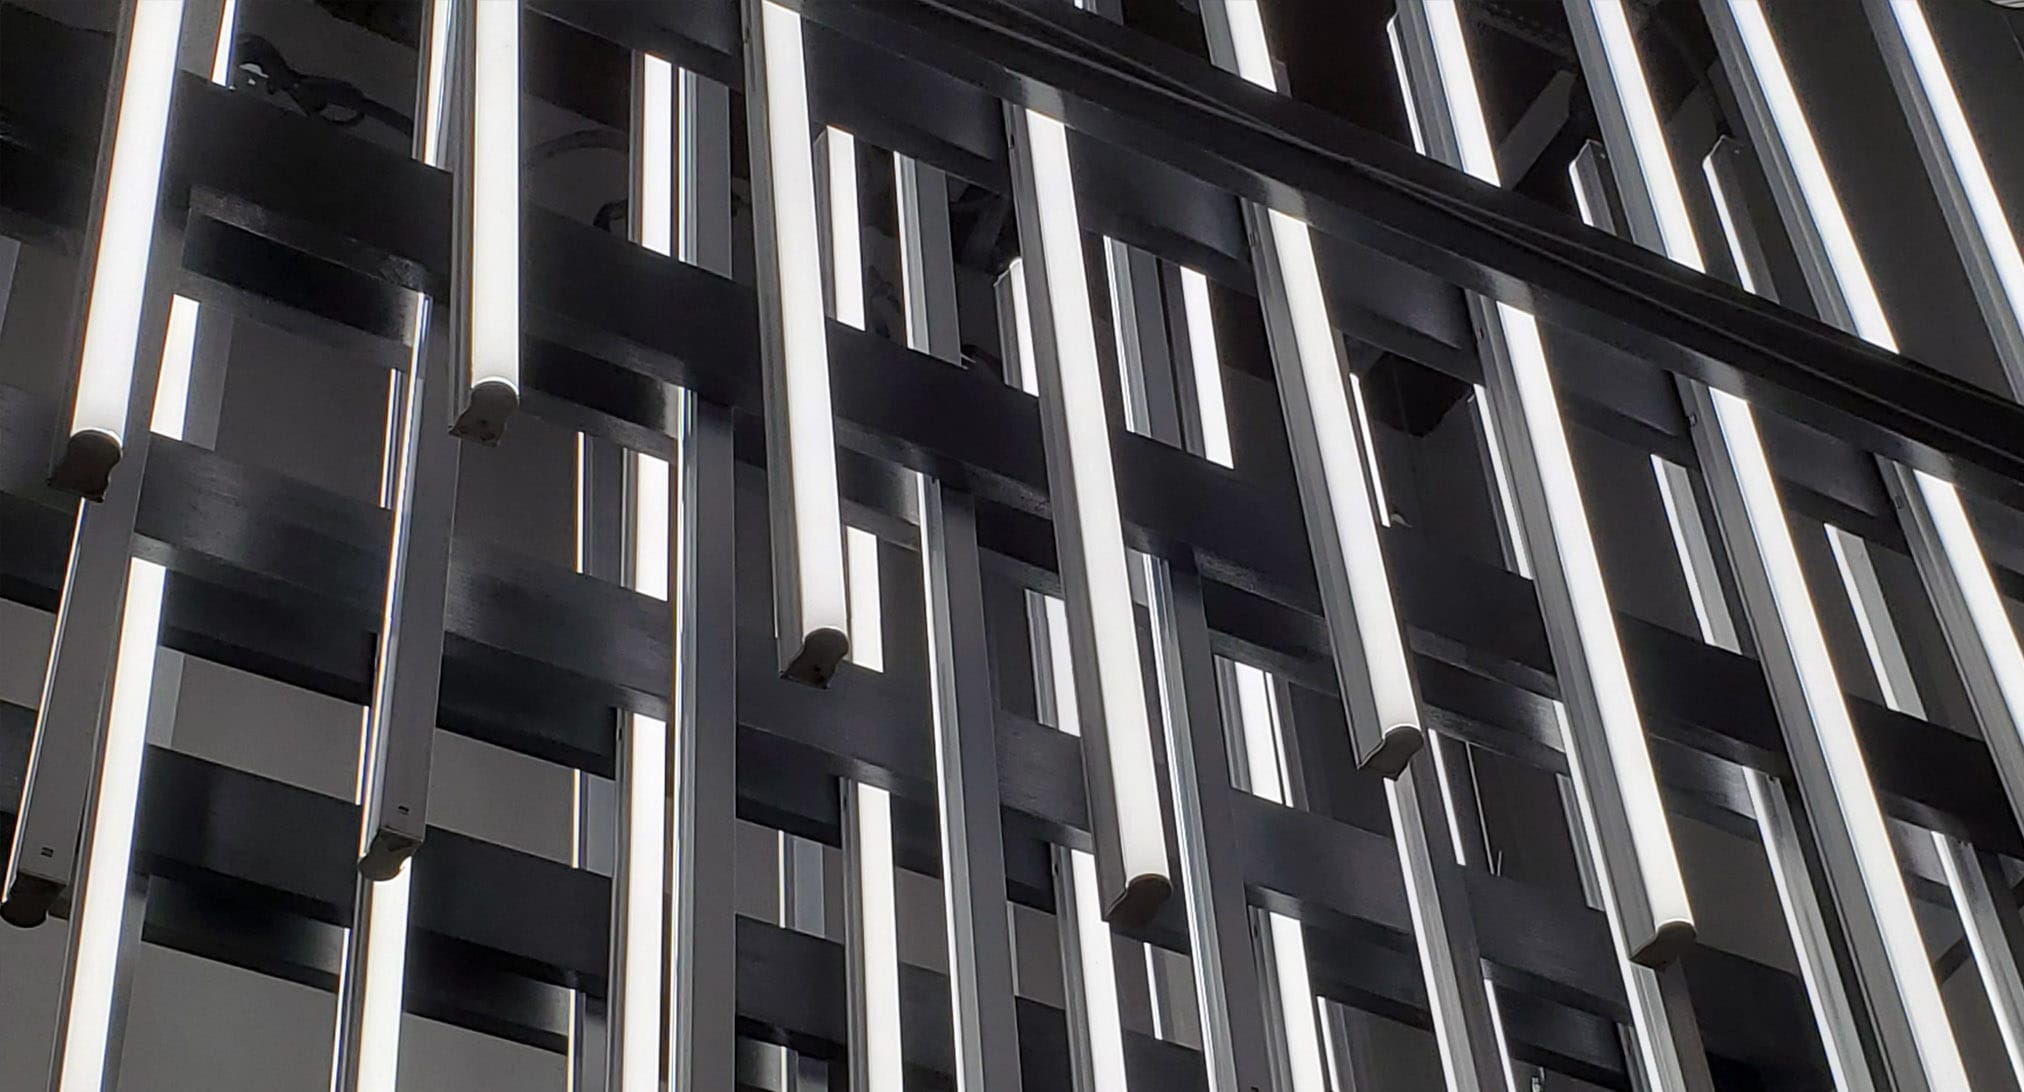
Once I had the client’s approval, it was time to build the frame. I ended up using 1×4 boards to try and keep the overall weight of the fixture down. The light bars included metal clips for mounting, so I carefully measured and drilled out all of the holes needed to clip the 36 lights on. I took care to try and make sure the rows of light bars were offset both vertically and horizontally to try and emphasize the ‘skyline’ effect.
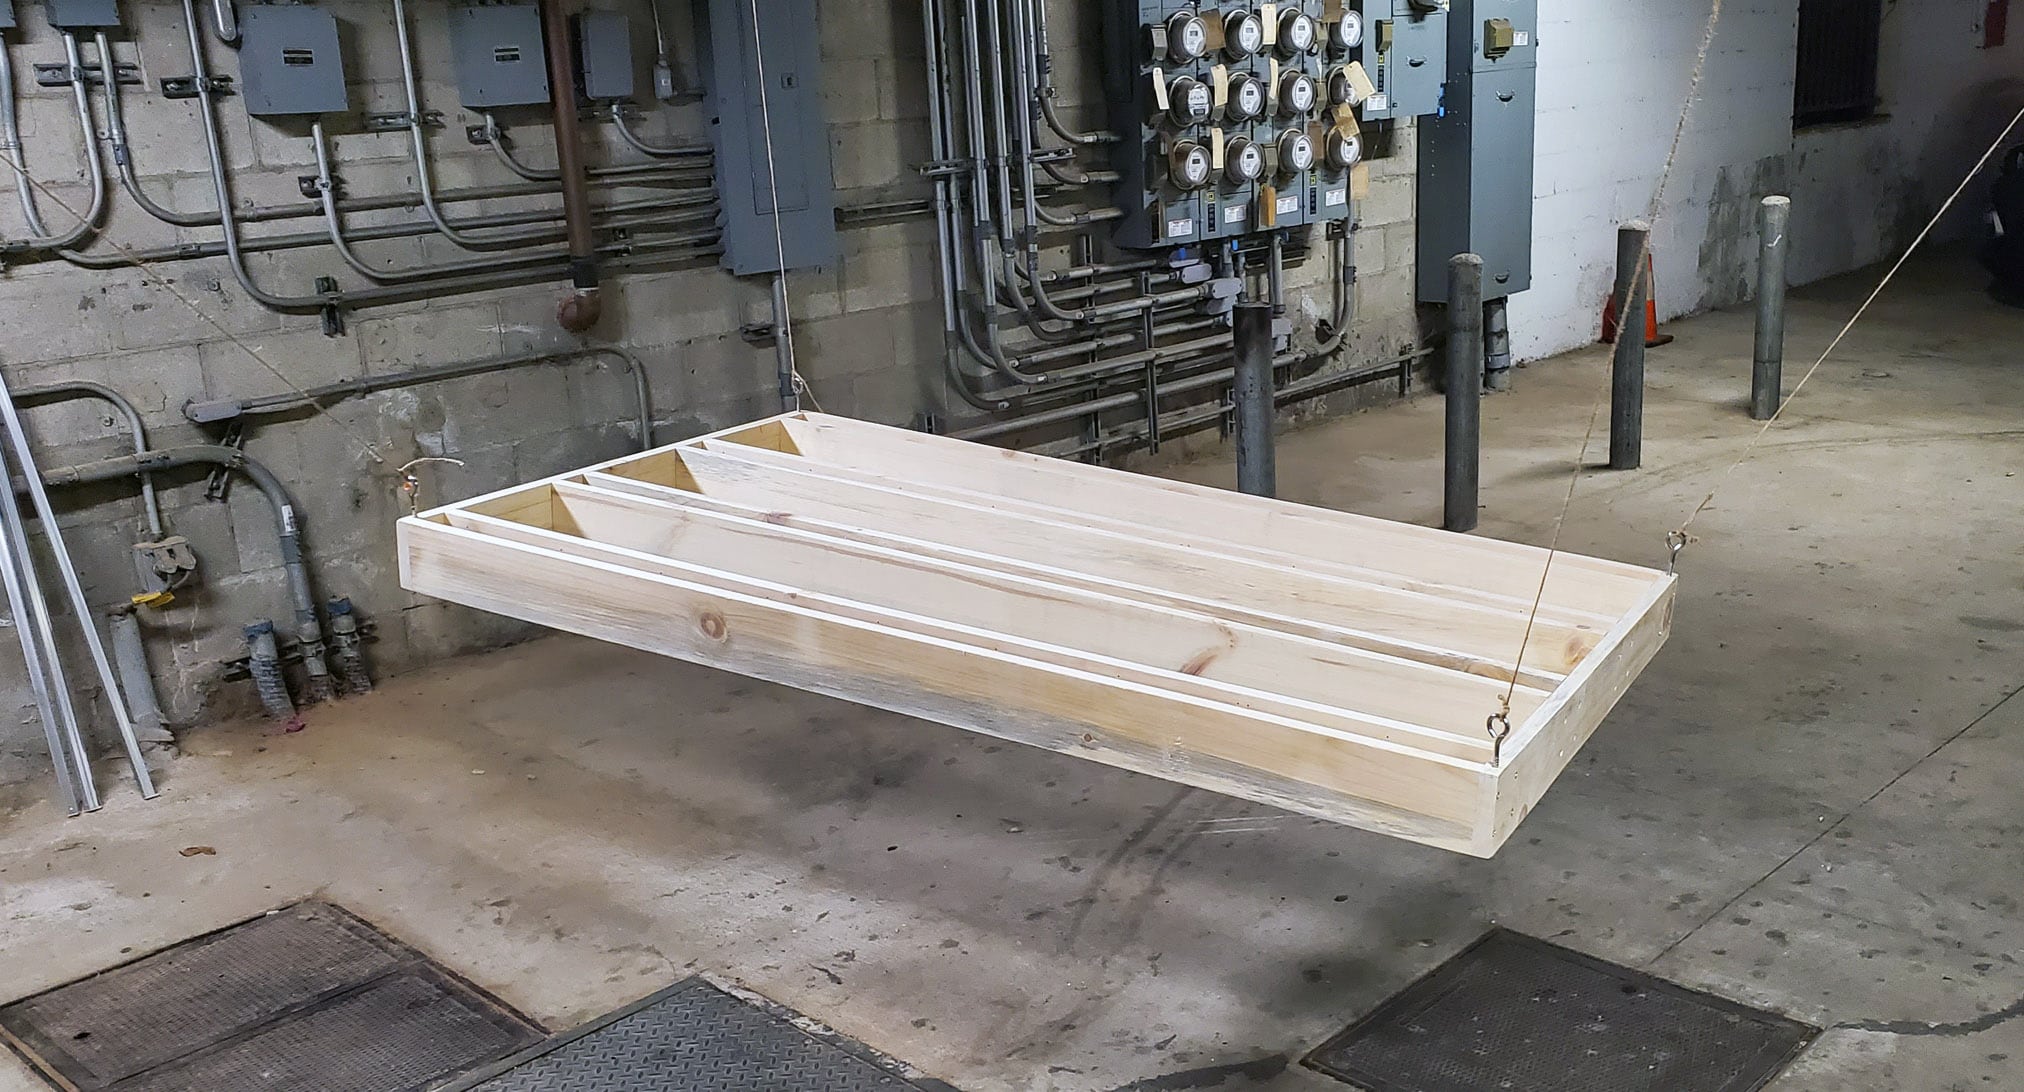
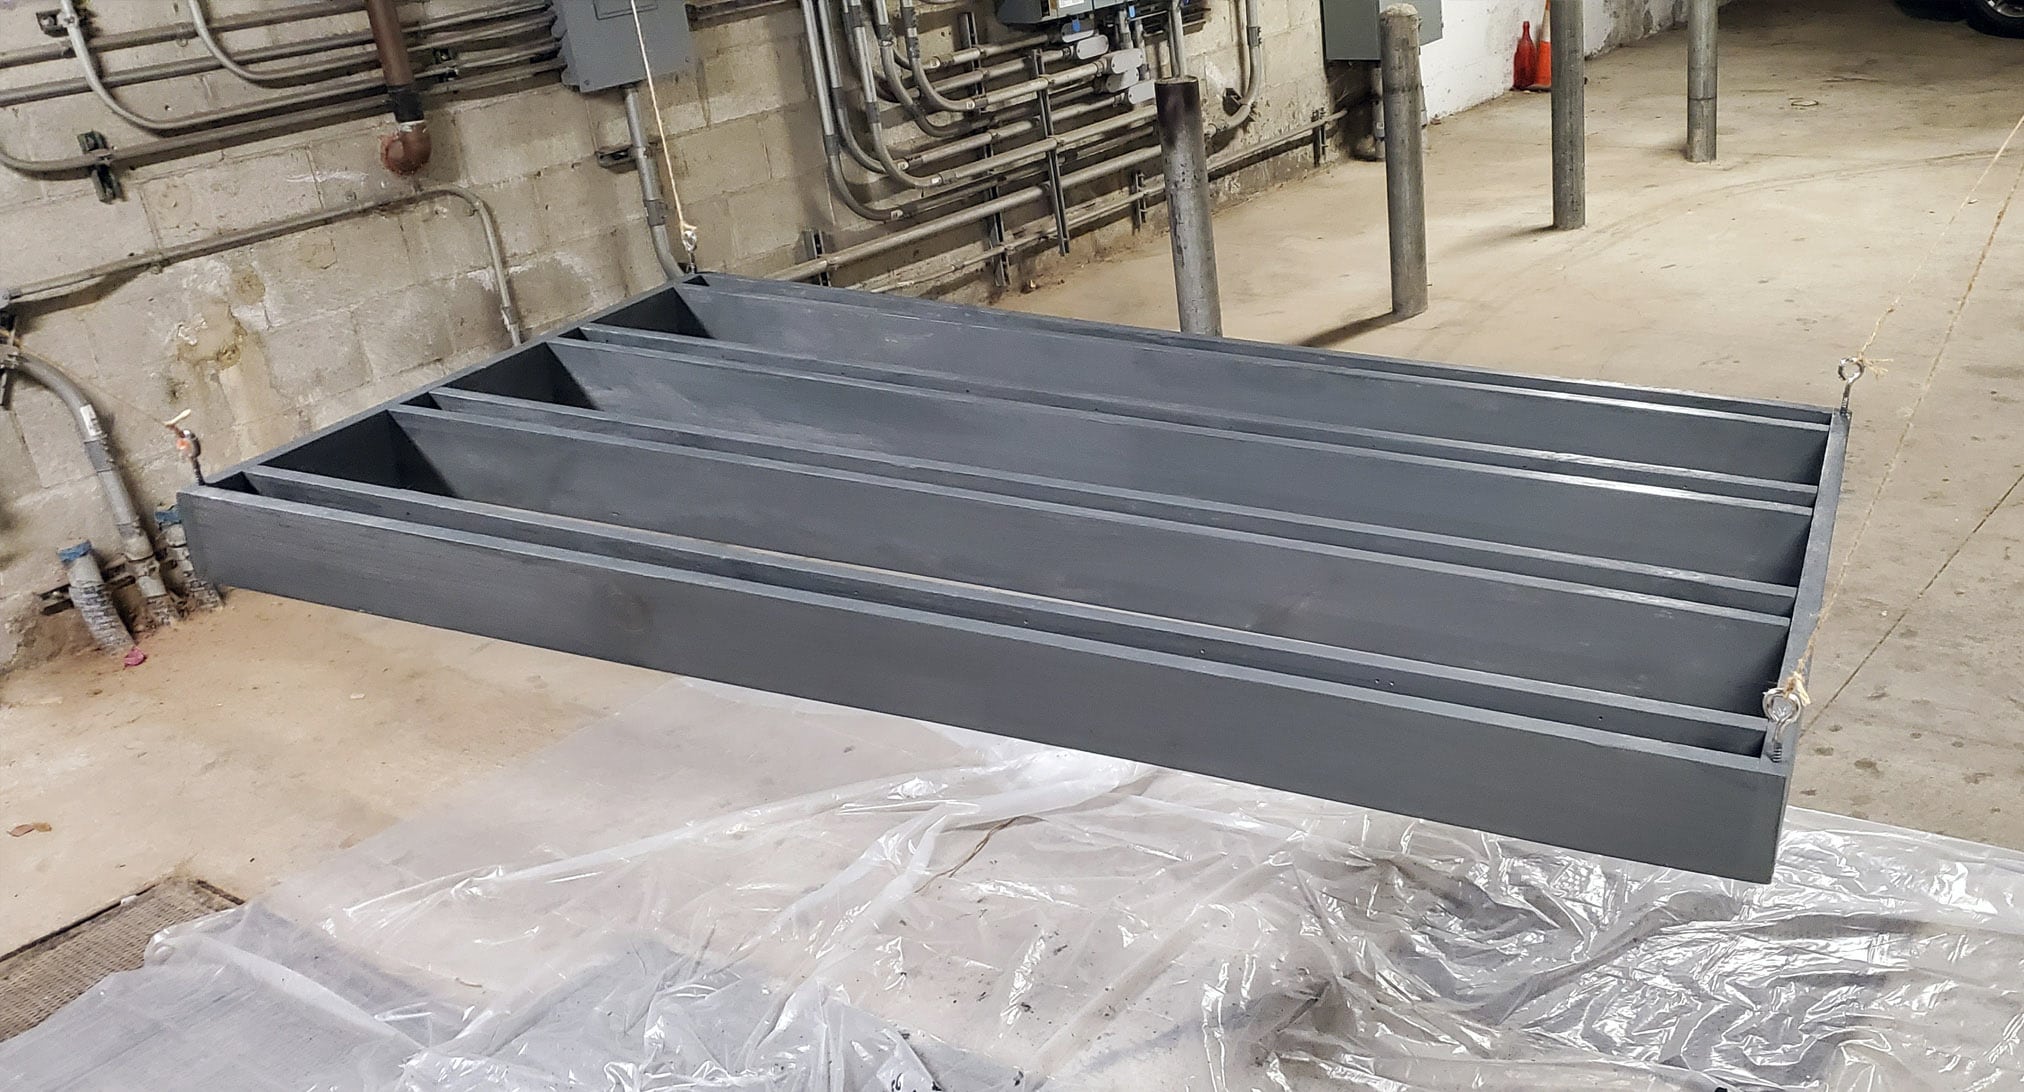
Once the frame was built, I suspended it from the ceiling of my workspace and set about brushing on a coat of Varthane Carbon Grey wood stain. This color was picked to match the weathered aesthetic of the other wooden elements already in the salon.
Once the stain dried, I grabbed a scotch-brite pad and buffed it back a bit to emphasize the weathered look of the wood. I installed a set of eye-hooks on each corner of the frame, and then threaded lengths of steel cable in an X shape across each side. The cables were crimped and then cinched down against the frame with a set of screws. The mounting clips for the LED bar lights were then installed into the pre-drilled holes.
ADDING LIGHT DIFFUSION
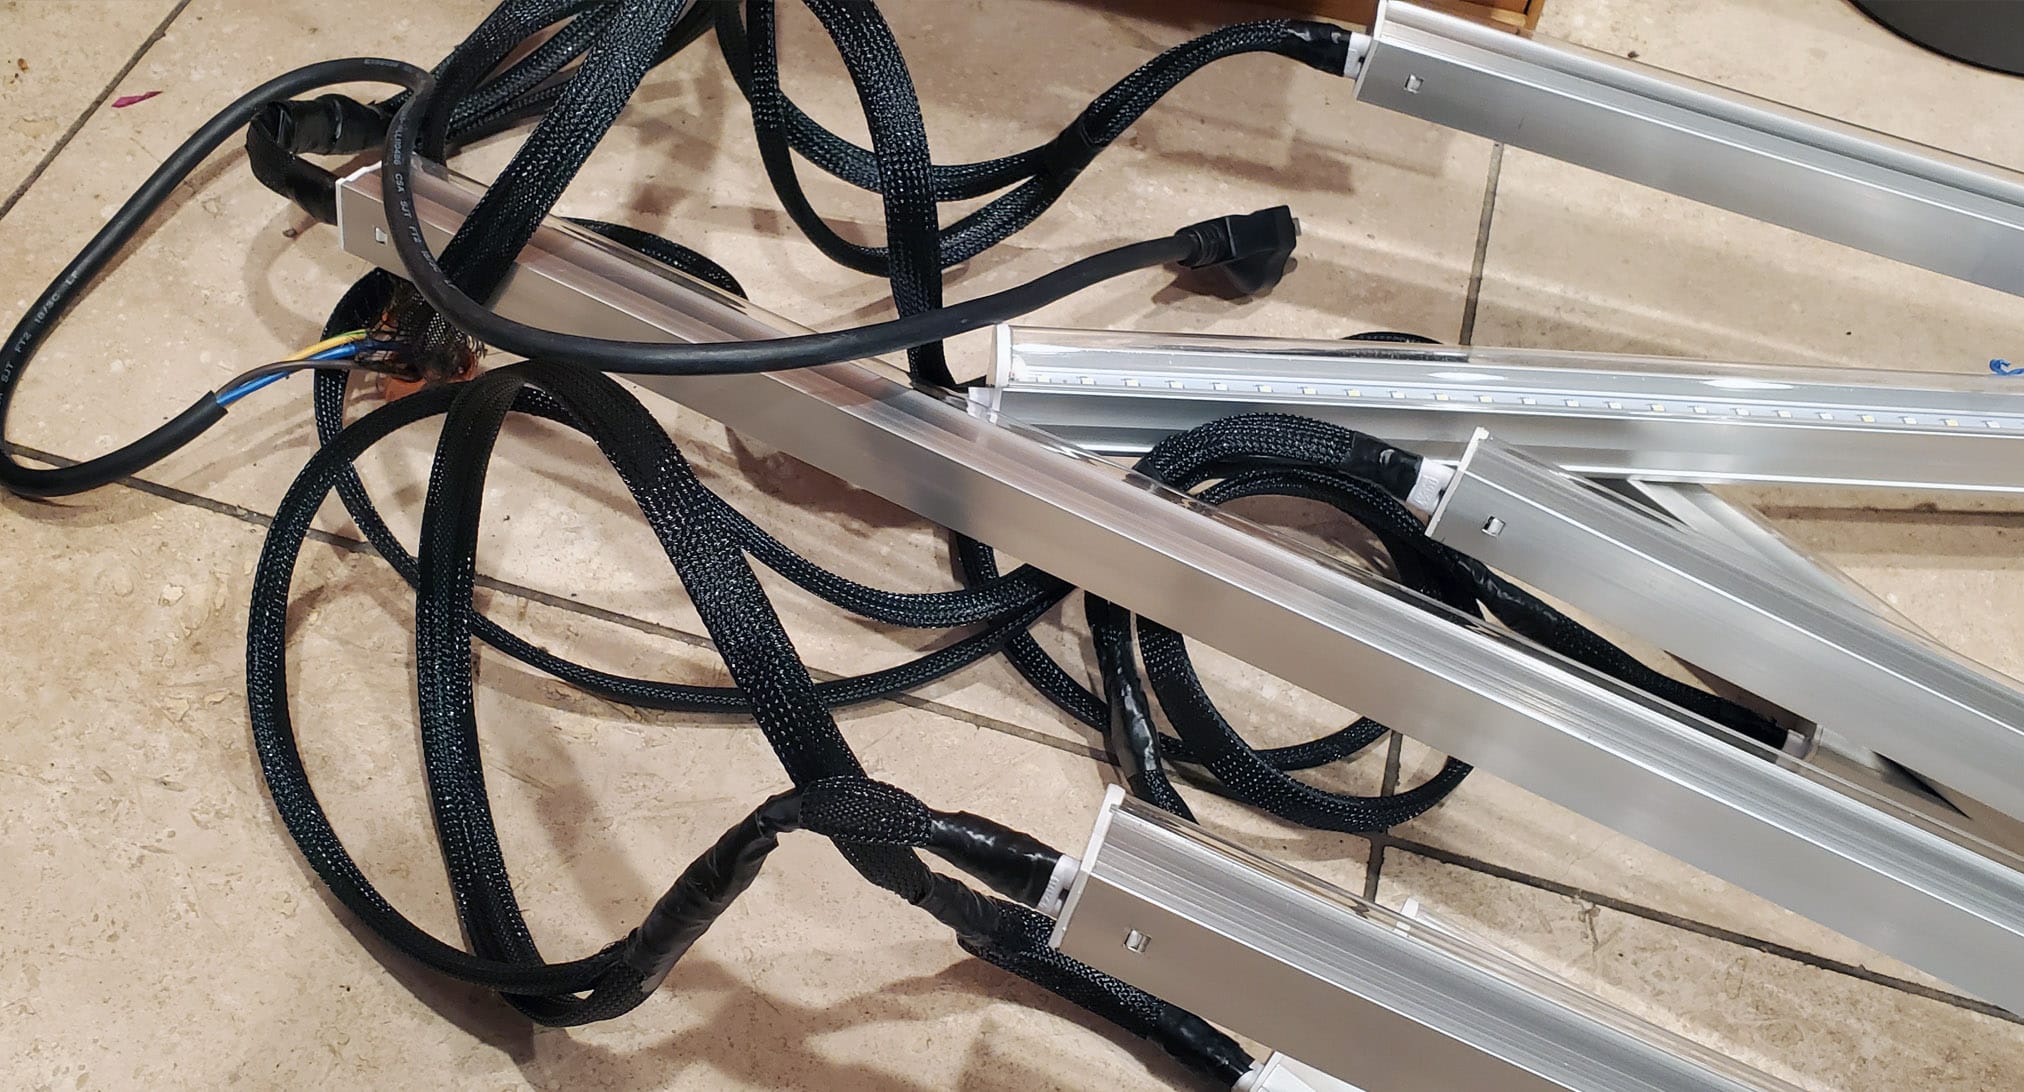
With the frame pretty much finished, the next job I had to tackle was the wiring of all the lights themselves. The bar lights we were using for this project had power plugs with 6″ leads that ended in bare wire, so I had a lot of soldering ahead of me. I added length to each of the power plugs and daisy-chained them in parallel after confirming that they didn’t draw too much power in that configuration. I bundled each row of LED light cables with expandable braided sleeving to try and keep things tidy.
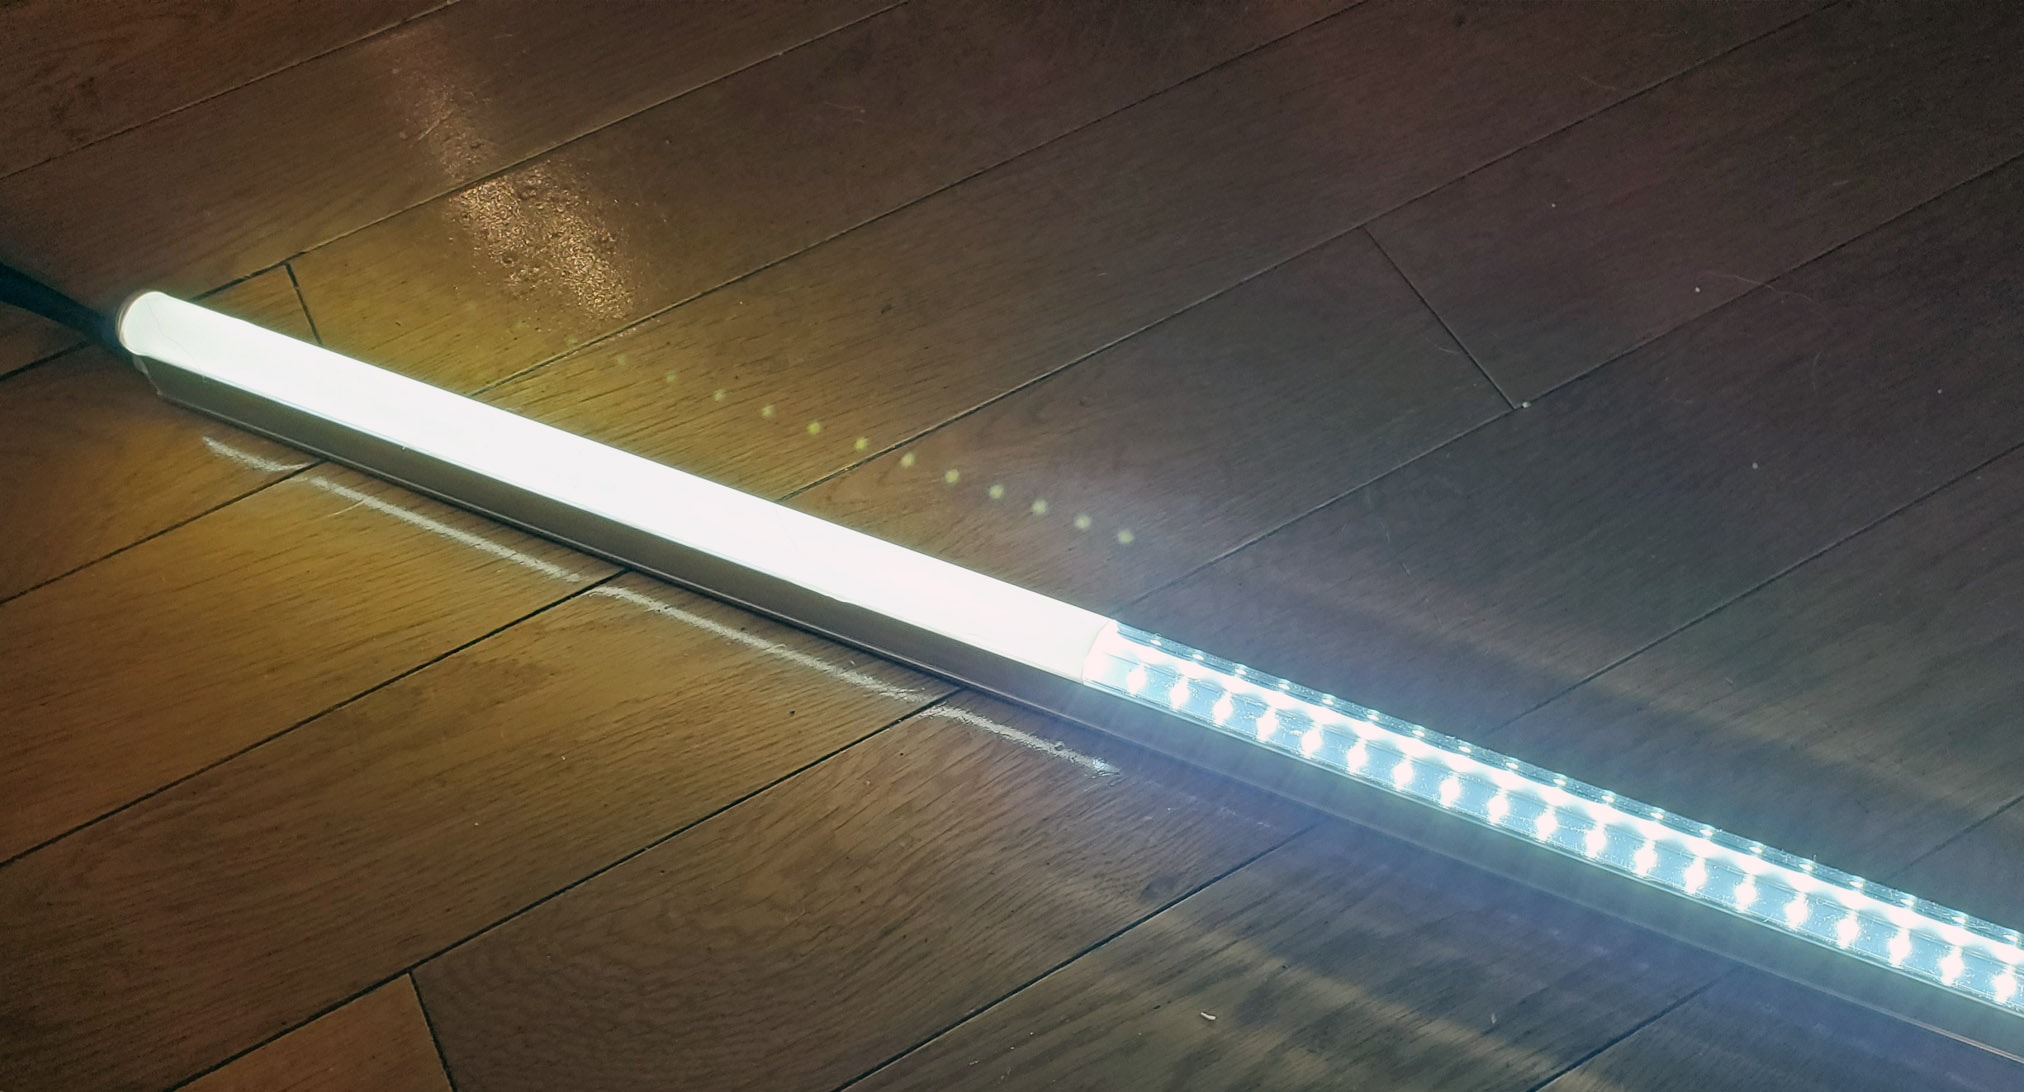
This worked great, but there was a little bit of a problem – these lights are super bright, and not dimmable thanks to the hardware inside each bar that handles the voltage regulation. I needed to diffuse the light a bit to make this into a chandelier, instead of an indoor sun. I tested a few options for this diffusion, including paint, sanding, and other inserts that would rest between the LEDs and the clear plastic shell. Ultimately, I found a solution that was very simple to install and looked perfectly uniform – 3M white vinyl tape.
I stretched vinyl tape over the whole length of the light bar and smoothed it down bit-by-bit to ensure there were no bubbles trapped underneath. After the tape was snugly applied, I took a sharp X-acto knife and ran it down the channels on the sides of the clear plastic, which let me peel away the excess and left the white vinyl diffusion precisely where I needed it.
INSTALLATION DAY
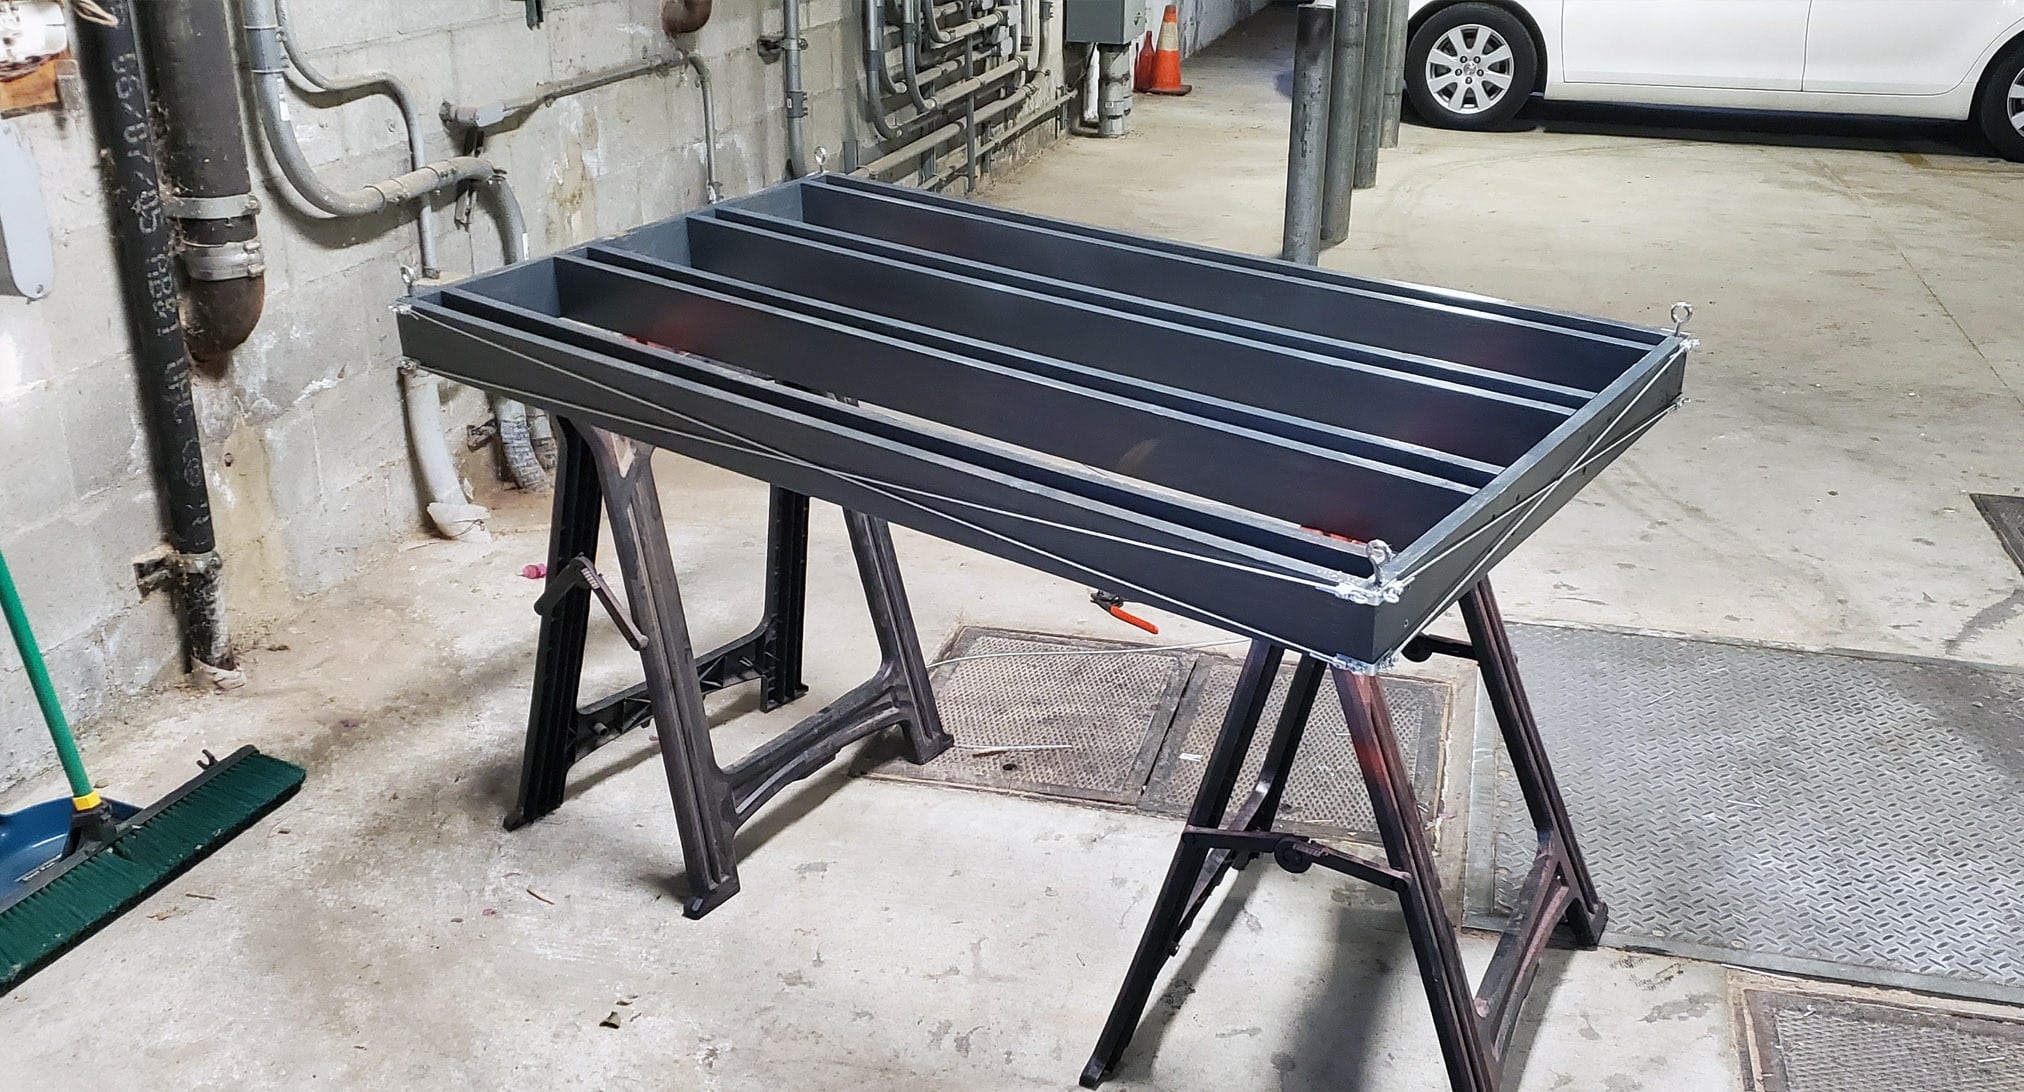
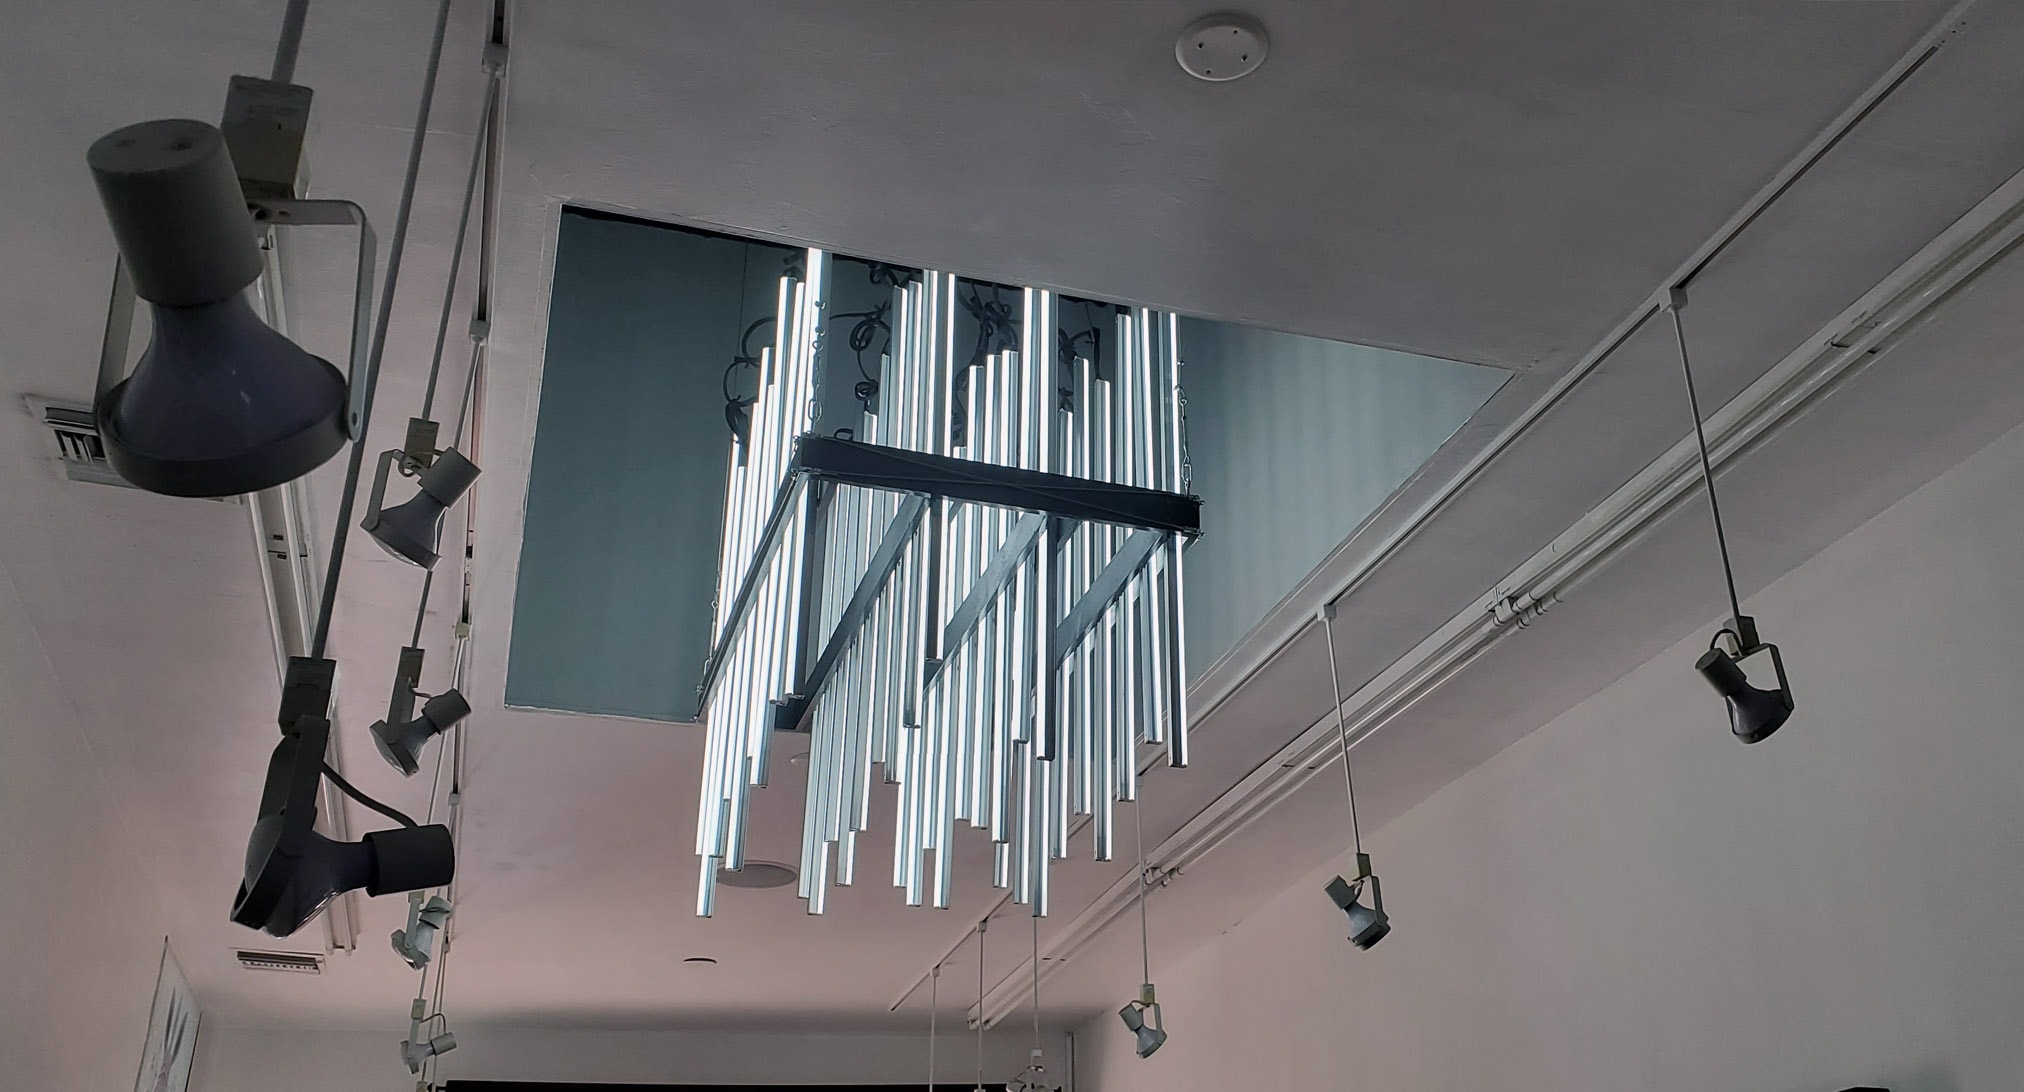
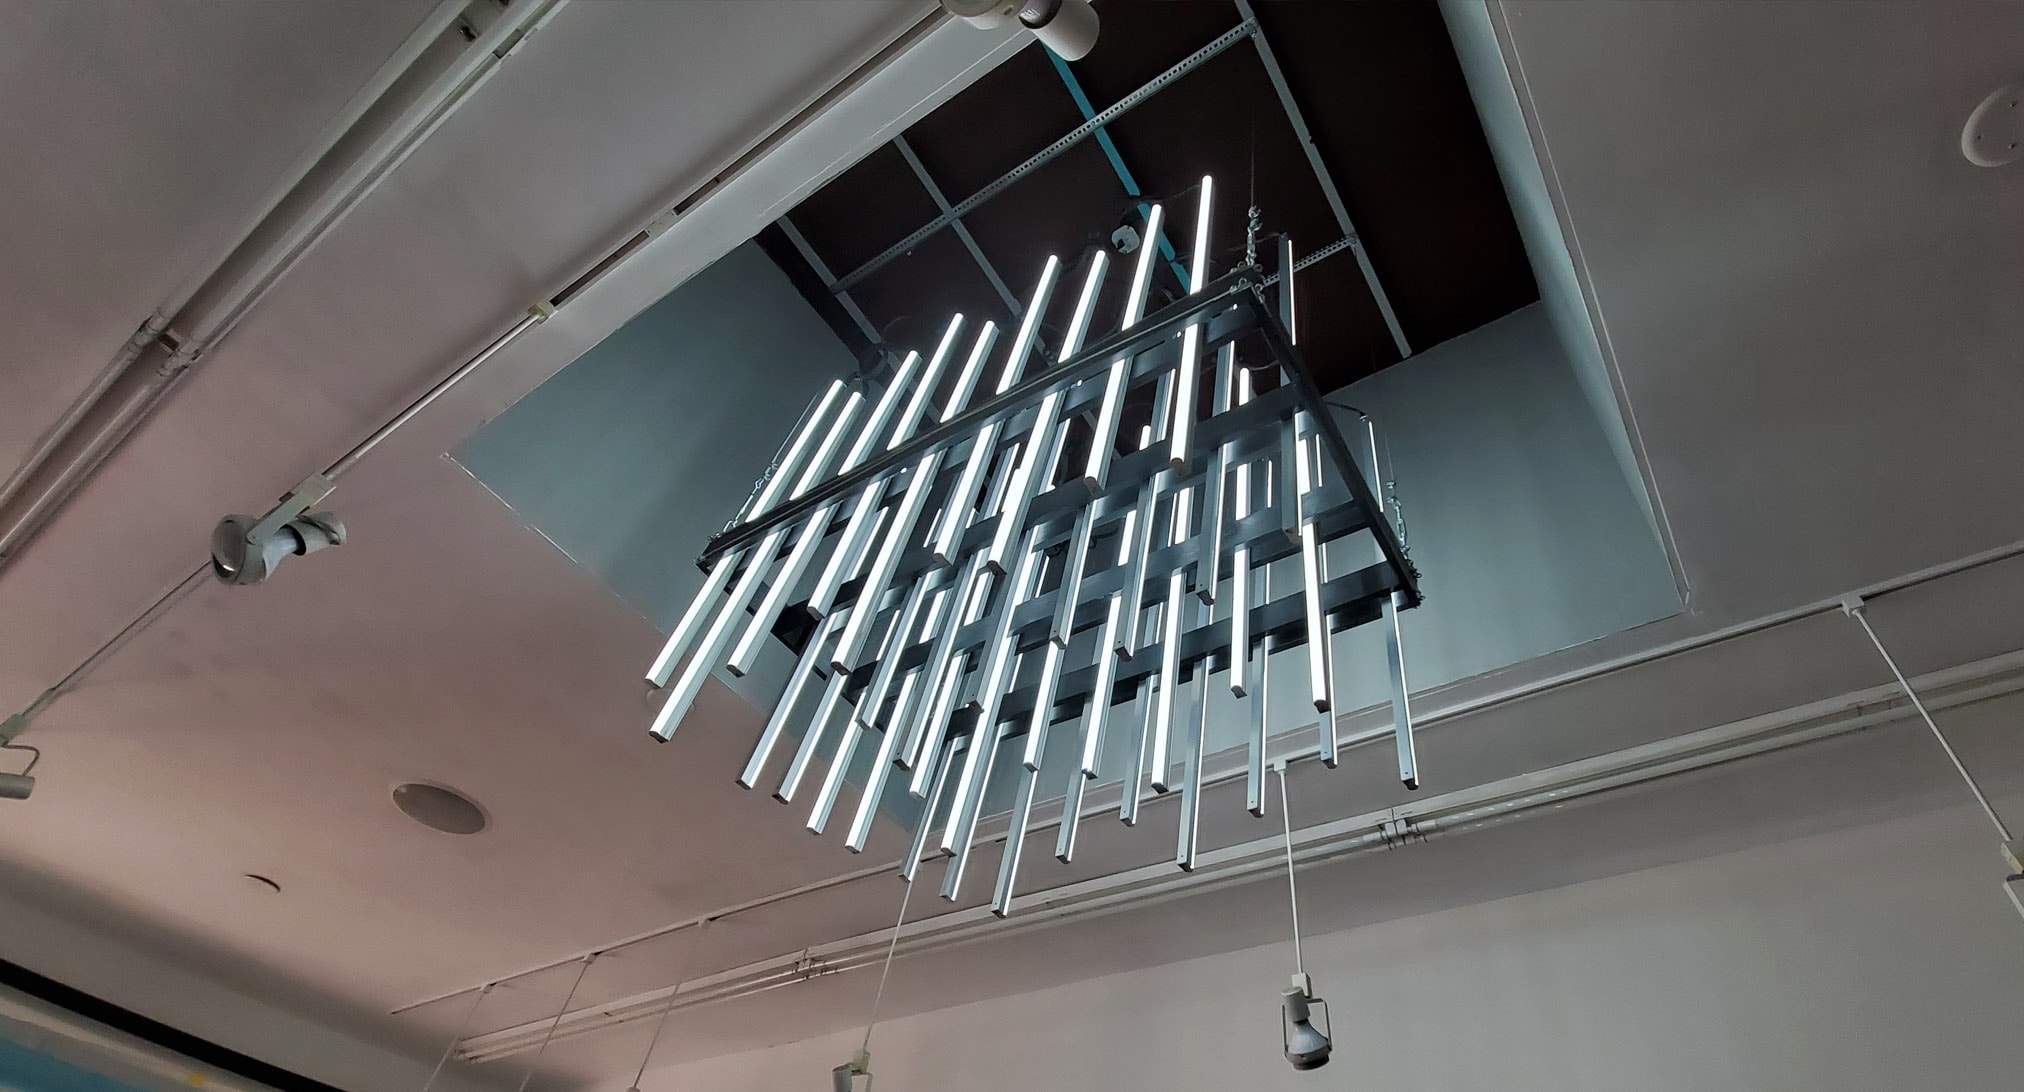
Johnny was able to get his hands on a 16-foot-tall ladder which made my life a little bit easier. The skylight had a metal channel frame already installed against the ceiling which gave me a good spot to anchor the steel cables that would carry the weight of the chandelier. I used a set of turnbuckles on each corner so that we could adjust the chandelier until it hung level. I took care to ensure that the cables and hardware were rated for far more weight than the final chandelier, just out of an abundance of caution.
With a little tweaking, we were able to get the chandelier hanging level and centered in the skylight hole. The client wanted it to sit low enough that the frame would be below the hole, but not so far down that it reached past the existing spotlights in the salon.
It ended up being a budget-friendly and chic-looking addition to the salon space. I put together a little video summary of the whole process for Instagram, embedded here for your enjoyment!

