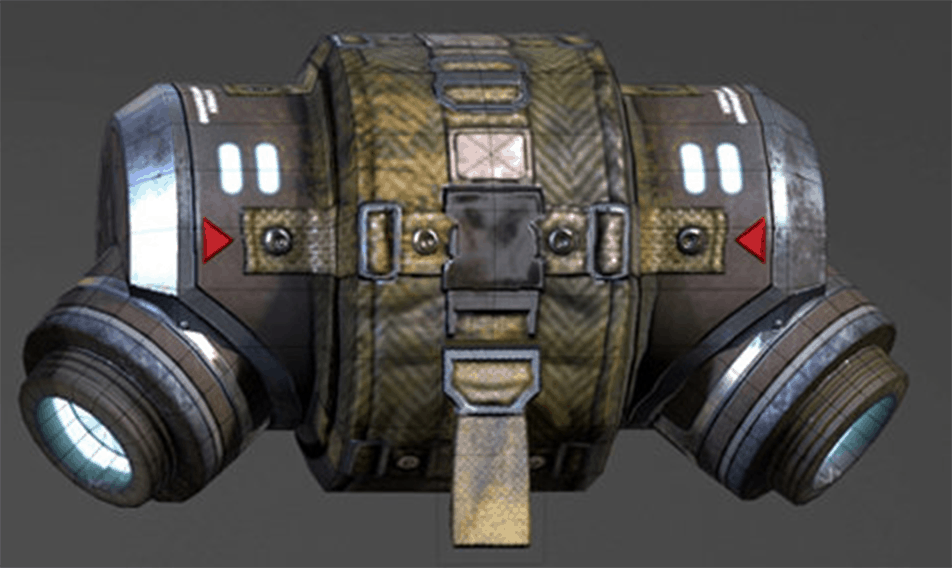
The IMC and Militia factions in the game use different variants of the jump kit, and even within factions the jump kits’ design can vary pretty widely depending on the player’s class and loadout. For mine, I decided I wanted to do the classic Militia Rifleman jump kit:
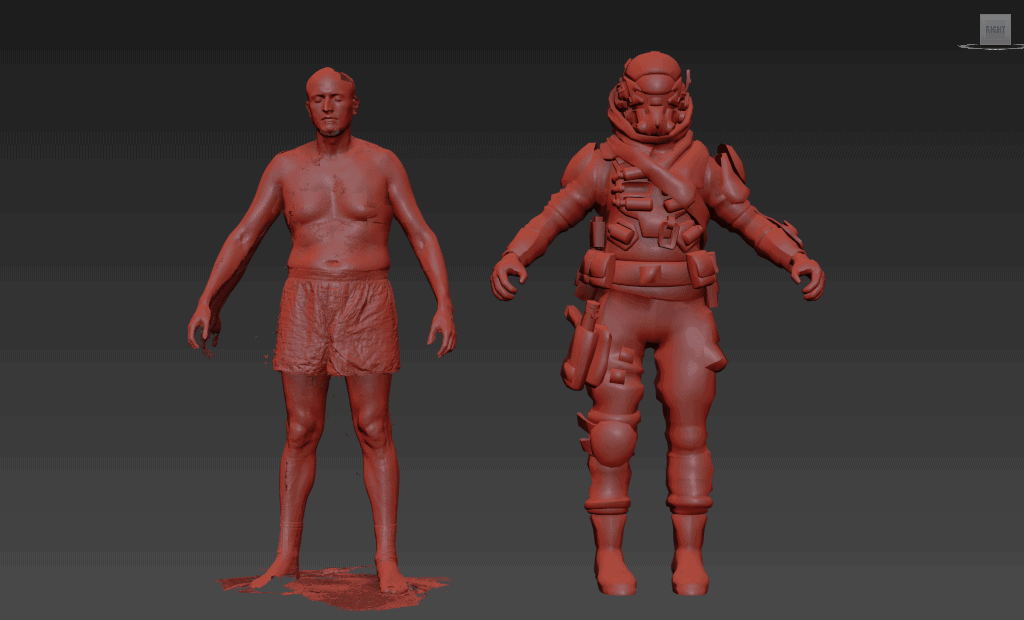
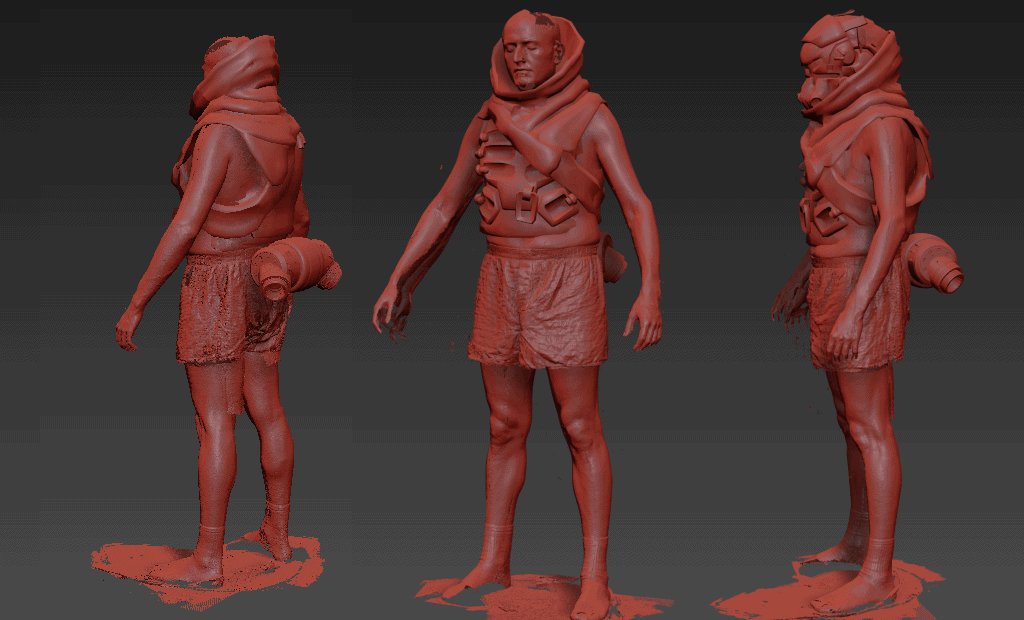
The easiest way I had of actually modeling the jump kit to the correct scale was to rip the pilot game model and scale it up to my height at 6’2″. I have a 3d scan of myself that I used for reference to ensure I was getting things about right.
I’m not in the best of shape, but whatever. Using this scan, I had an established scale to work from.
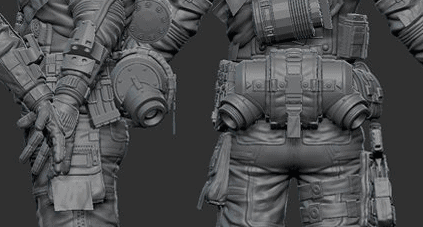
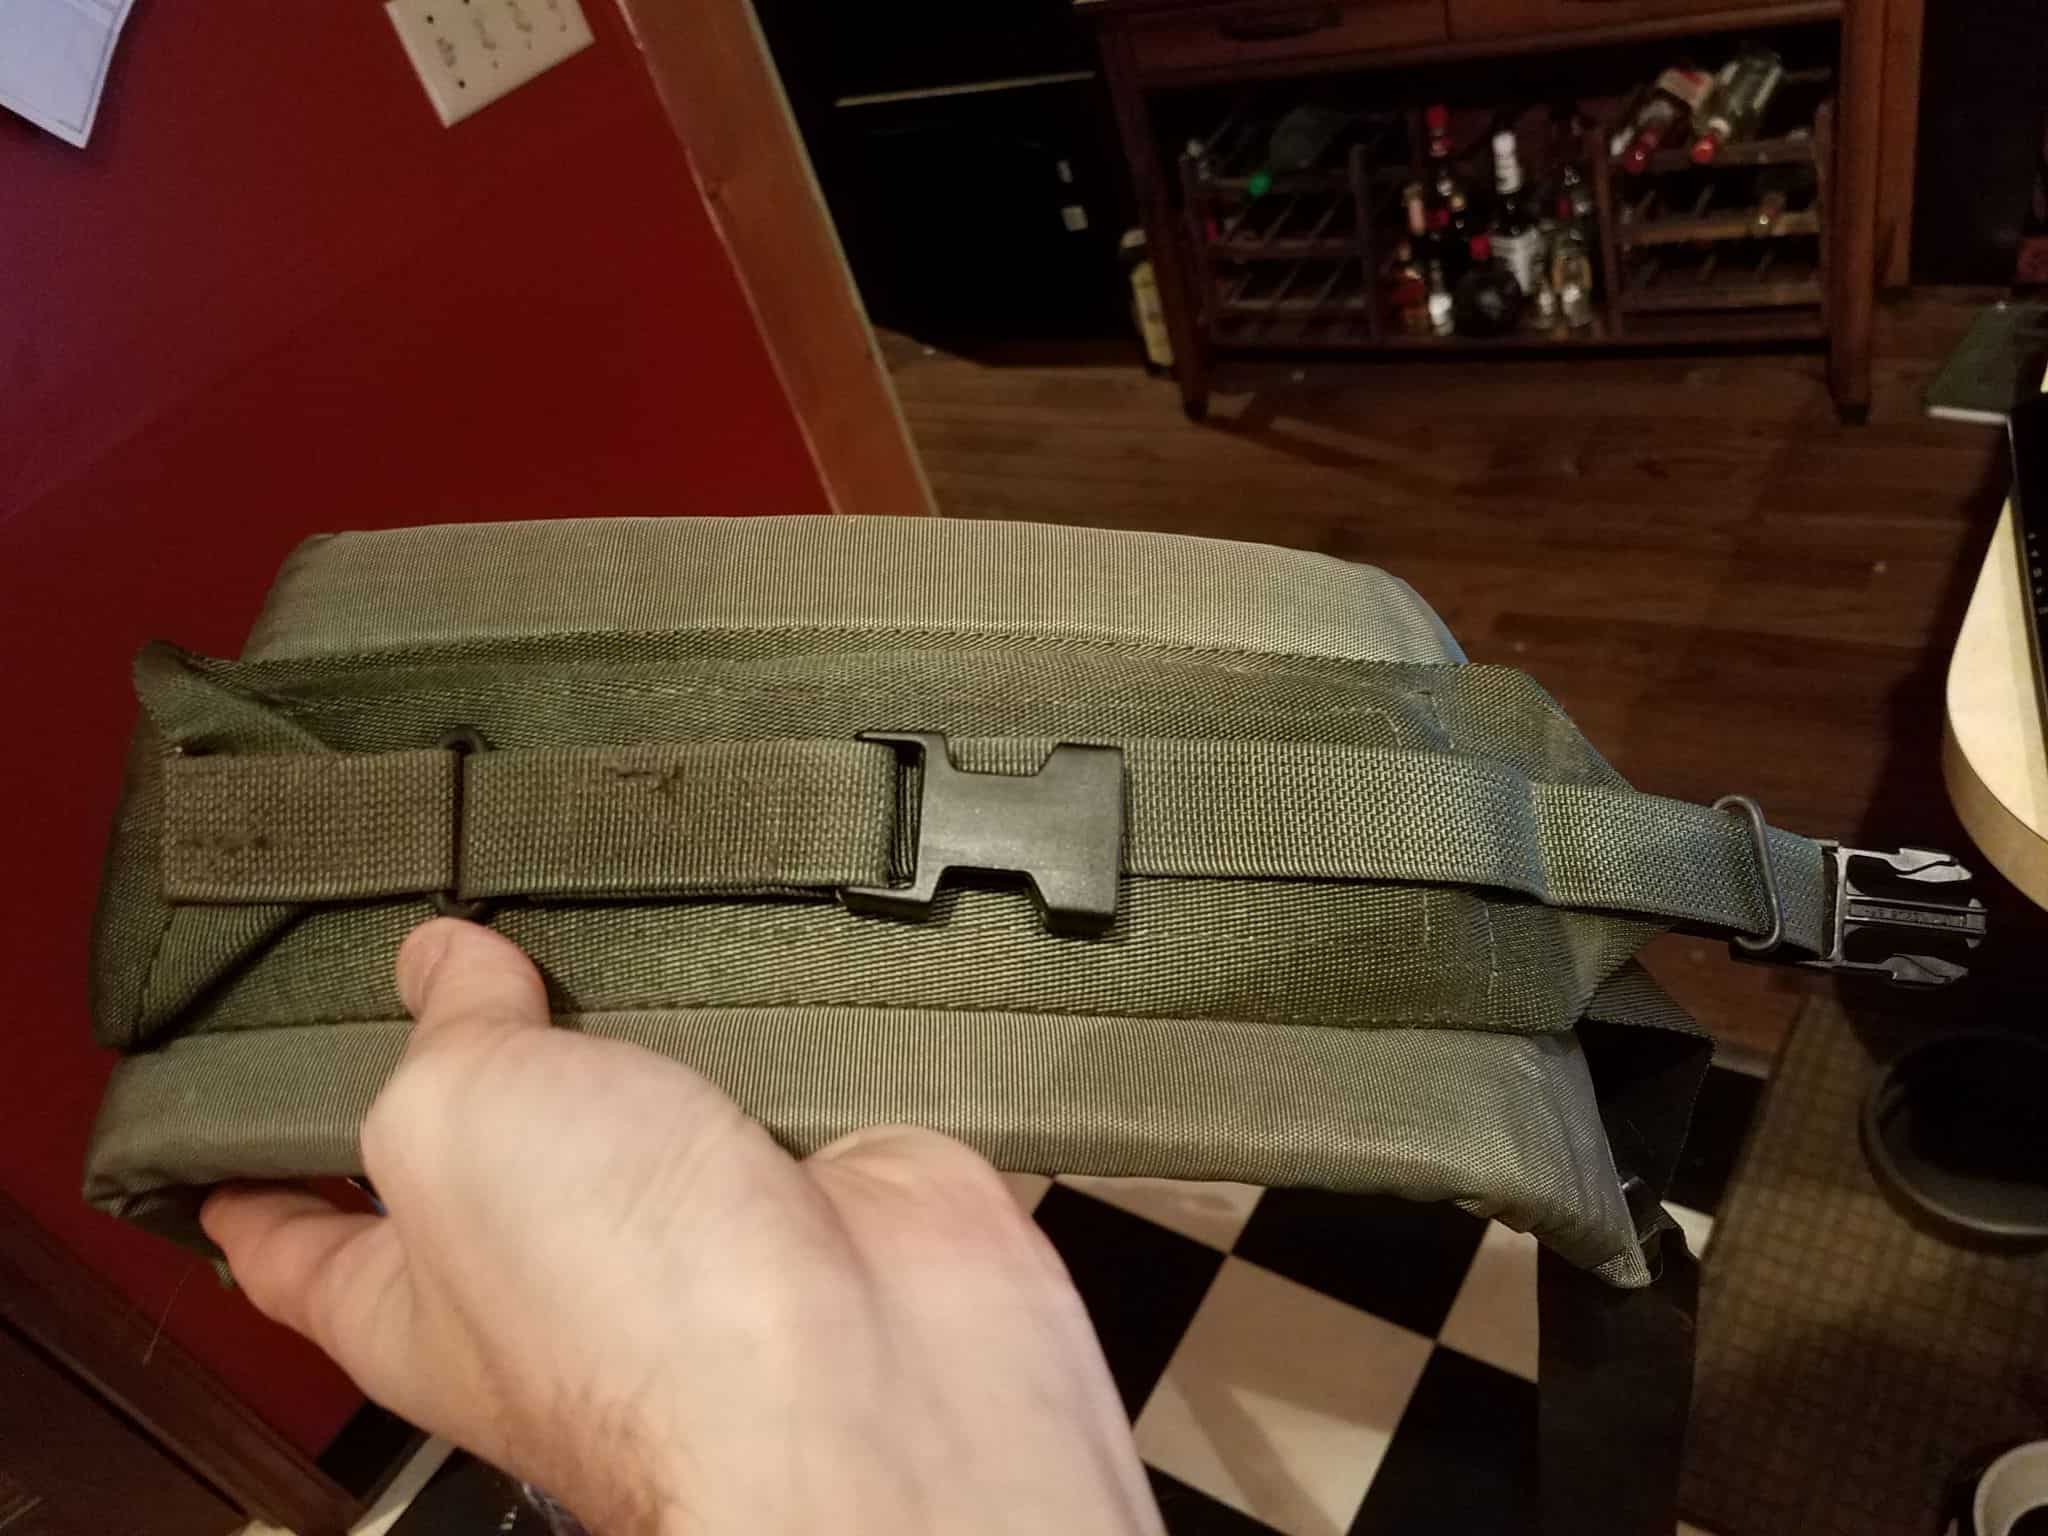
I also noted that there is a padded fabric element vertically wrapped around the middle of the jump kit. It just so happens that I have a good solution for this:
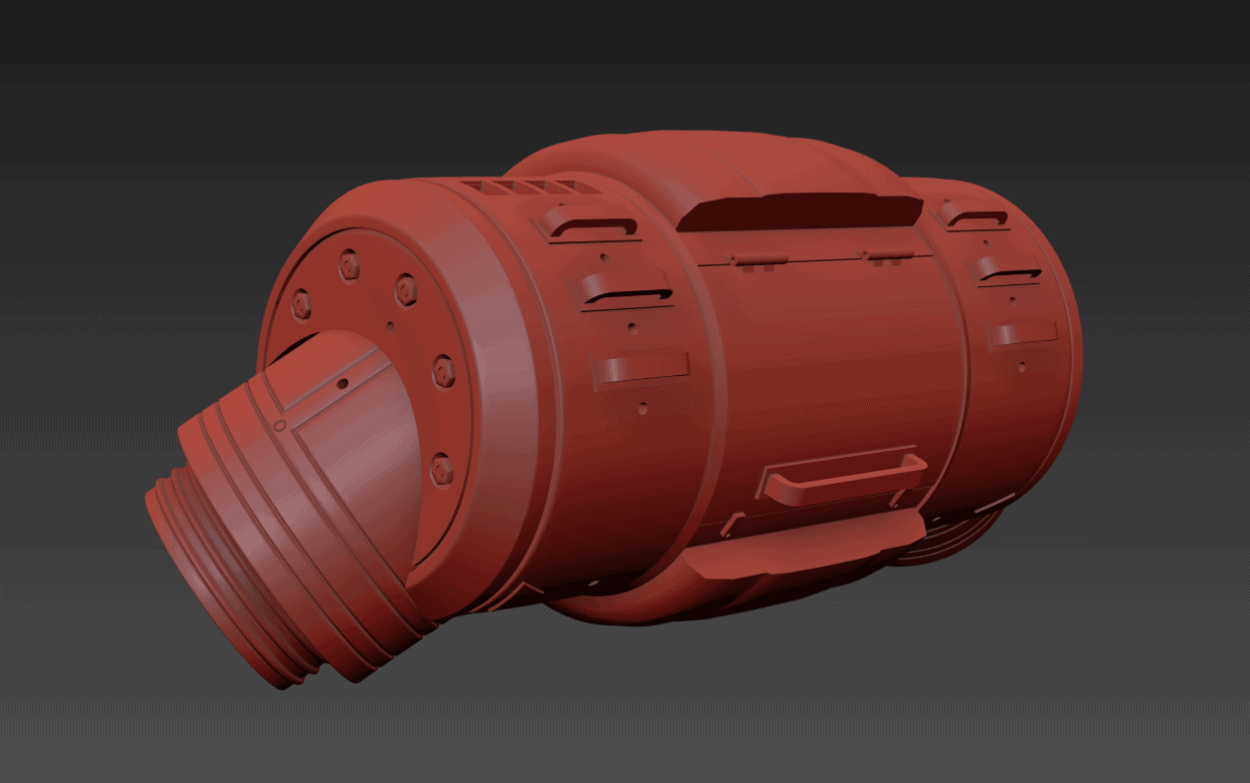
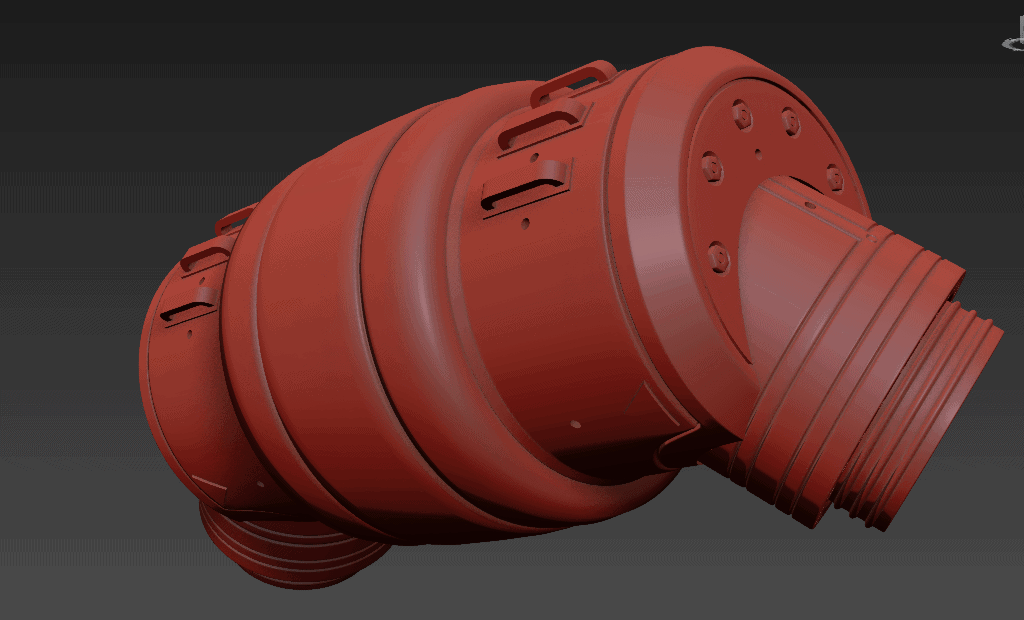
A military battle belt from a surplus store. I took some rough measurements of the thing with the thought that I’ll just wrap it around the main canister body and sew the extra needed straps and hardware on. Using that as a base, I spent the evening interpreting all of the reference material I could find into the most detailed rendition of the jump kit I could manage, with printing limitations in mind. The wrap you’ll see around the middle of the canister is based on the measurements I took of the belt I have, and just there as a stand-in on the model.
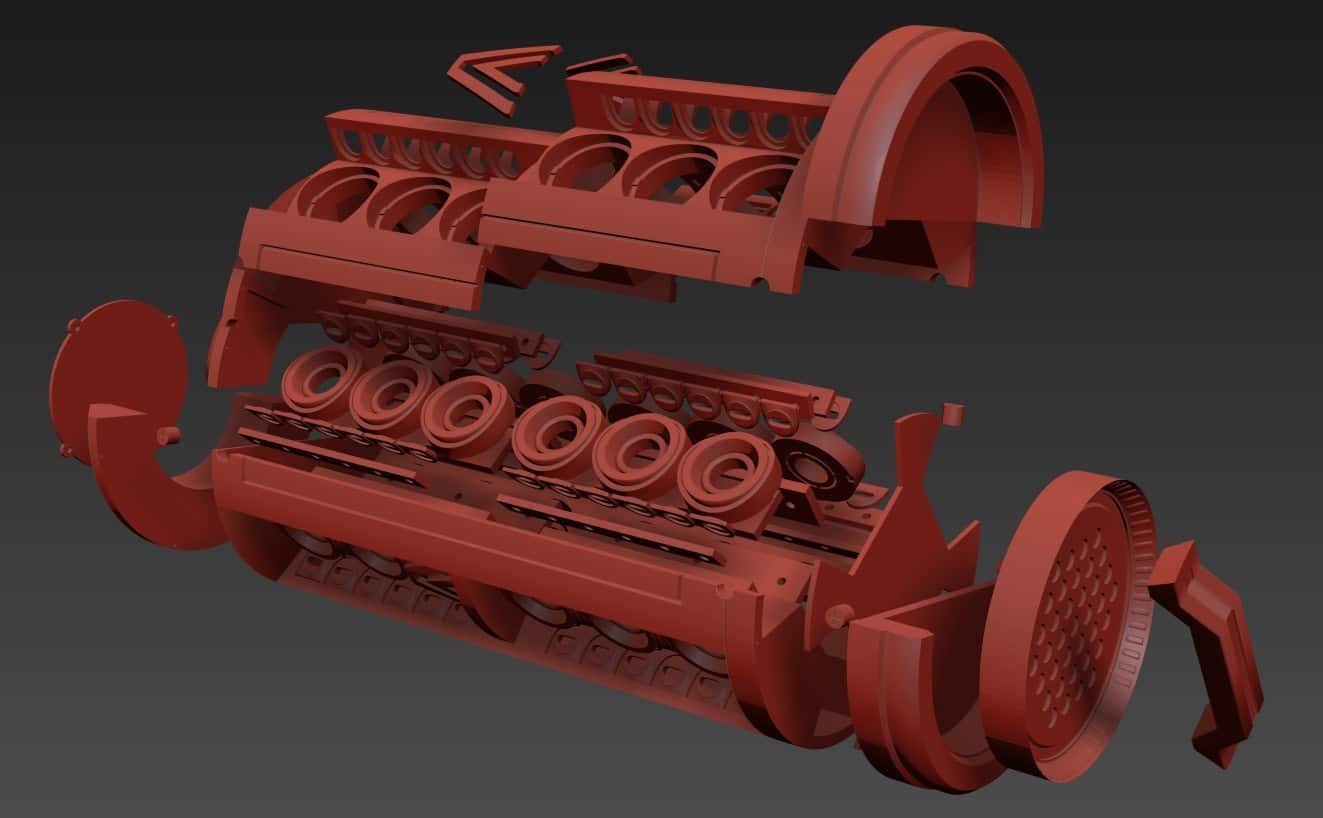
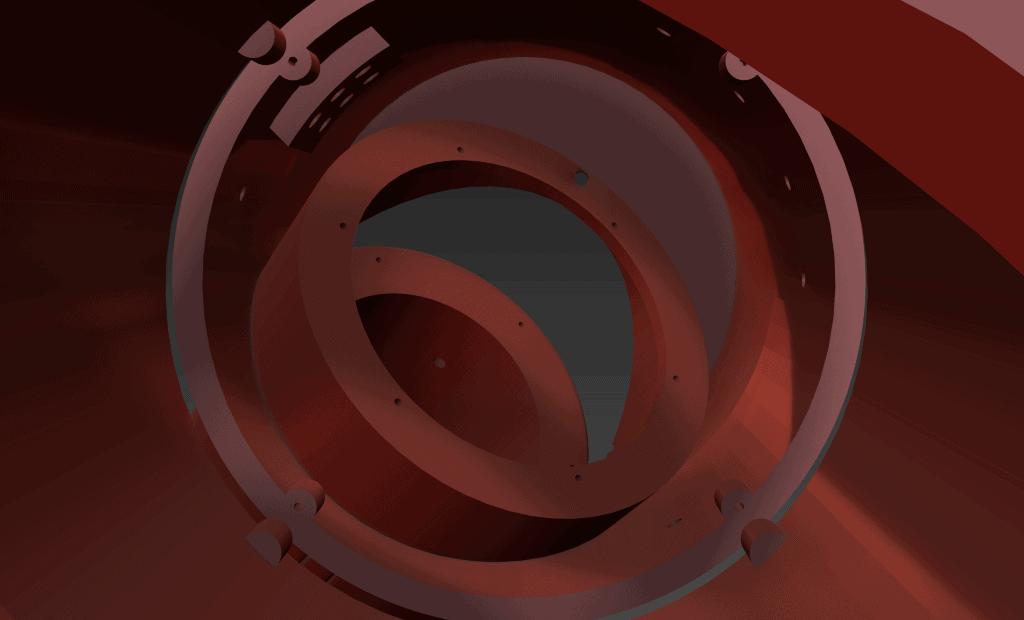
Each thruster nozzle is three separate pieces – the main thruster body, the nozzle, and an inset ring designed to hold the 16-LED version of Adafruit’s Neopixel Ring. These are all sized precisely to align with one another and fit together neatly. The oval holes in the canister body itself are designed to have some thin acrylic sheeting glued in behind them, which I plan on frosting with some sandpaper. The square mounts pictured in the exploded view above are then glued into place behind that acrylic in the slot, with holes for 6 RGBW LEDs on either side of the thruster to produce the lighting effect. The left and right halves of the main jump kit canister have alignment pin holes to be properly attached to the center canister tube, to make my life a little easier.
The ‘back’ of the jump kit canister has a few loops for molle-style 1-inch webbing to give me some attachment points so I can comfortably hang the kit off my waist. I also put some screw holes around the body of the jump kit in a few places where I think I might want to secure straps to the canister with M4 screws.
A comparison with the in-game model, for scale:
I sized it up against myself and I think it’s pretty good. I also took the opportunity to have a bit of fun and ‘borrow’ the armor from the ingame model to hide my shame!
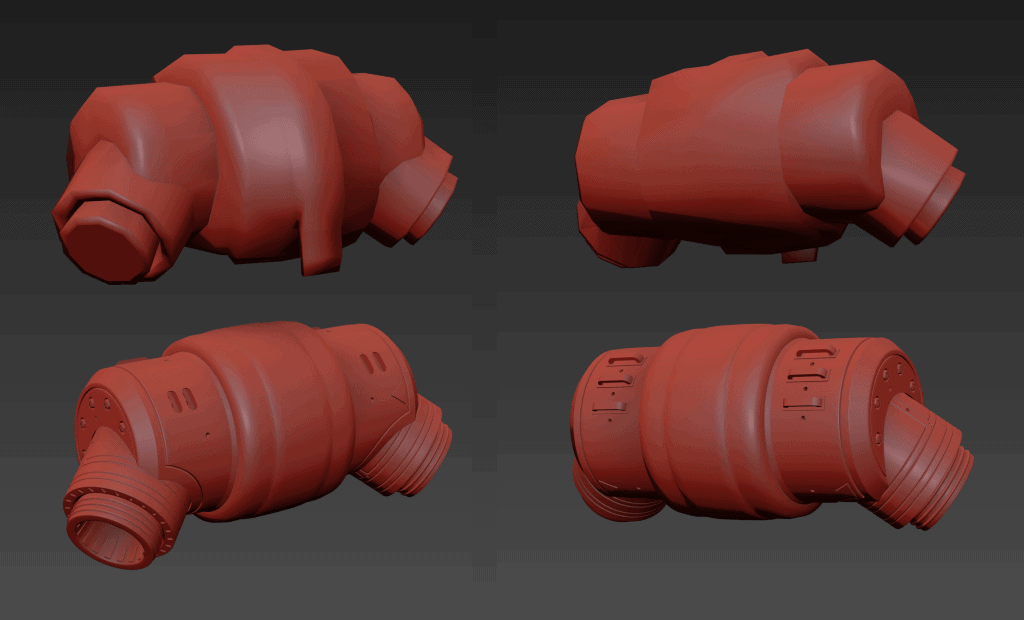
This just, just fits on my printer’s print bed, which is a relief. I could probably have done a lot of this in easier fashion with large sections of PVC pipe, but I like the challenge of designing and engineering this stuff. I will probably continue working on the model so that I can add attachment points for an arduino uno in the center canister, as well as some manner of large rechargable battery that will be able to drive all of the Neopixels and maybe other parts of the costume like fans and lights in my helmet.