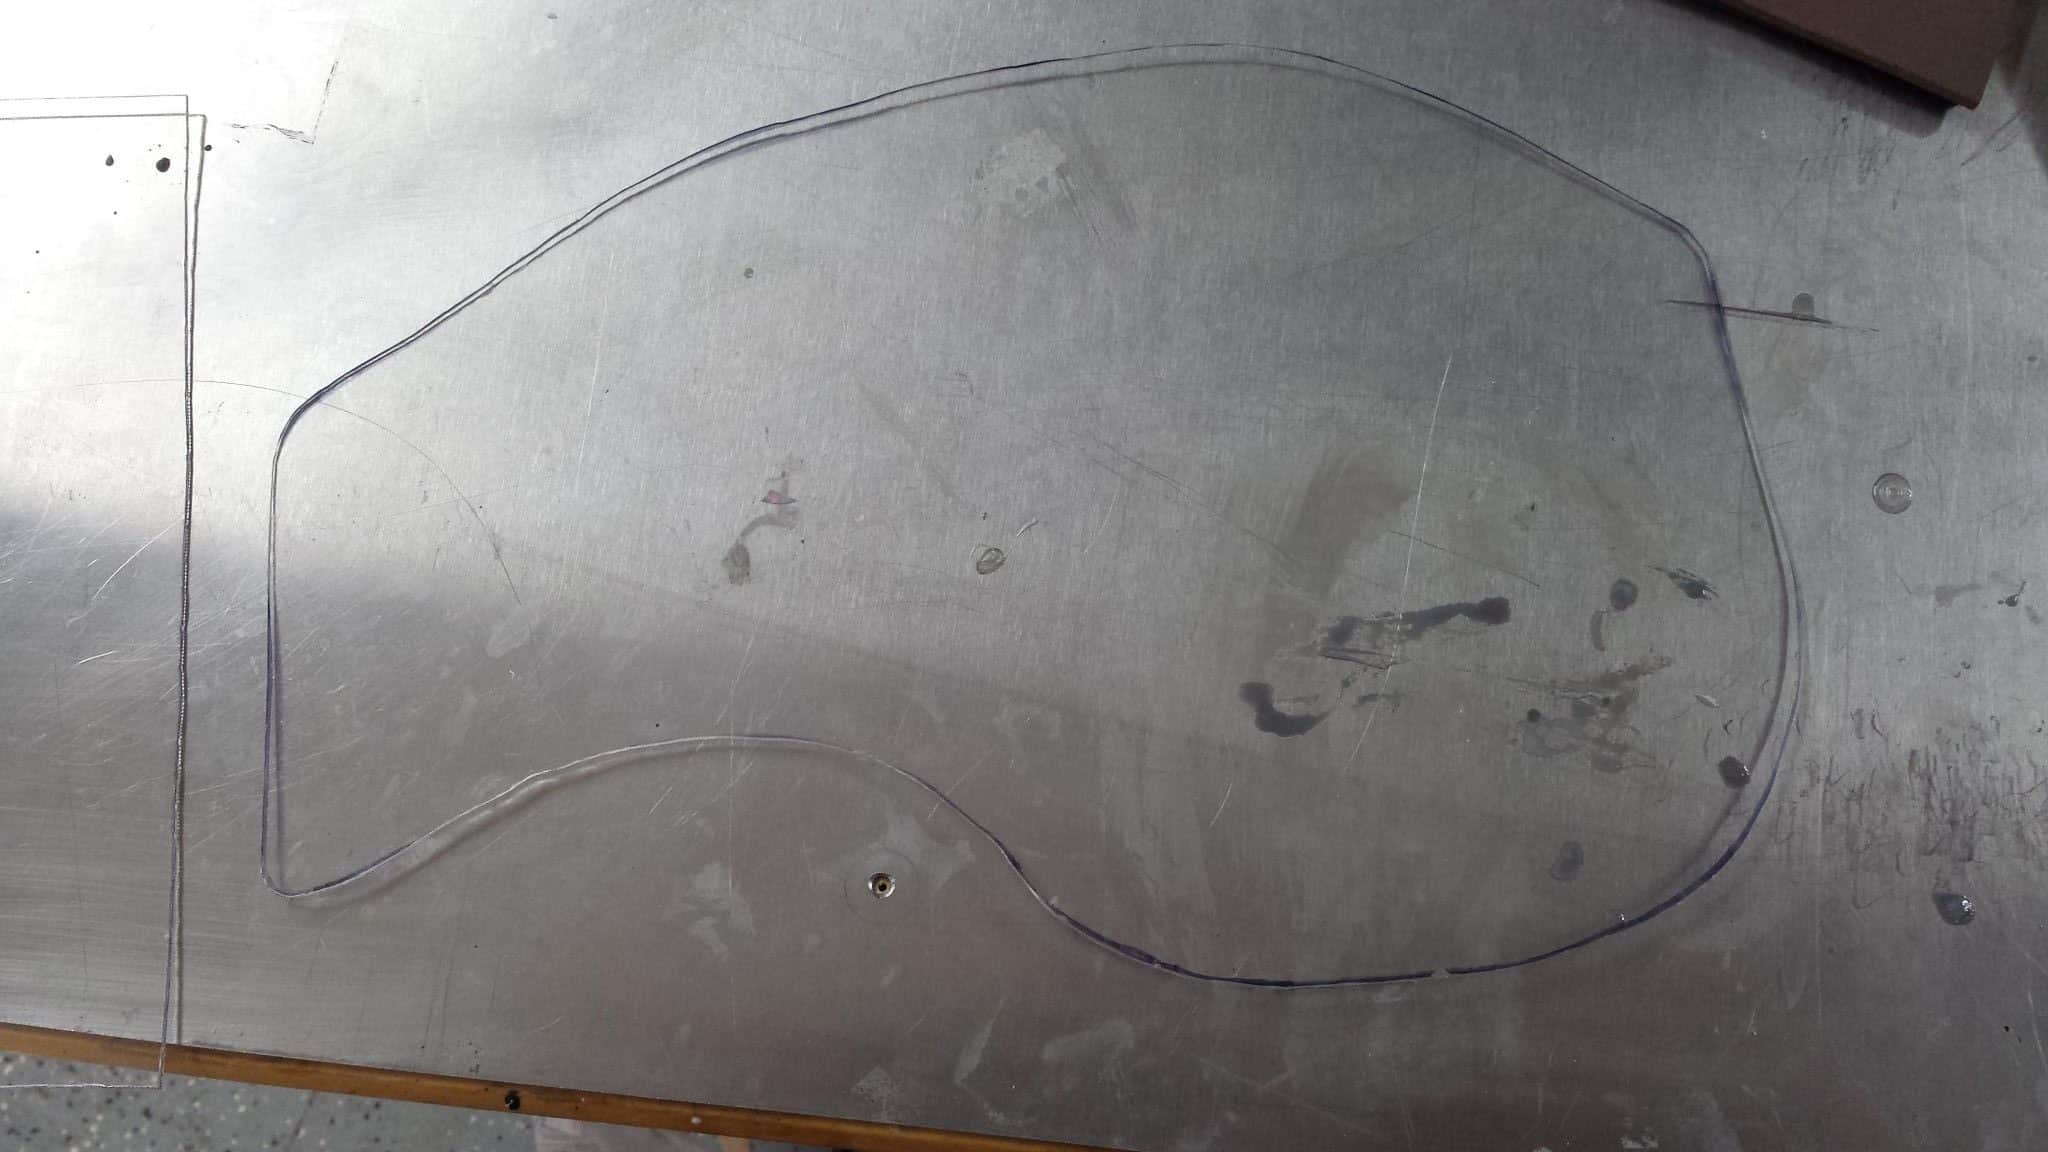
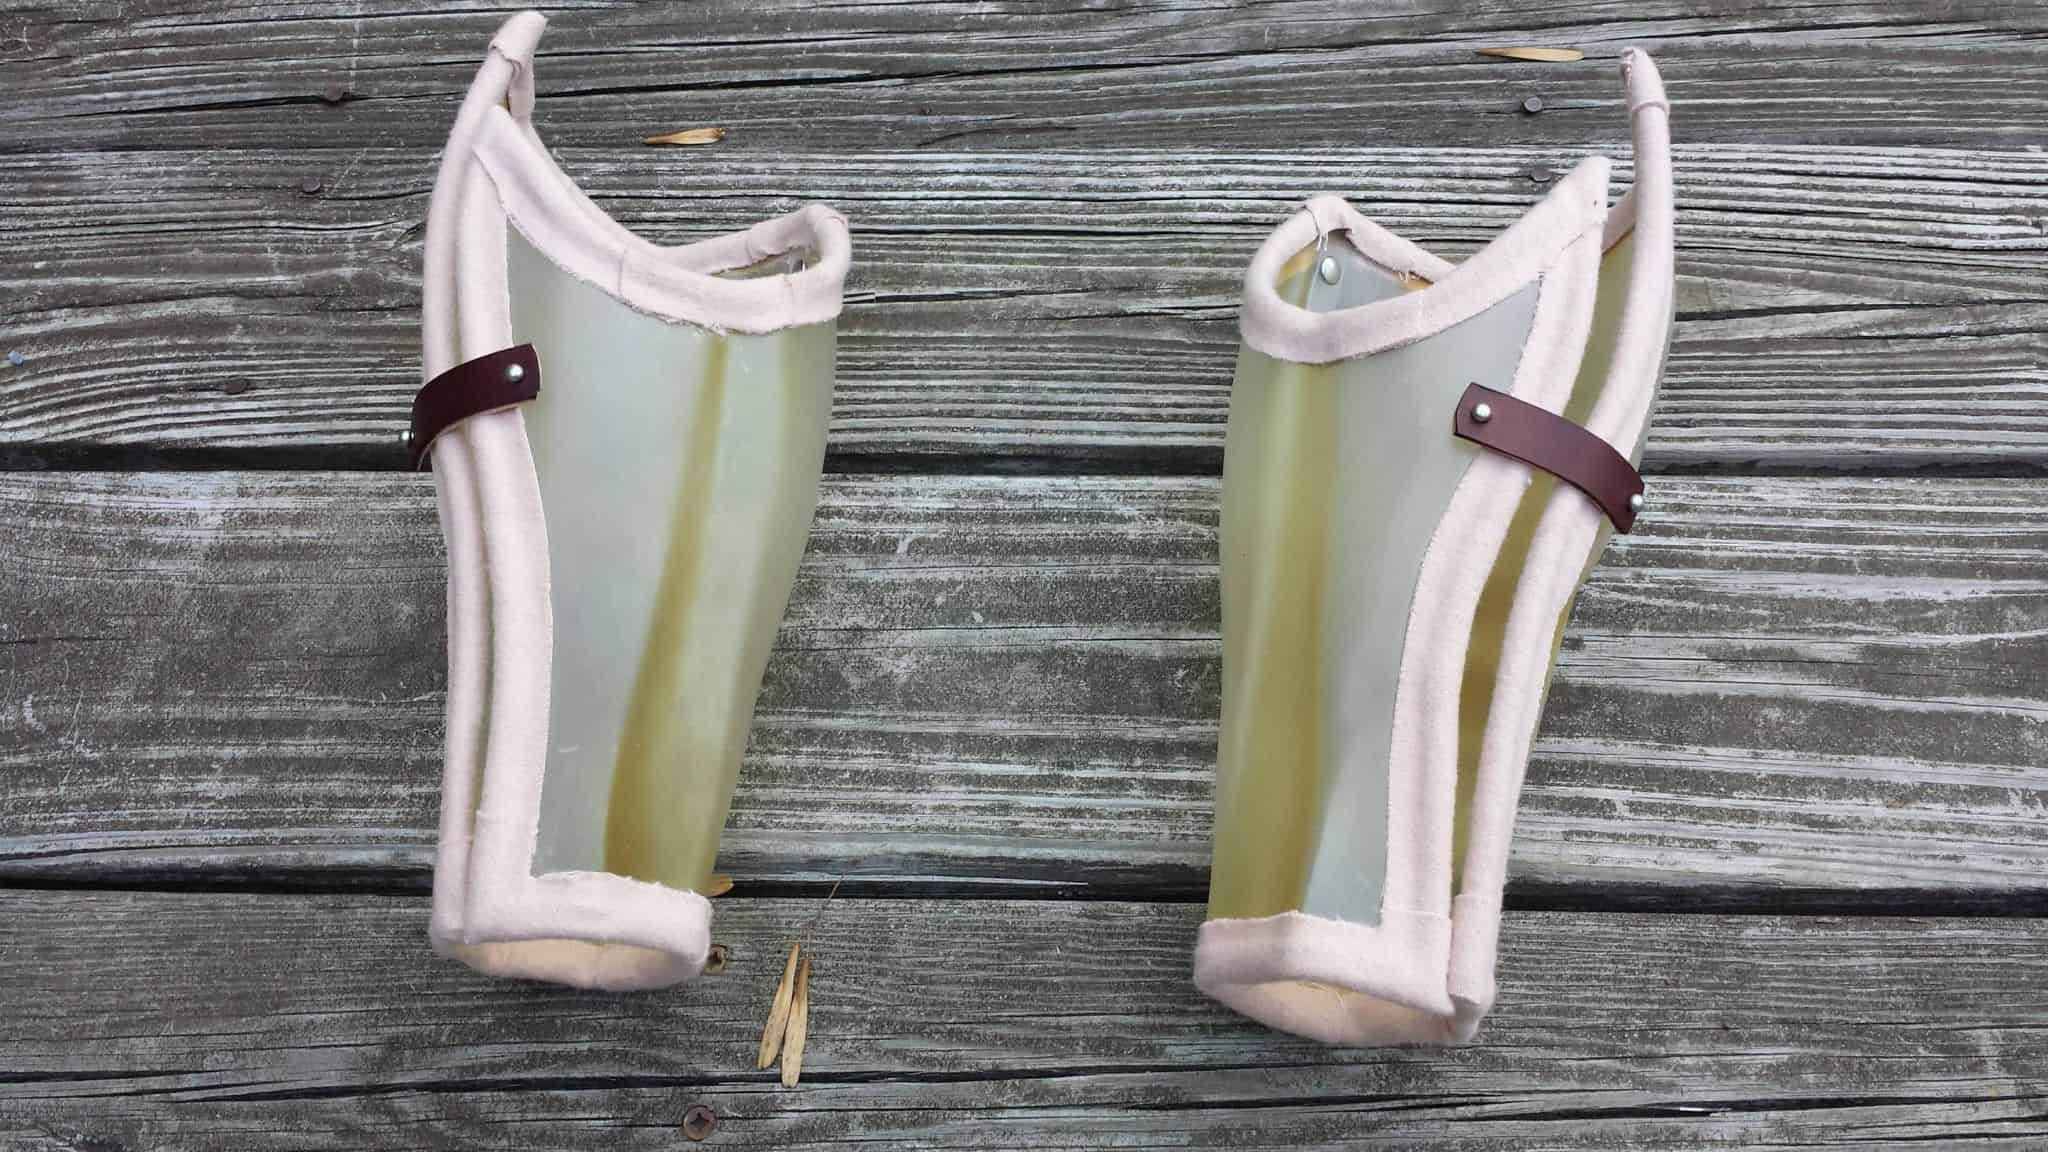
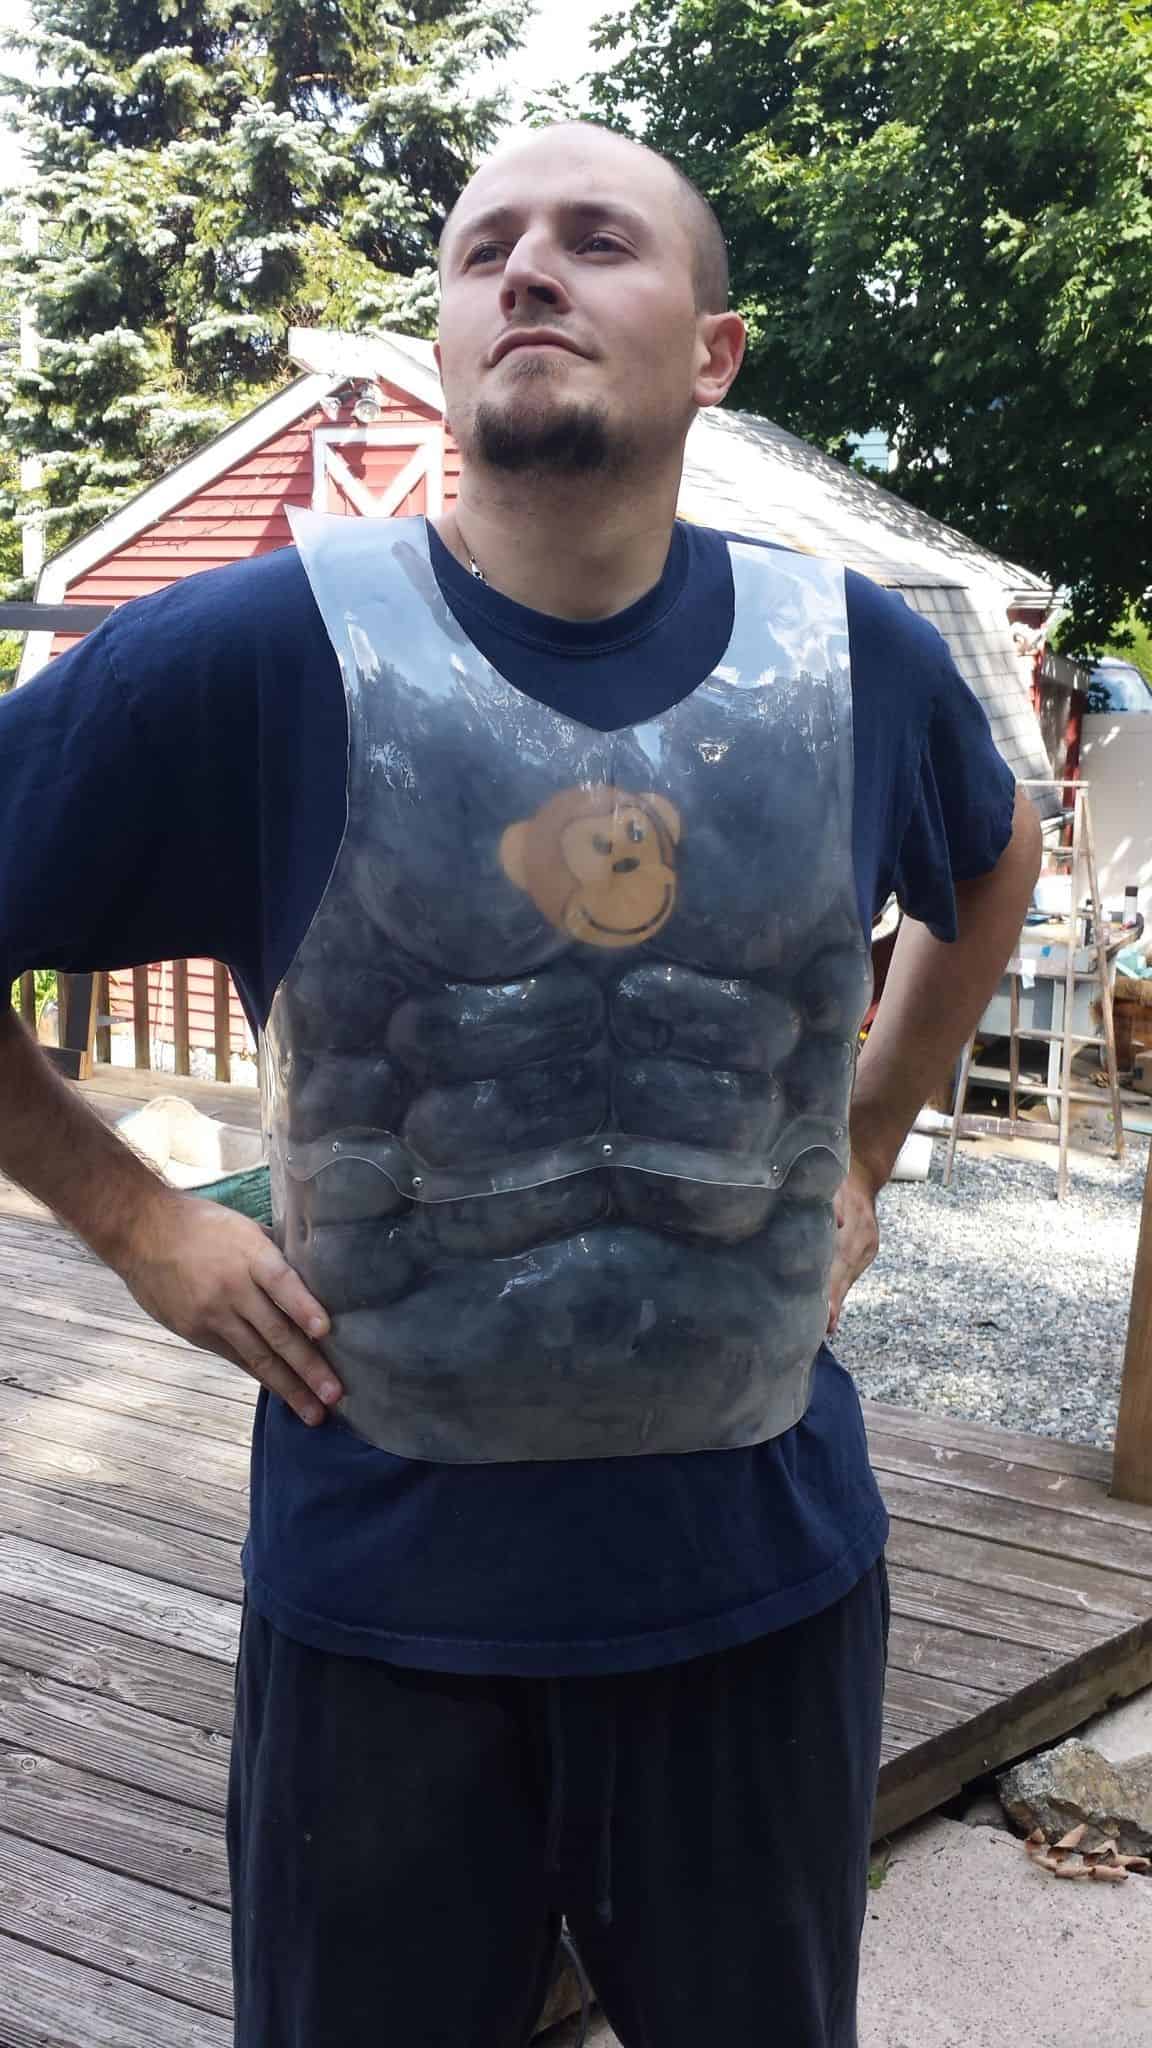
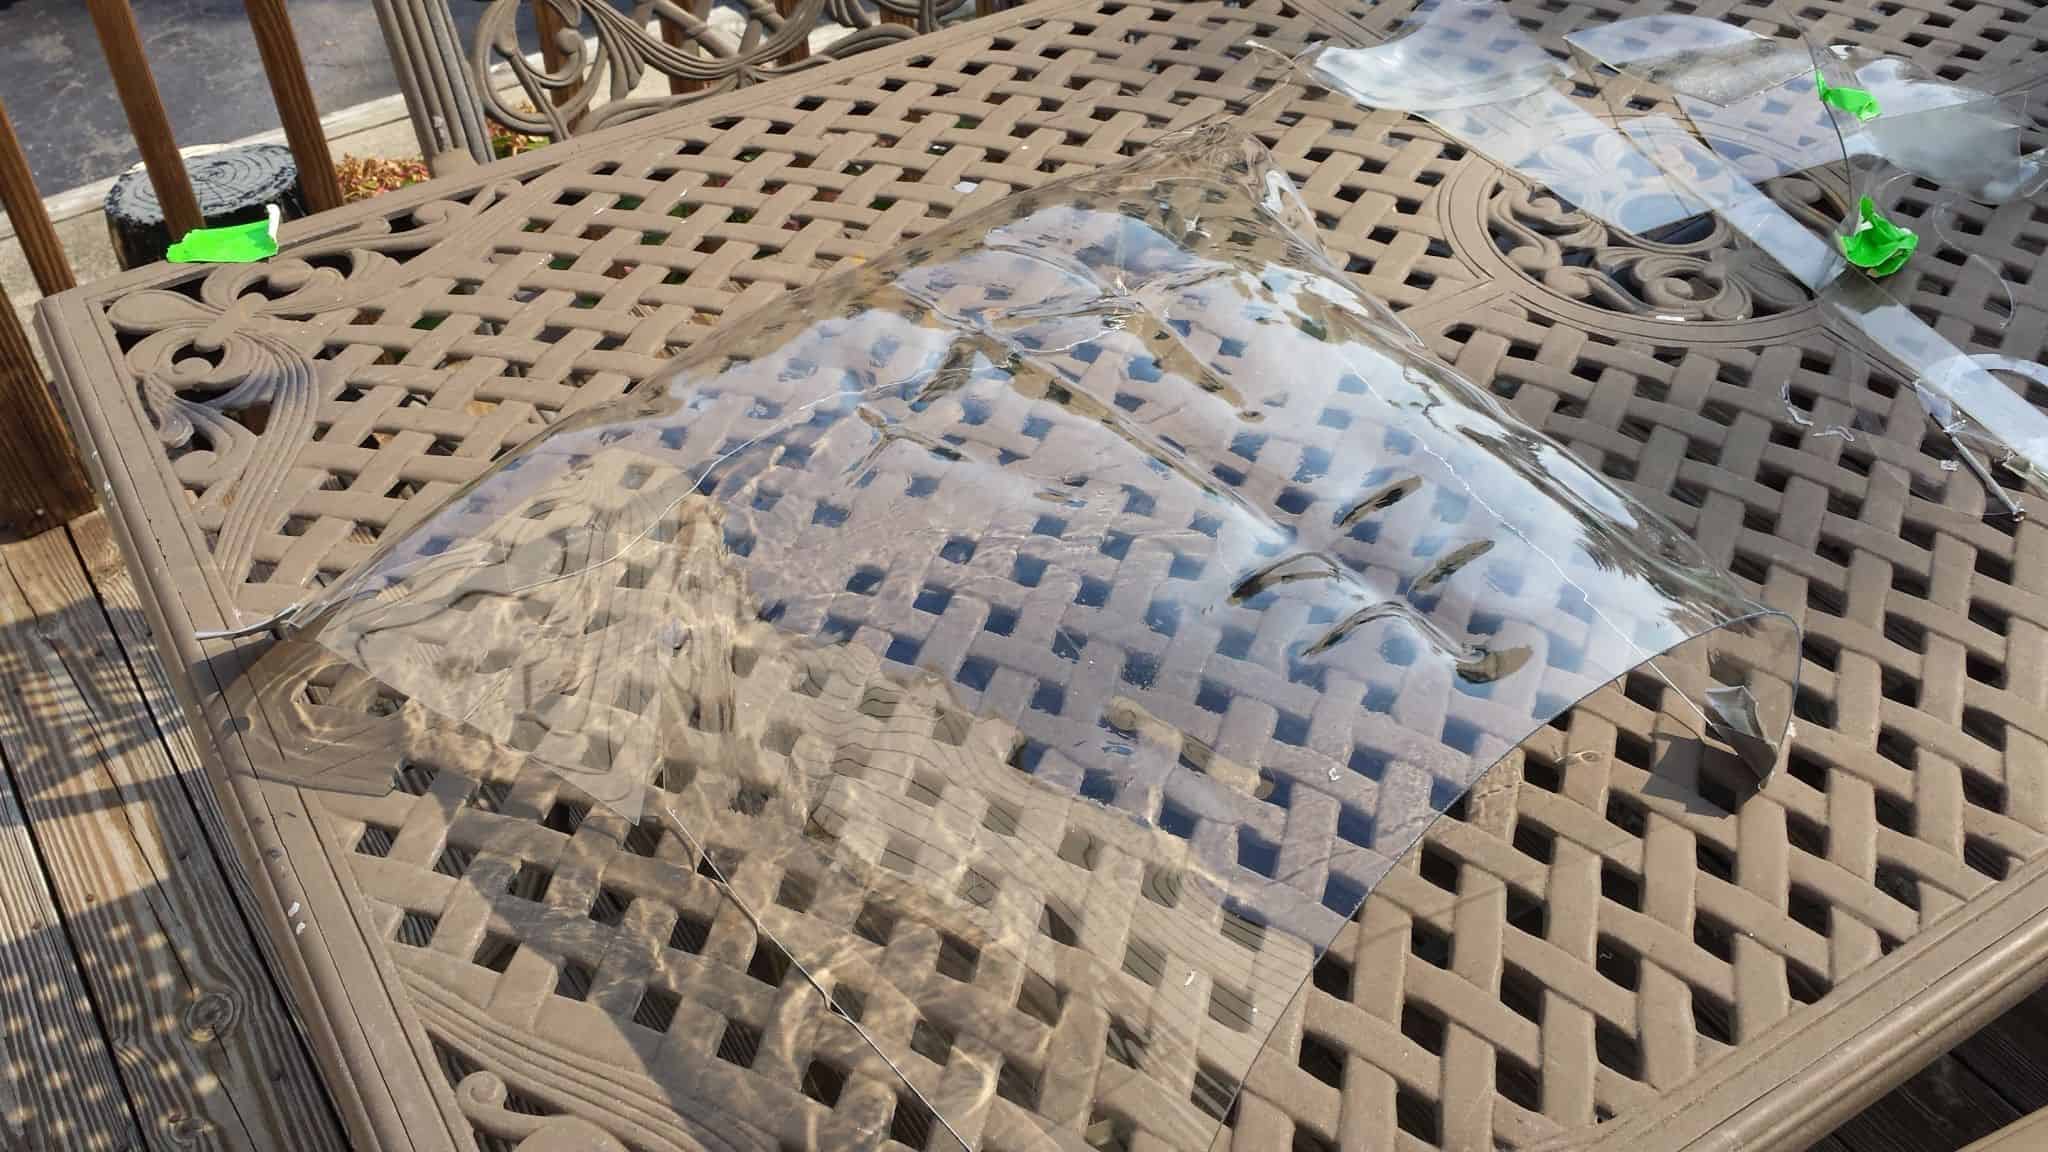
Torso armor’s underway properly now! I used a headlight polishing kit to slightly frost the PETG I had heat-formed because it needed a bit of definition behind the armor. Only scuffed up the back side so that the outer shell was still glossy.
PETG is definitely the way to go with this. Transparent worbla has no structural strength to it – this stands up on its own. It feels satisfying and you could probably hit me with a baseball bat and not crack it. Not that you should.
I riveted the top and bottom halves together with an overlap comparable to what I saw on Joe. Haven’t finished shaping the shoulders with the heatgun yet but that shouldn’t be too tricky.
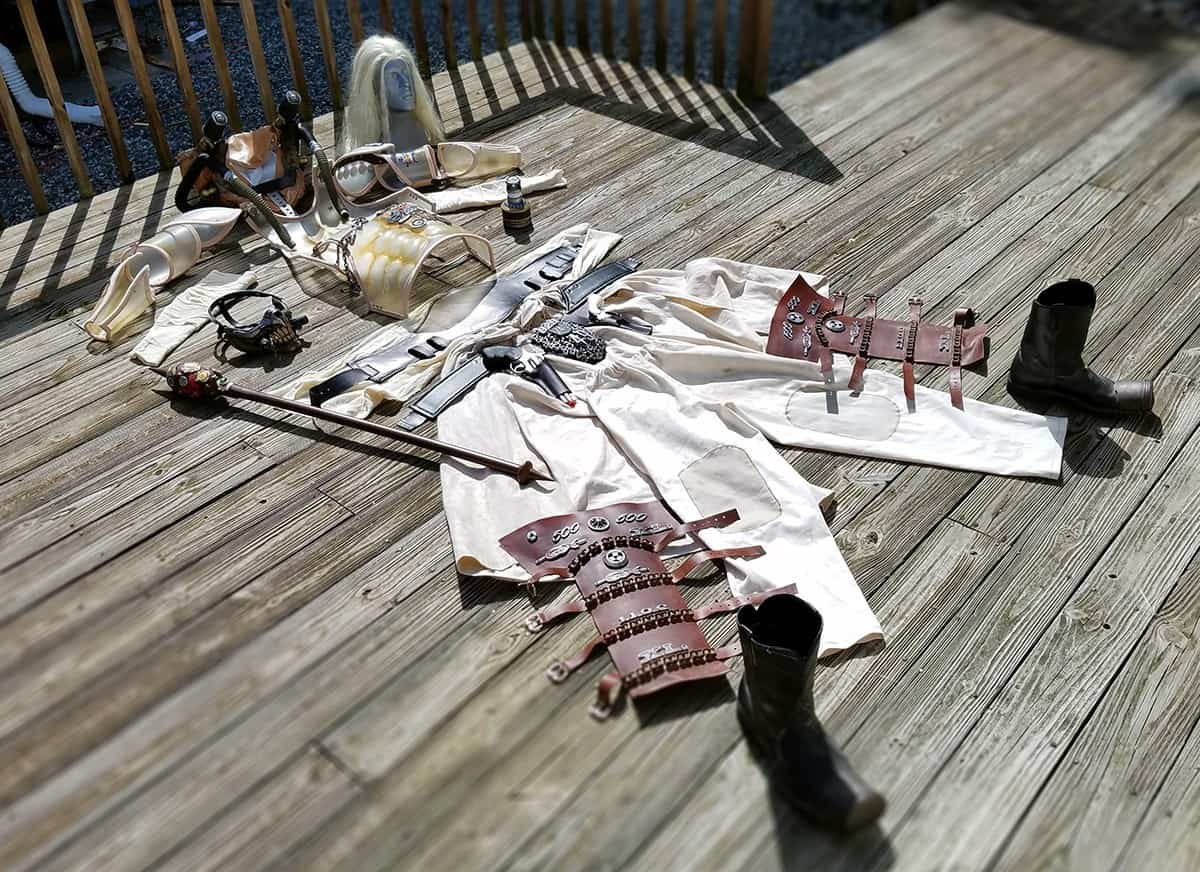
I will trim a bit off the bottom of the gutplate to make it more accurate to Joe’s, and of course it needs the yellow/orange/umber staining to exaggerate the musculature. I will buy some suede tomorrow and hopefully figure out how to trim the armor to my satisfaction. It’s not perfectly accurate by any means, but I think it gets the gist of Joe across pretty well.
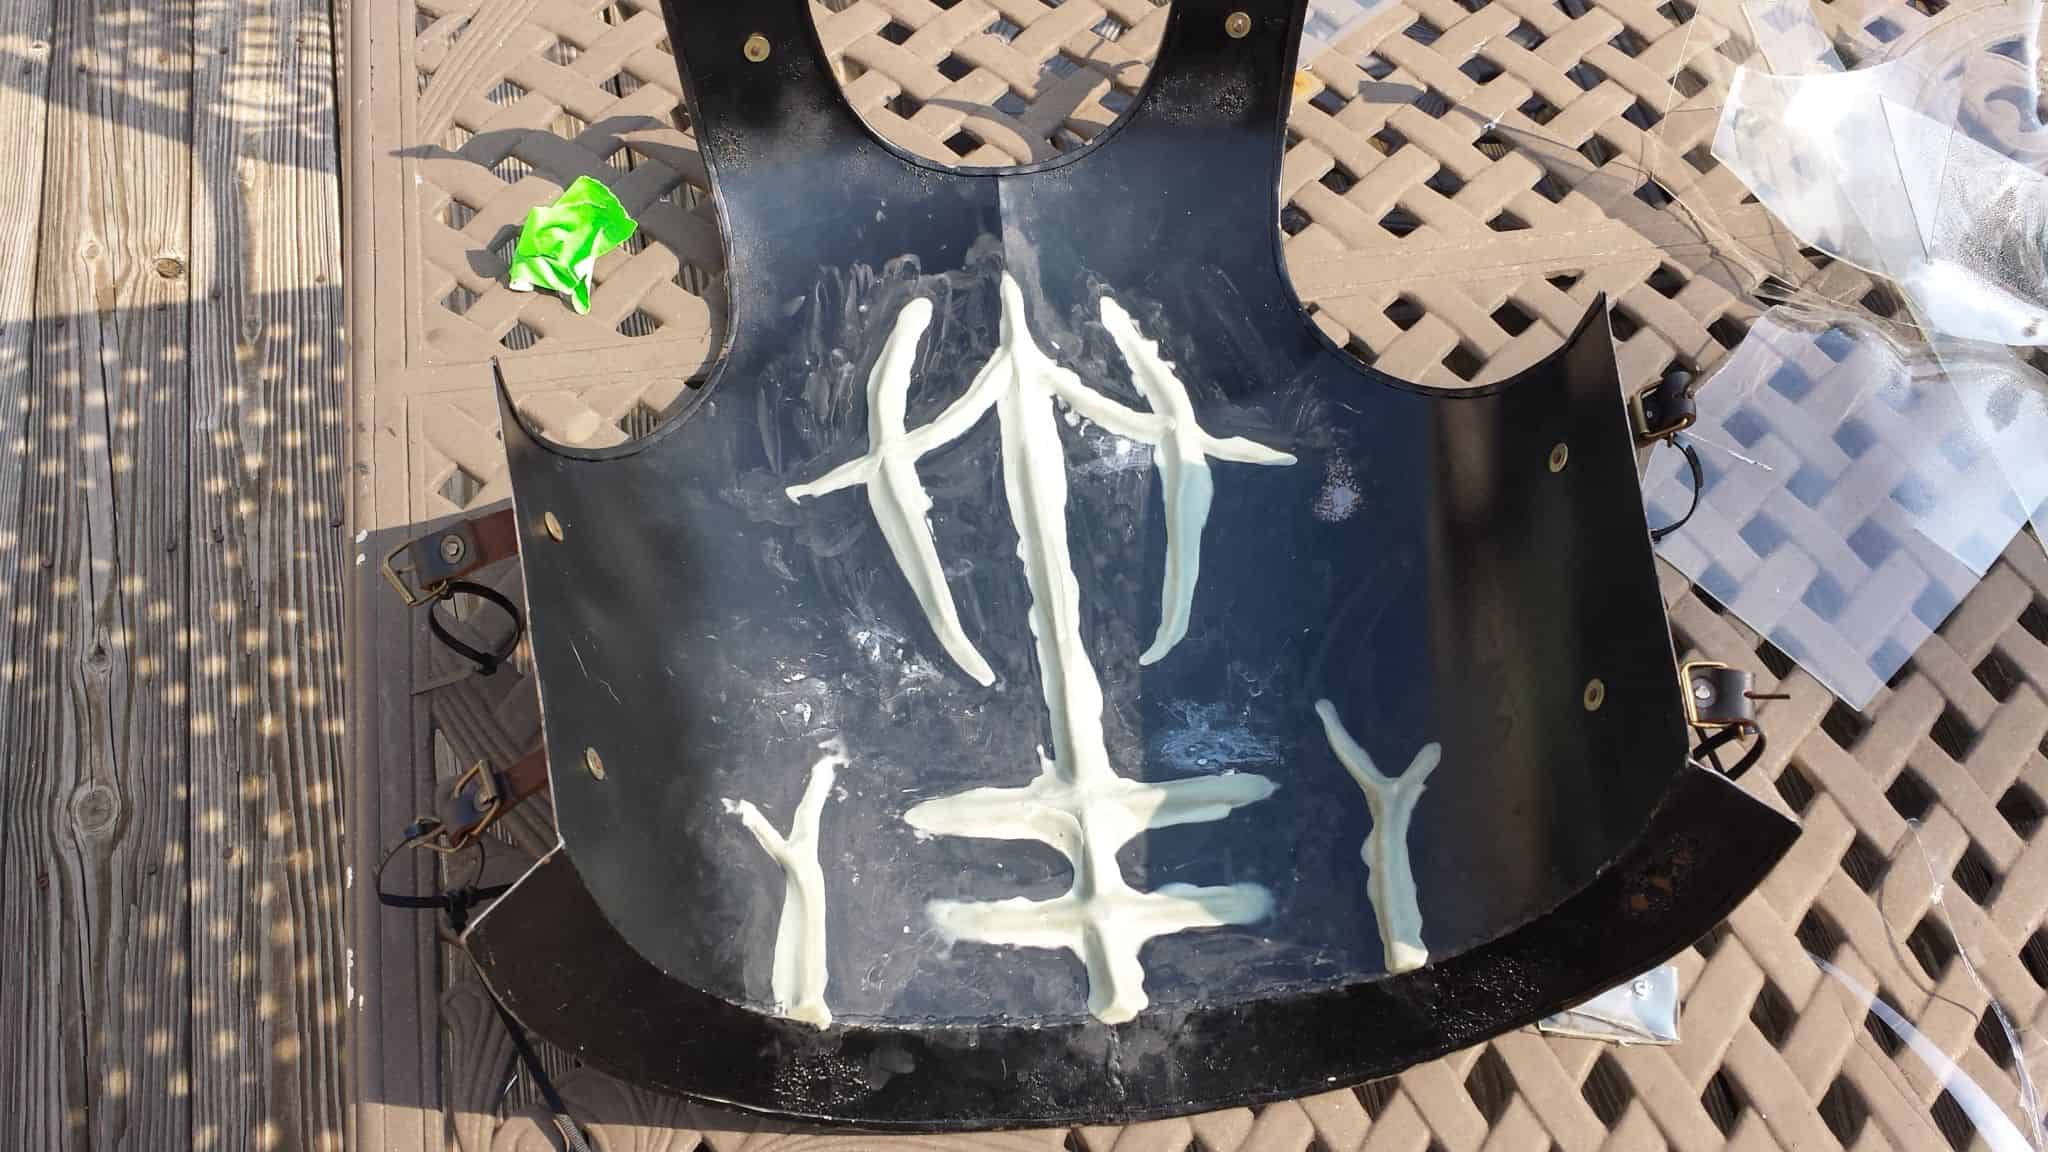
We took the back of the roman armor and some Apoxie Sculpt and added some extra bits so we had something to form Joe’s weird back musculature over, since the backplate of the armor we were using was otherwise unadorned.
As before, this stuff is pretty hard to photograph, but I’m quite happy with it so far. Gotta trim it and frost it like we did with the front plate. For now, though, I’m going to try and source some suede for the trim on the front!