This year, I’ve decided Star Lord was going to be the costume of choice, partly because I loved the daylights out of the Guardians of the Galaxy movie, and partly because the wonderful community at TheRPF has been releasing some great 3d files for me to play around with on my printers.
I’m an attorney by day, so my time to do prop-making is kind of limited. My office is adjacent to an architect that I have befriended. They had a Makerbot Replicator 2 in their office that wasn’t working, and one day in March I offered to fix it for them if they’d let me use it periodically. I got it running for them in short order, and they’ve hardly ever used it since, which has left it free for me to tool around with. After a month or two of having access to it, I also bought a 3d printer for my home, because I was enjoying it so much – a Makergear M2, which is hands-down the nicest 3d printer I have ever, ever used. As such, at any given time, I usually have two printers going making various stuff for me to play around with after my usually-long workdays are over!
I also have serious project ADD, so you’ll see me bouncing all over different parts of the build as my whims dictate. Hopefully I will get stuff done in time!
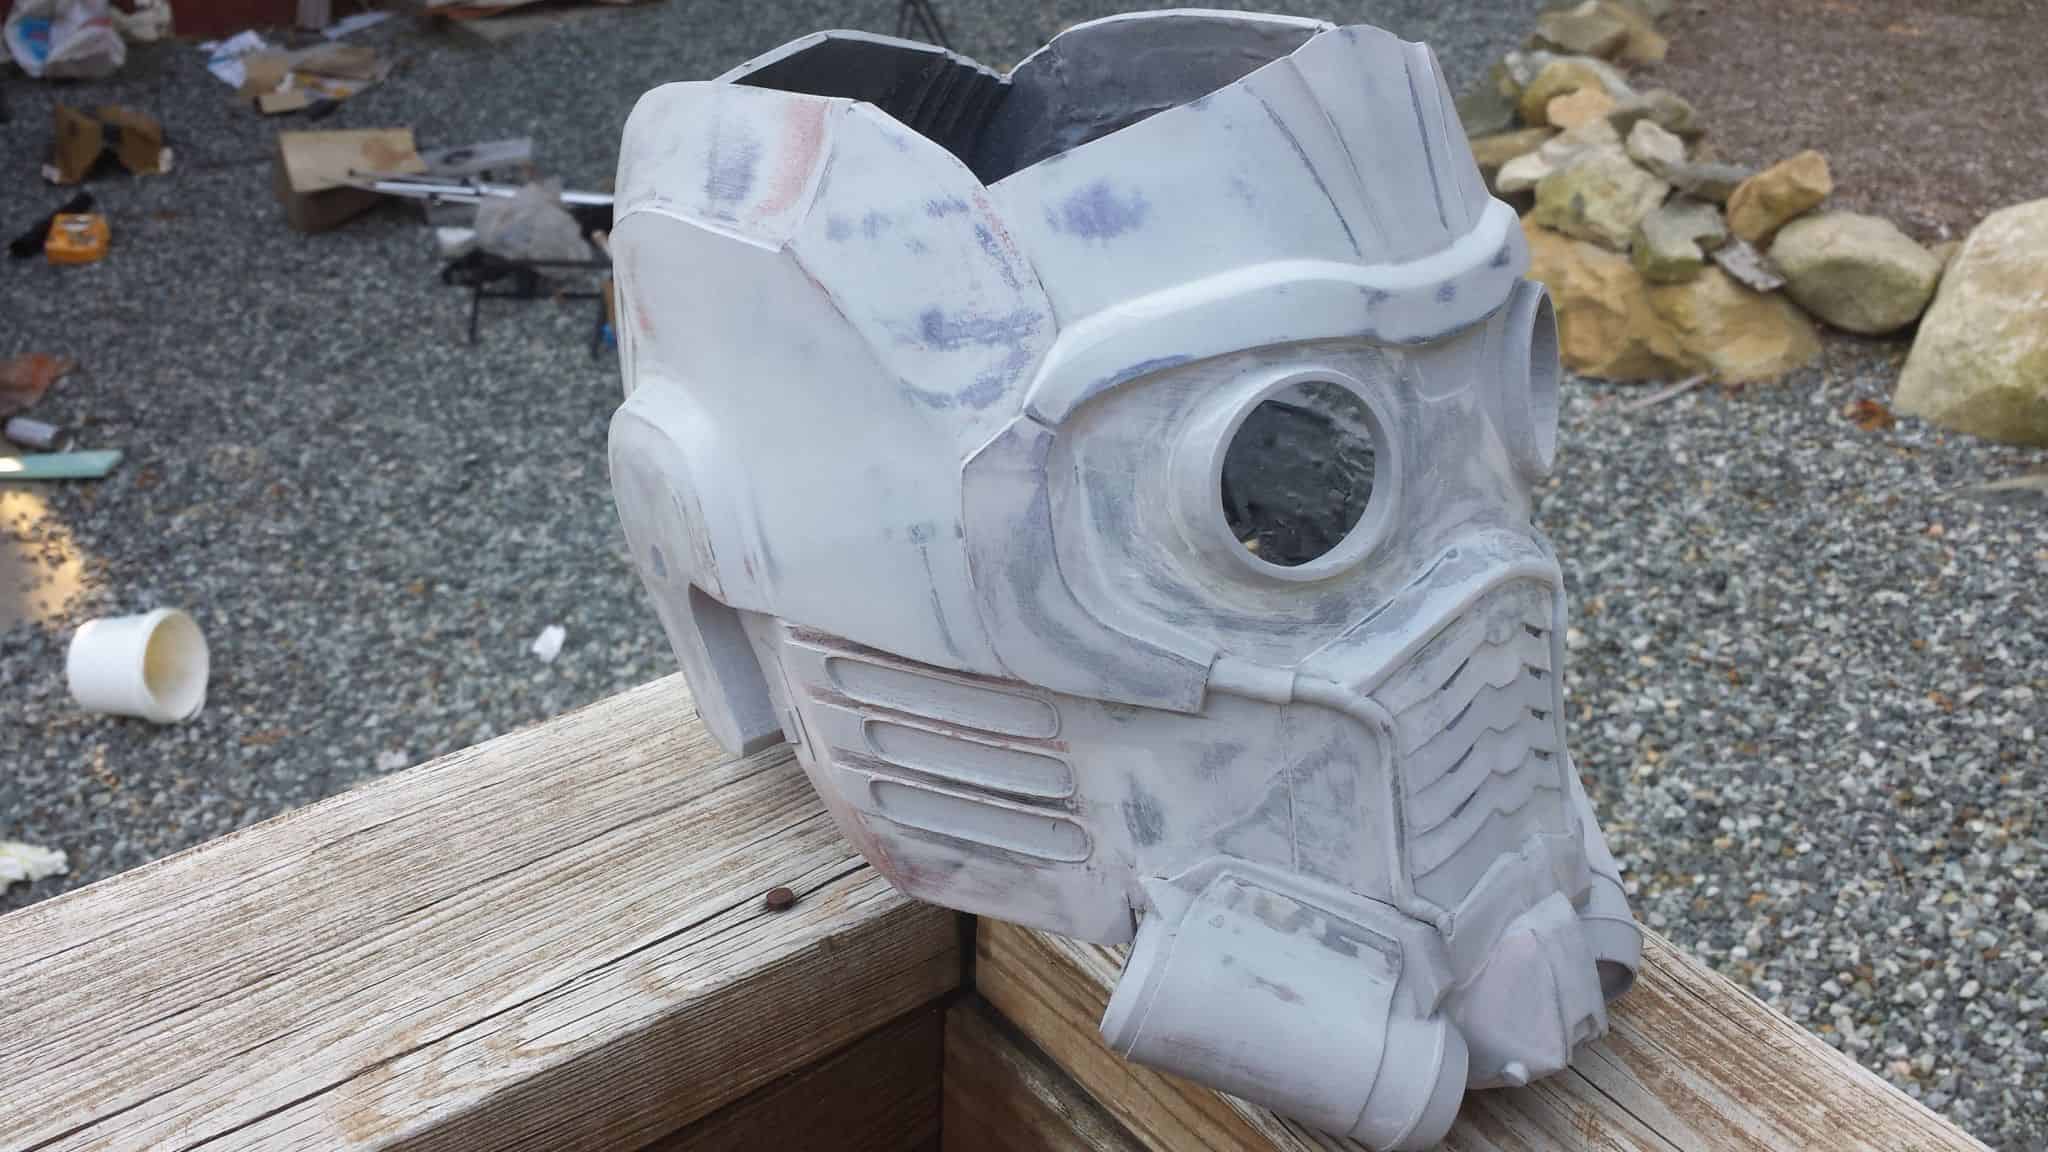
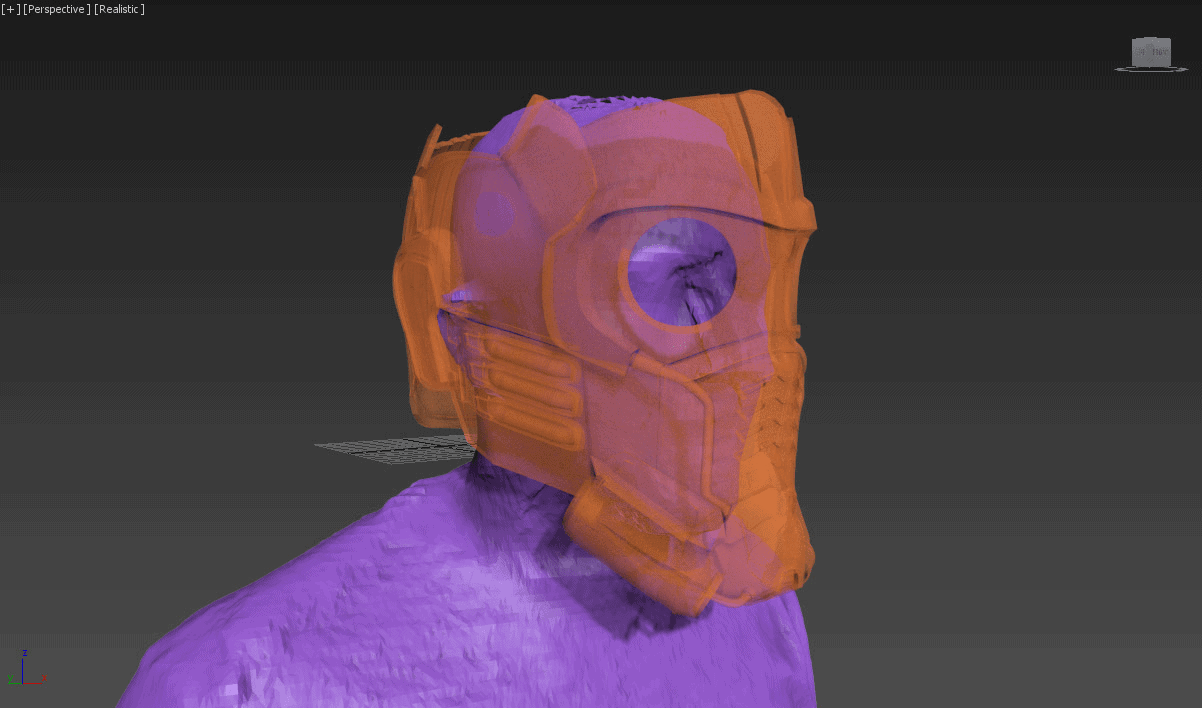
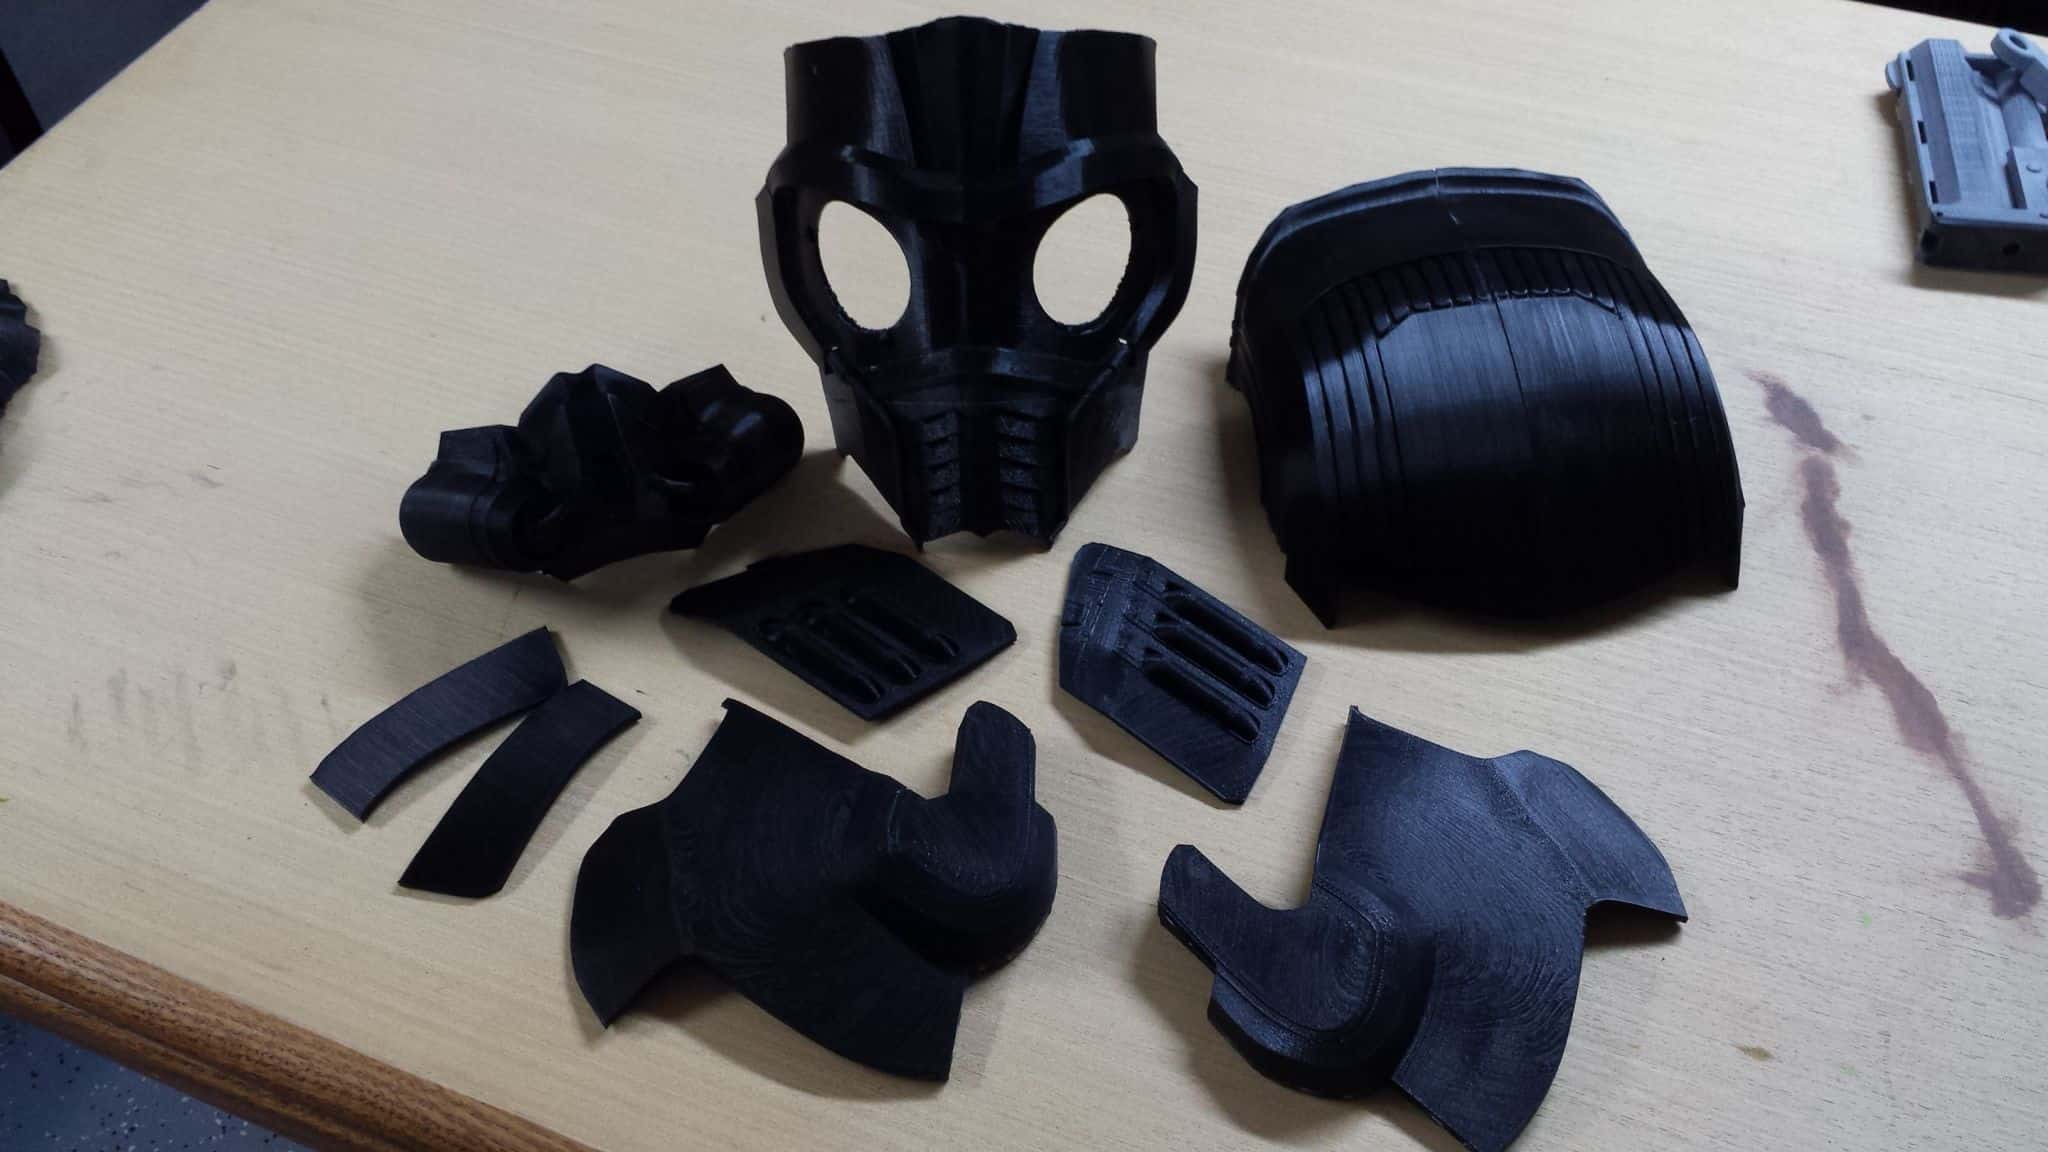
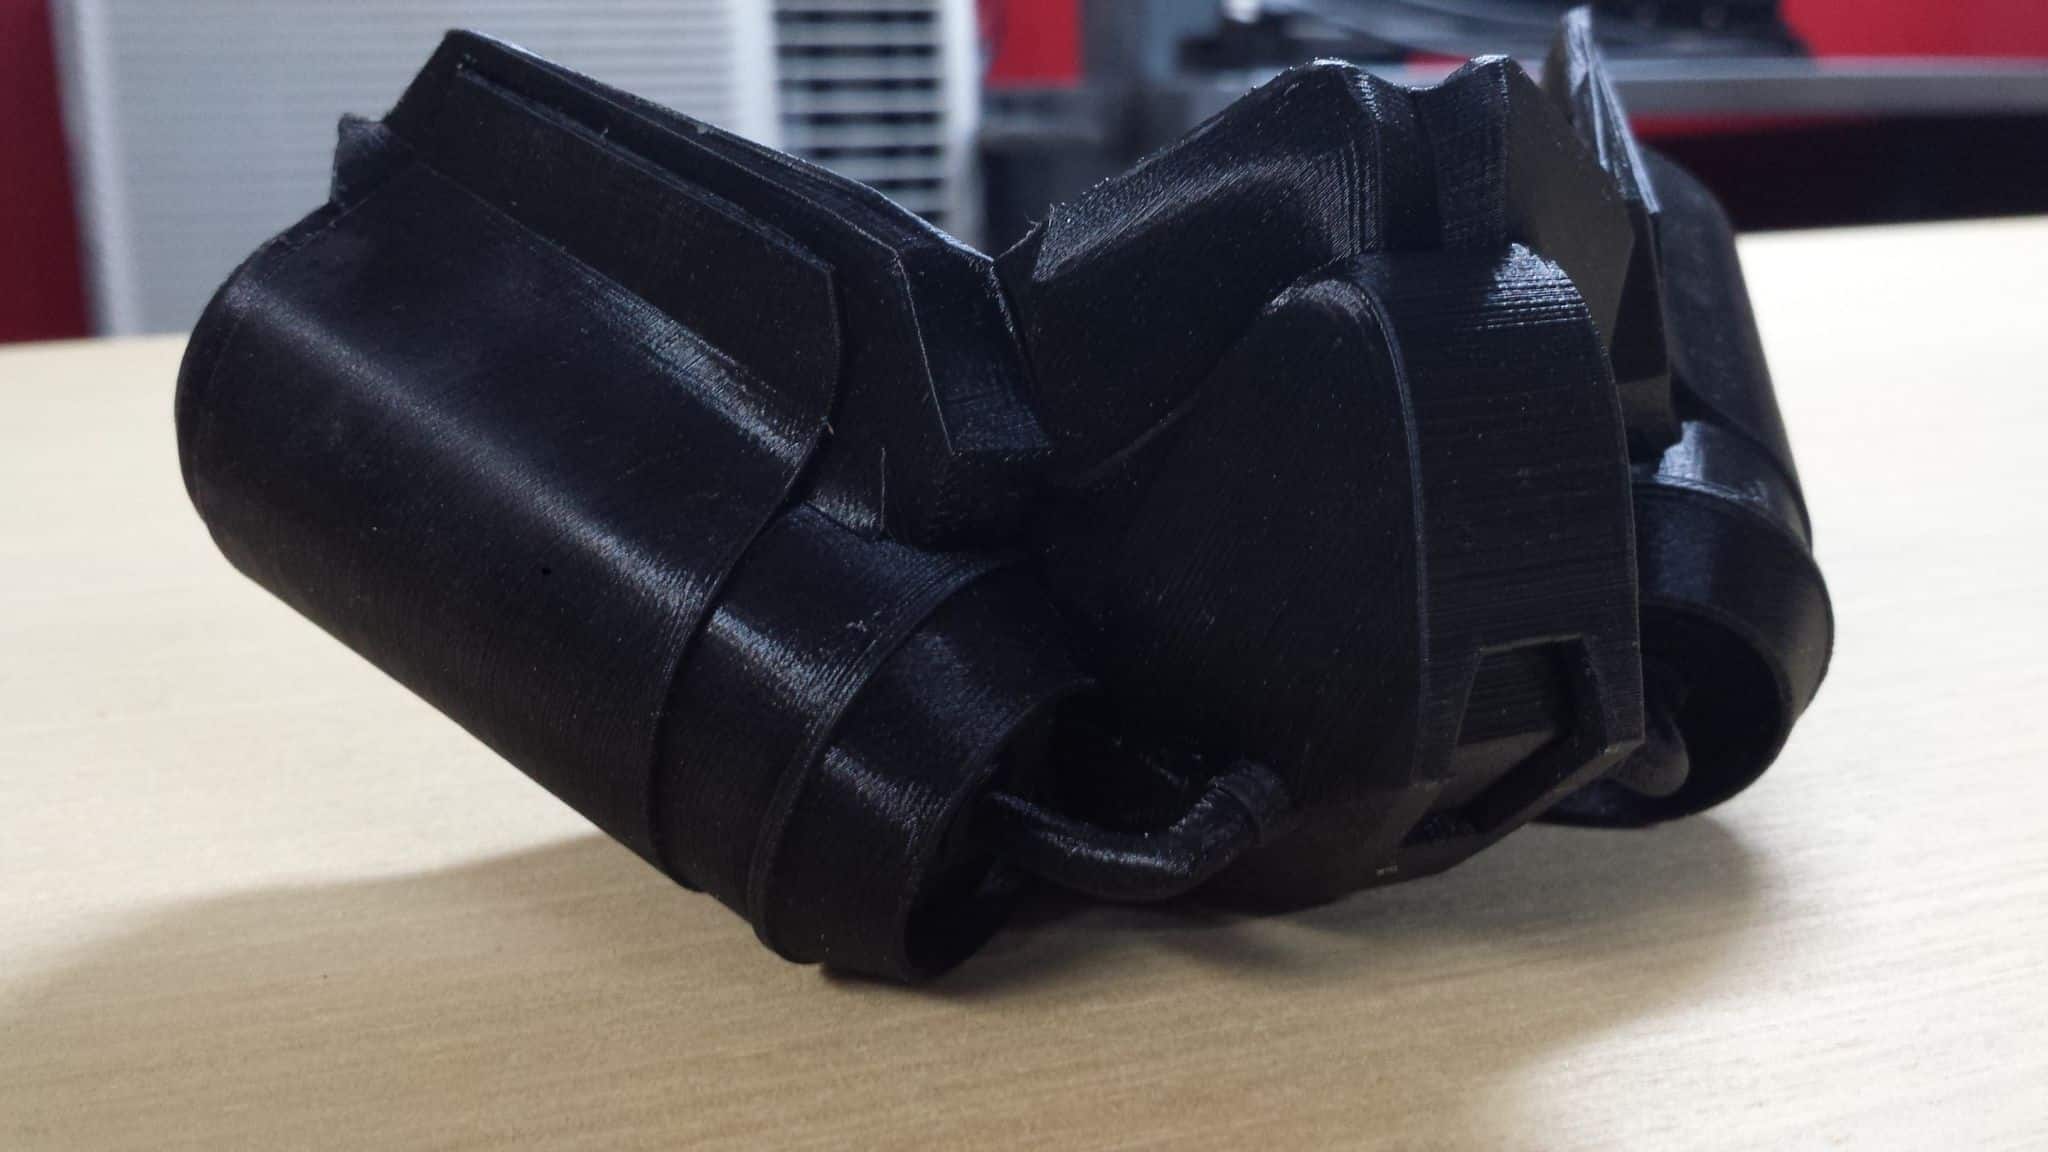
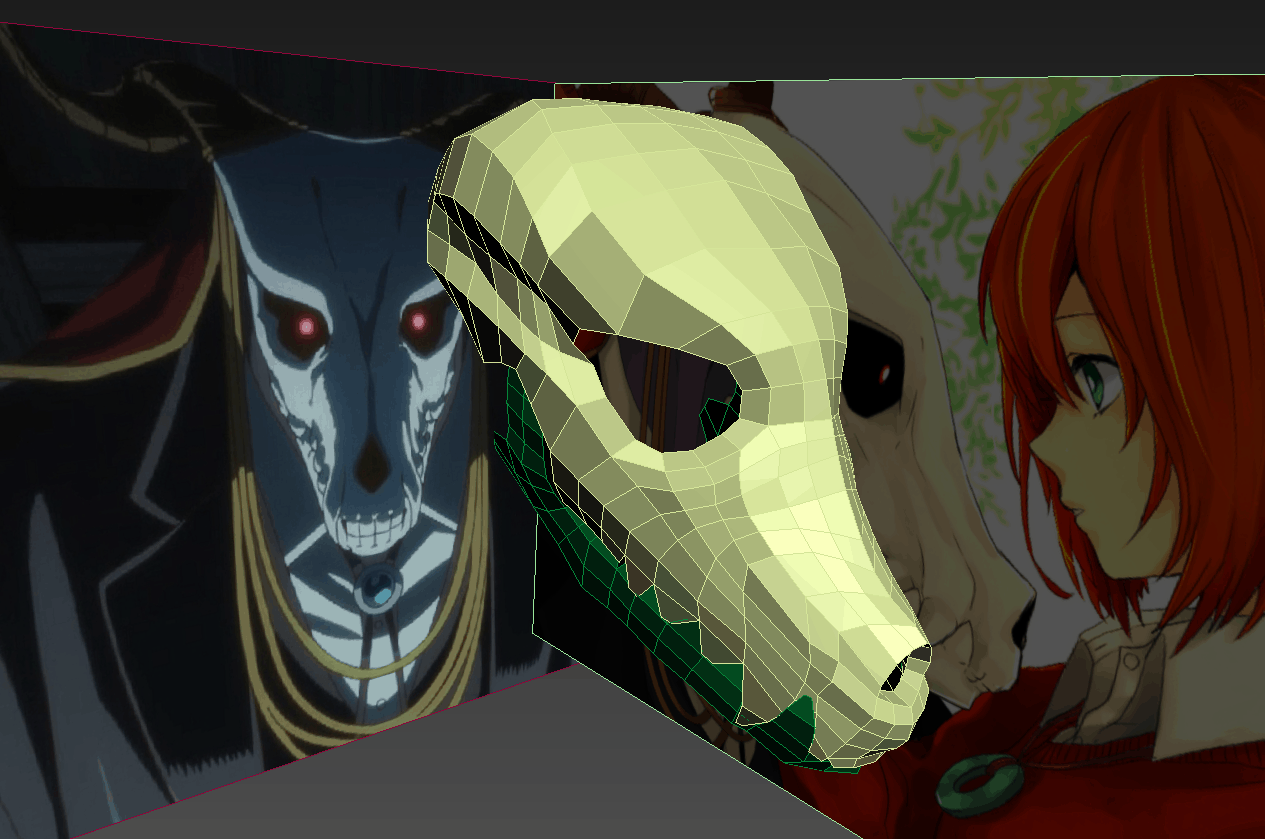
I’ll start with the mask, since it’s the part I expect most of you have seen a lot of. Most people have been printing these files at 88% scale – I’ve been printing mine at 90% scale, mostly because I have a bigger head. Before I did that, I used a Kinect and my laptop to 3d scan my head so I had a rough volumetric approximation, and then pieced the parts together in 3d Studio Max to make sure it’d fit.
It should be an okay fit. It looks like it has a bit of extra room at the front and back, and might be a little tight on the sides, but I figure I’ll get it assembled and if I need to, I will use a heat gun to gently flex the curvature on the sides out a bit more, which should also result in bringing the front and back a bit closer together.
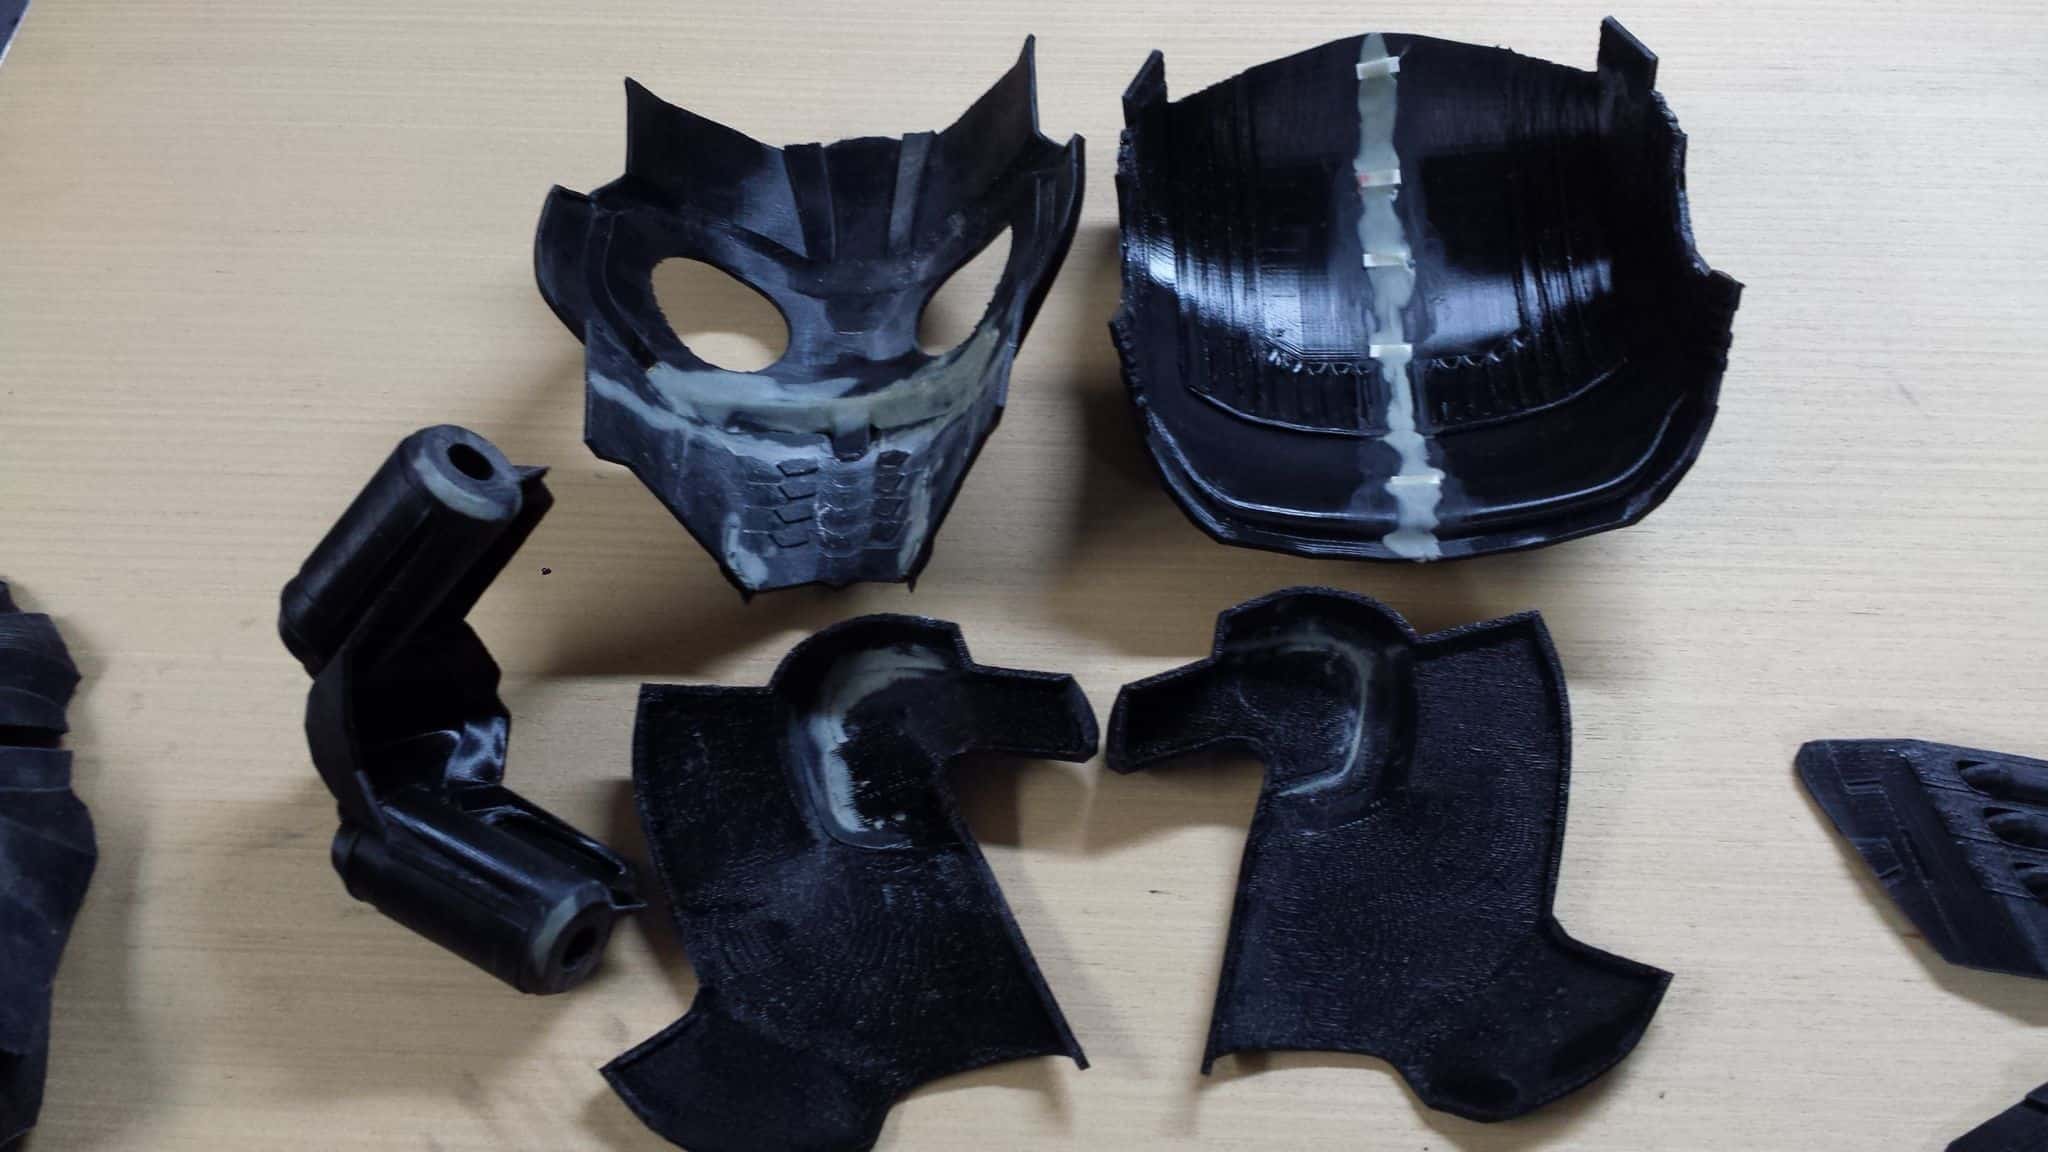
The files that Helagak on TheRPF.com released have been great, but do require a bit of work to get together. I wouldn’t have been able to build this mask without him posting them up, though, so I am eternally grateful. I’ve been printing these with my Makergear M2 at .1mm resolution, which is reasonably fine, if a bit slow. The material they are made of is PLA, because I find ABS prints to be a bit cagey to work with without warping. If everything goes well, I’m anticipating making a mold and resin cast of the thing down the line for proper wear.
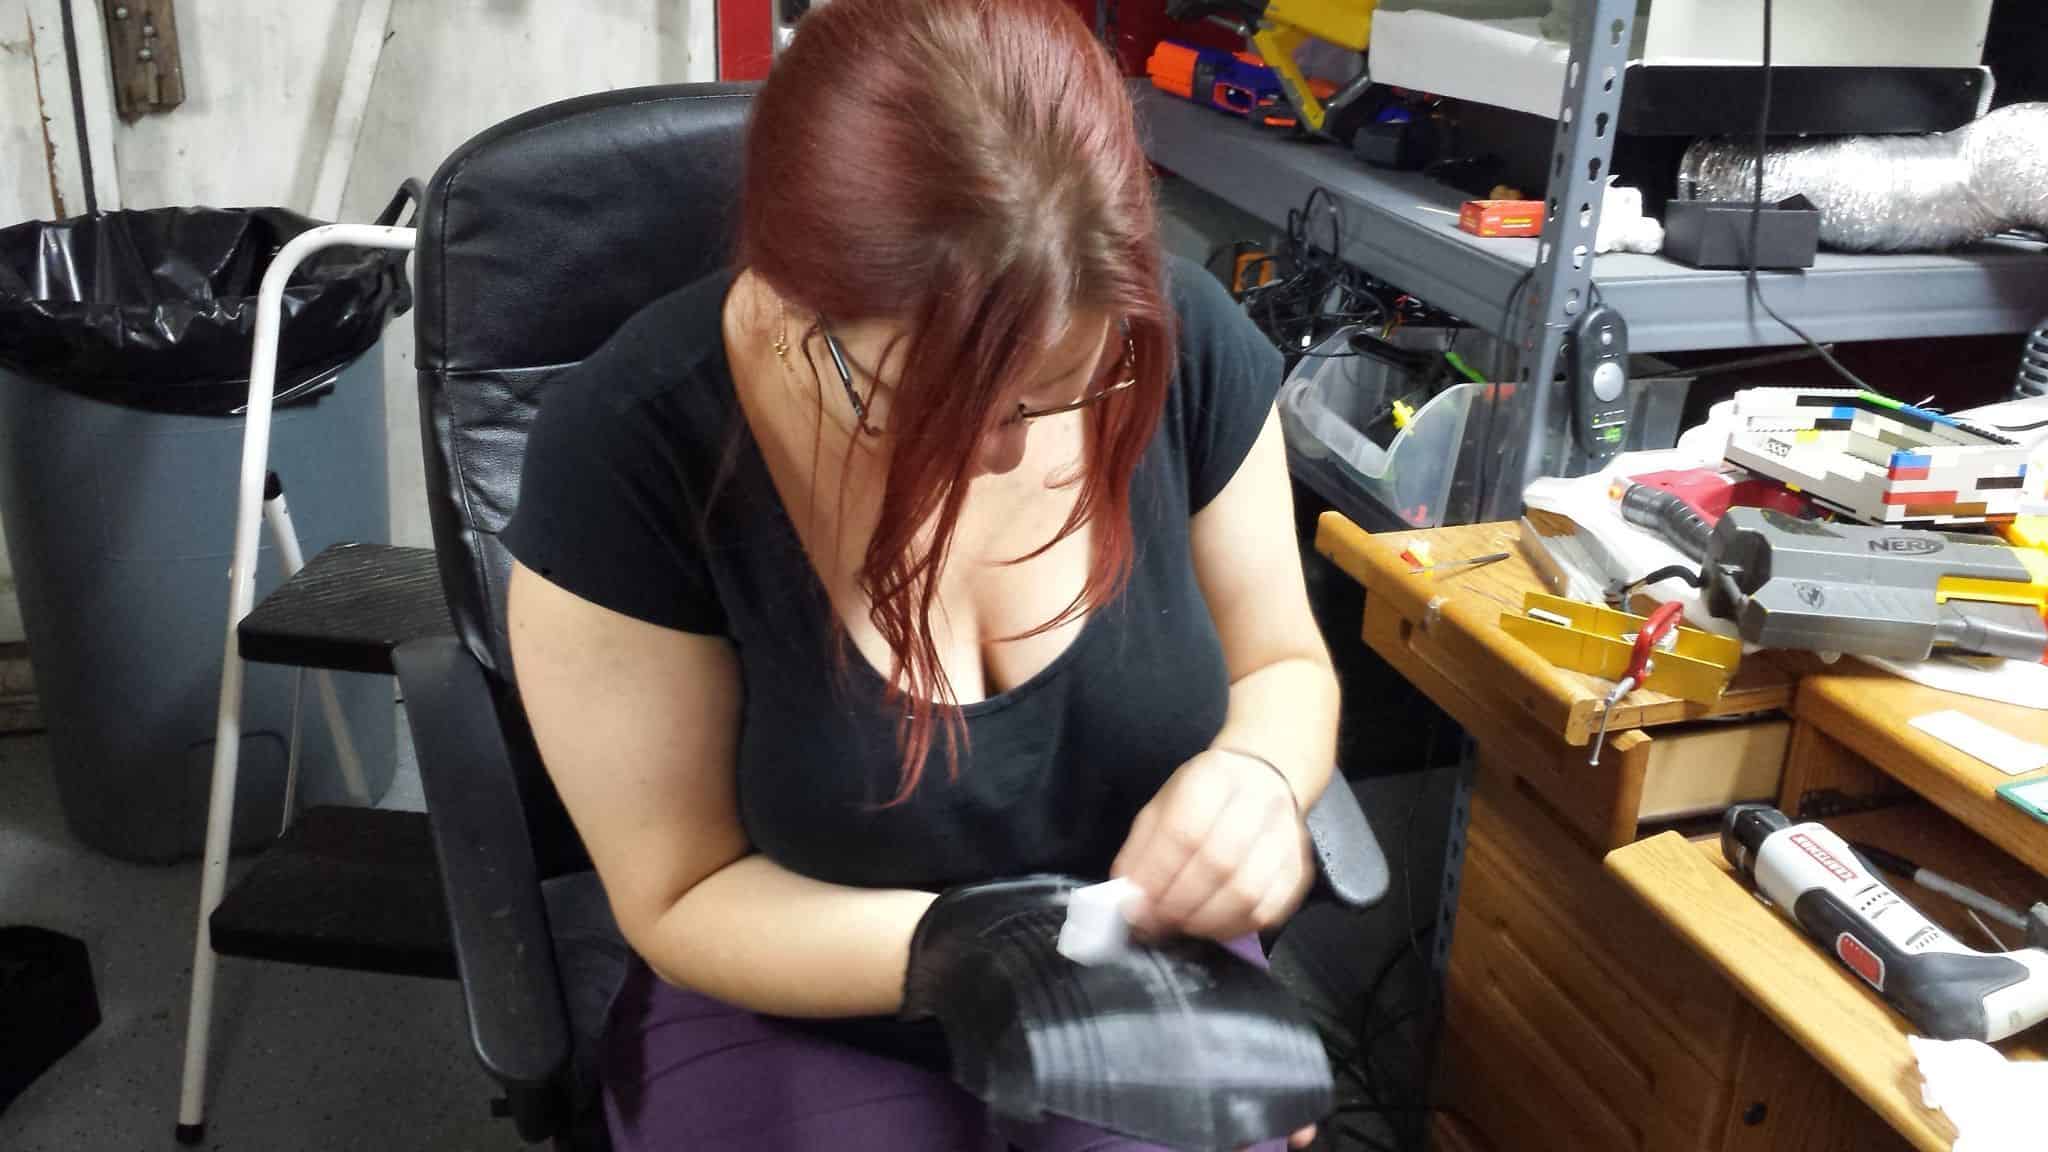
I’ve been using ApoxieSculpt to join the back seams of the parts after I superglue bits together. Apoxiesculpt is also my go-to touchup putty of choice for work on props, since I find Bondo messy.
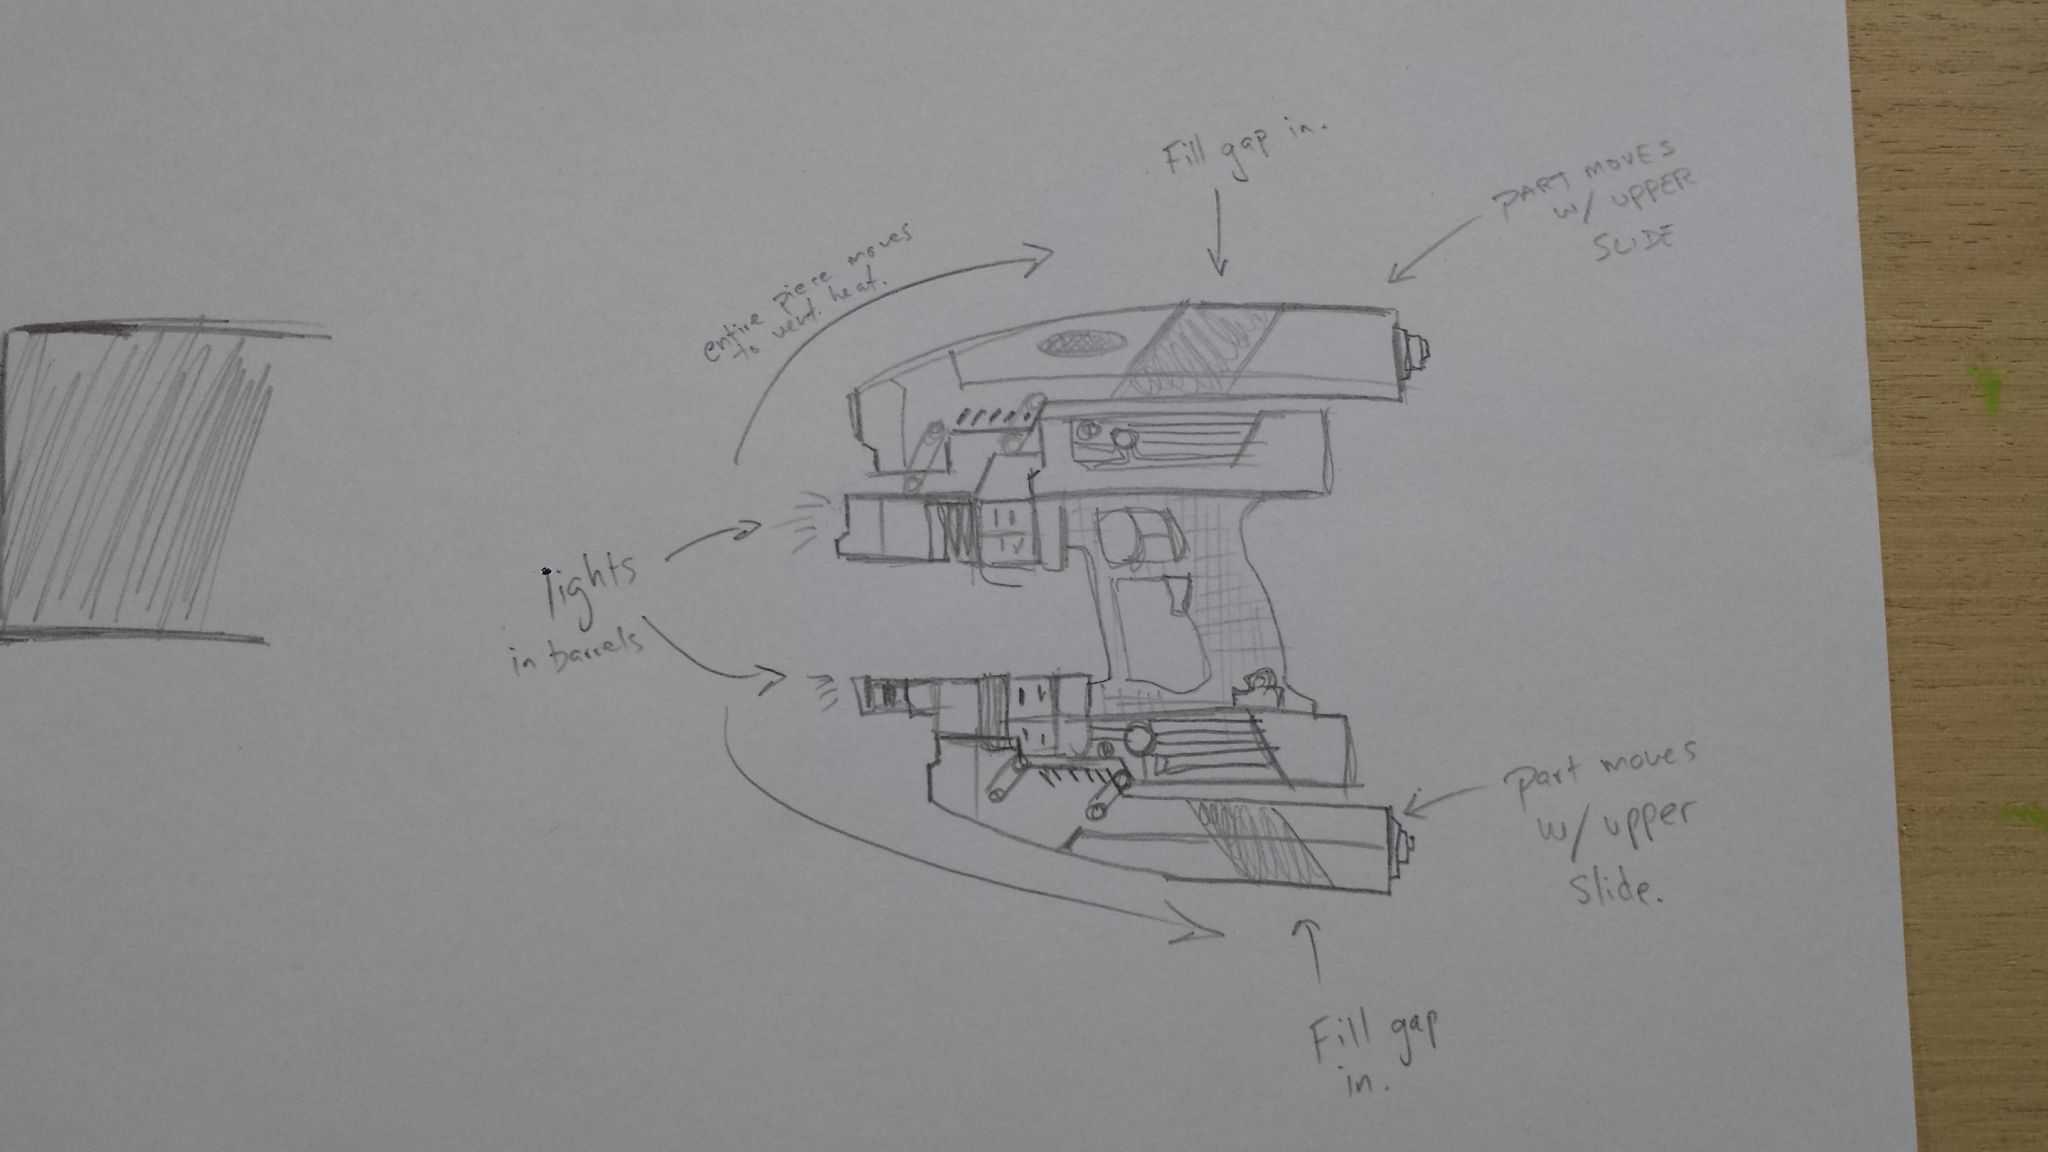
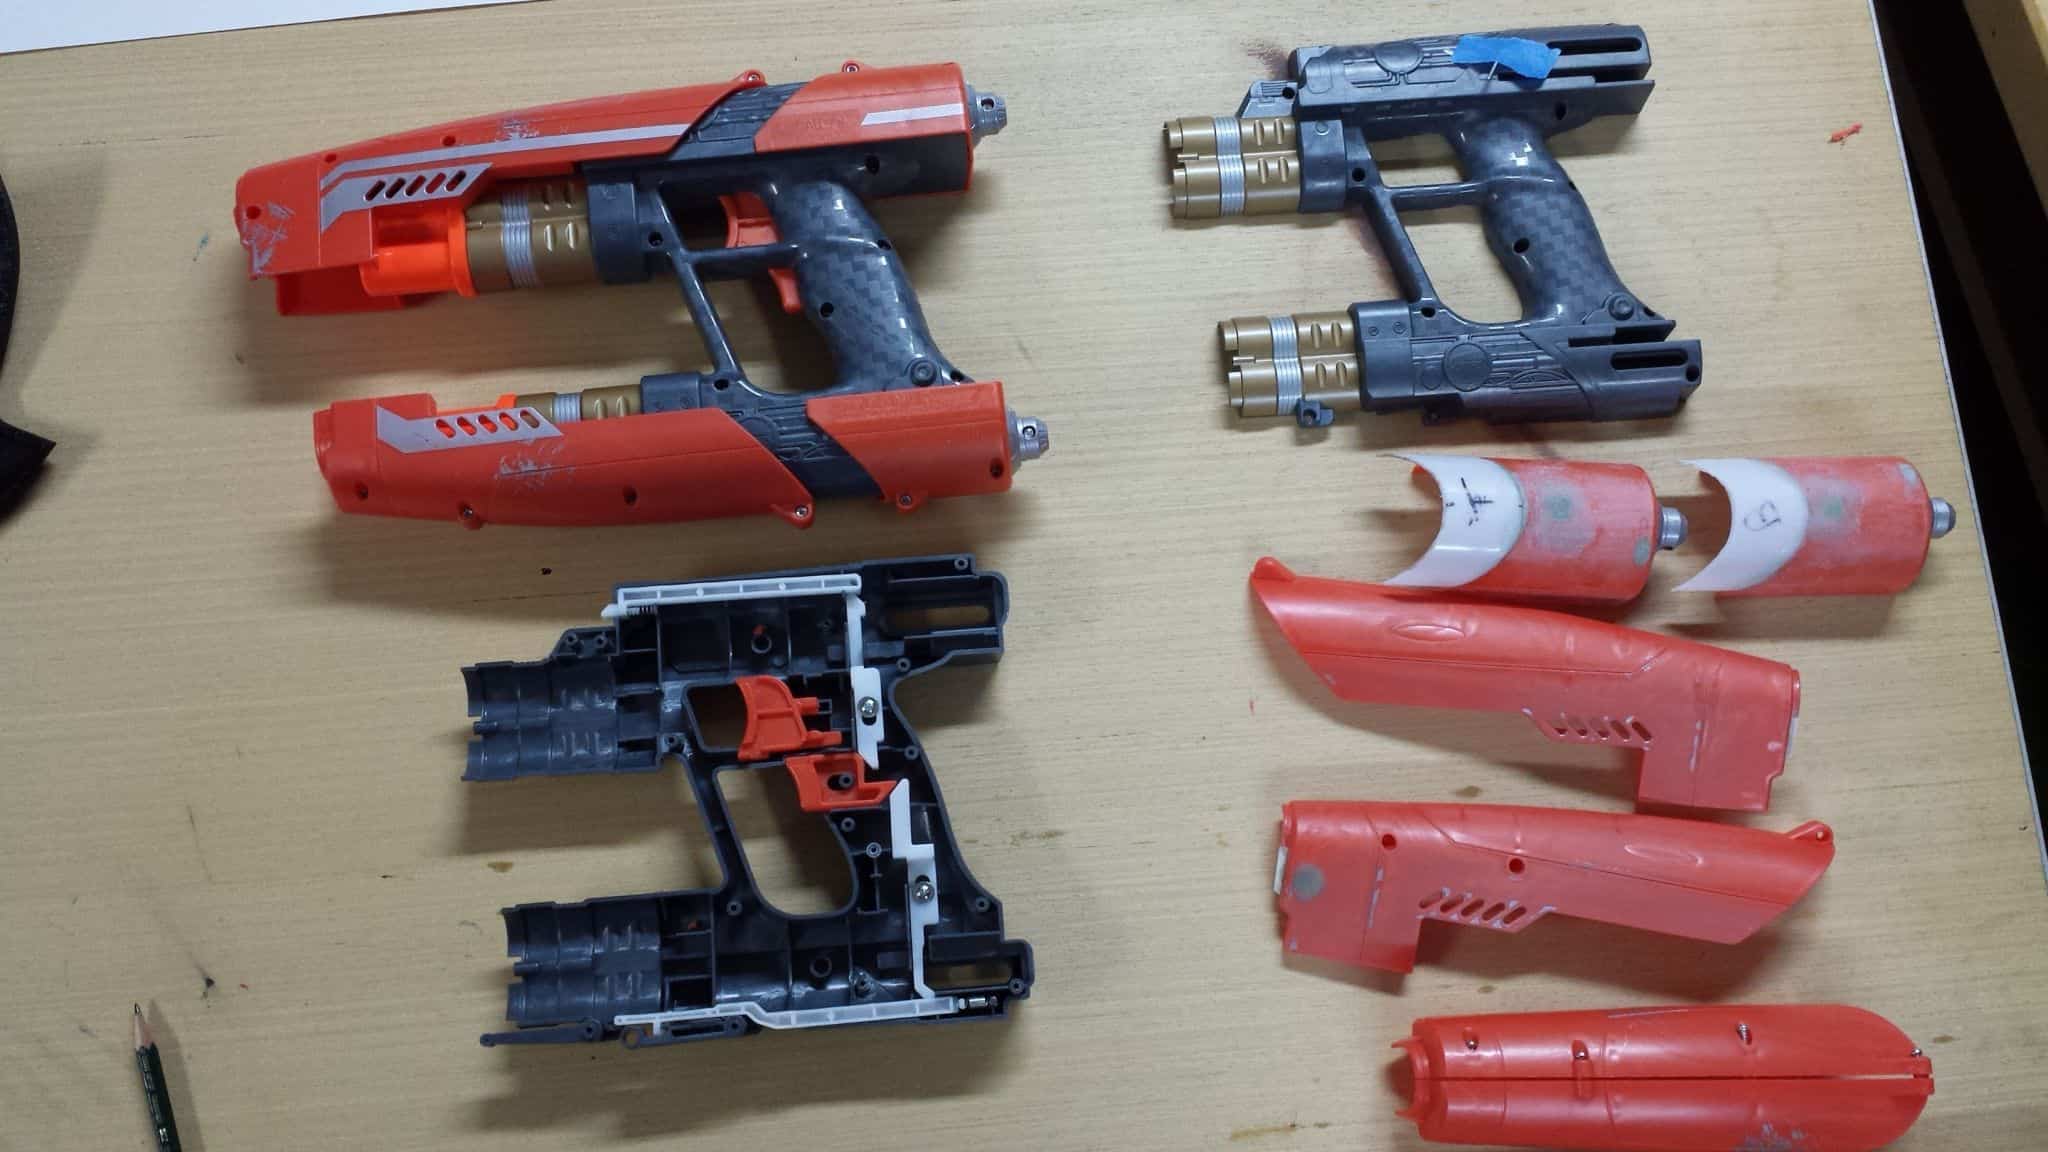
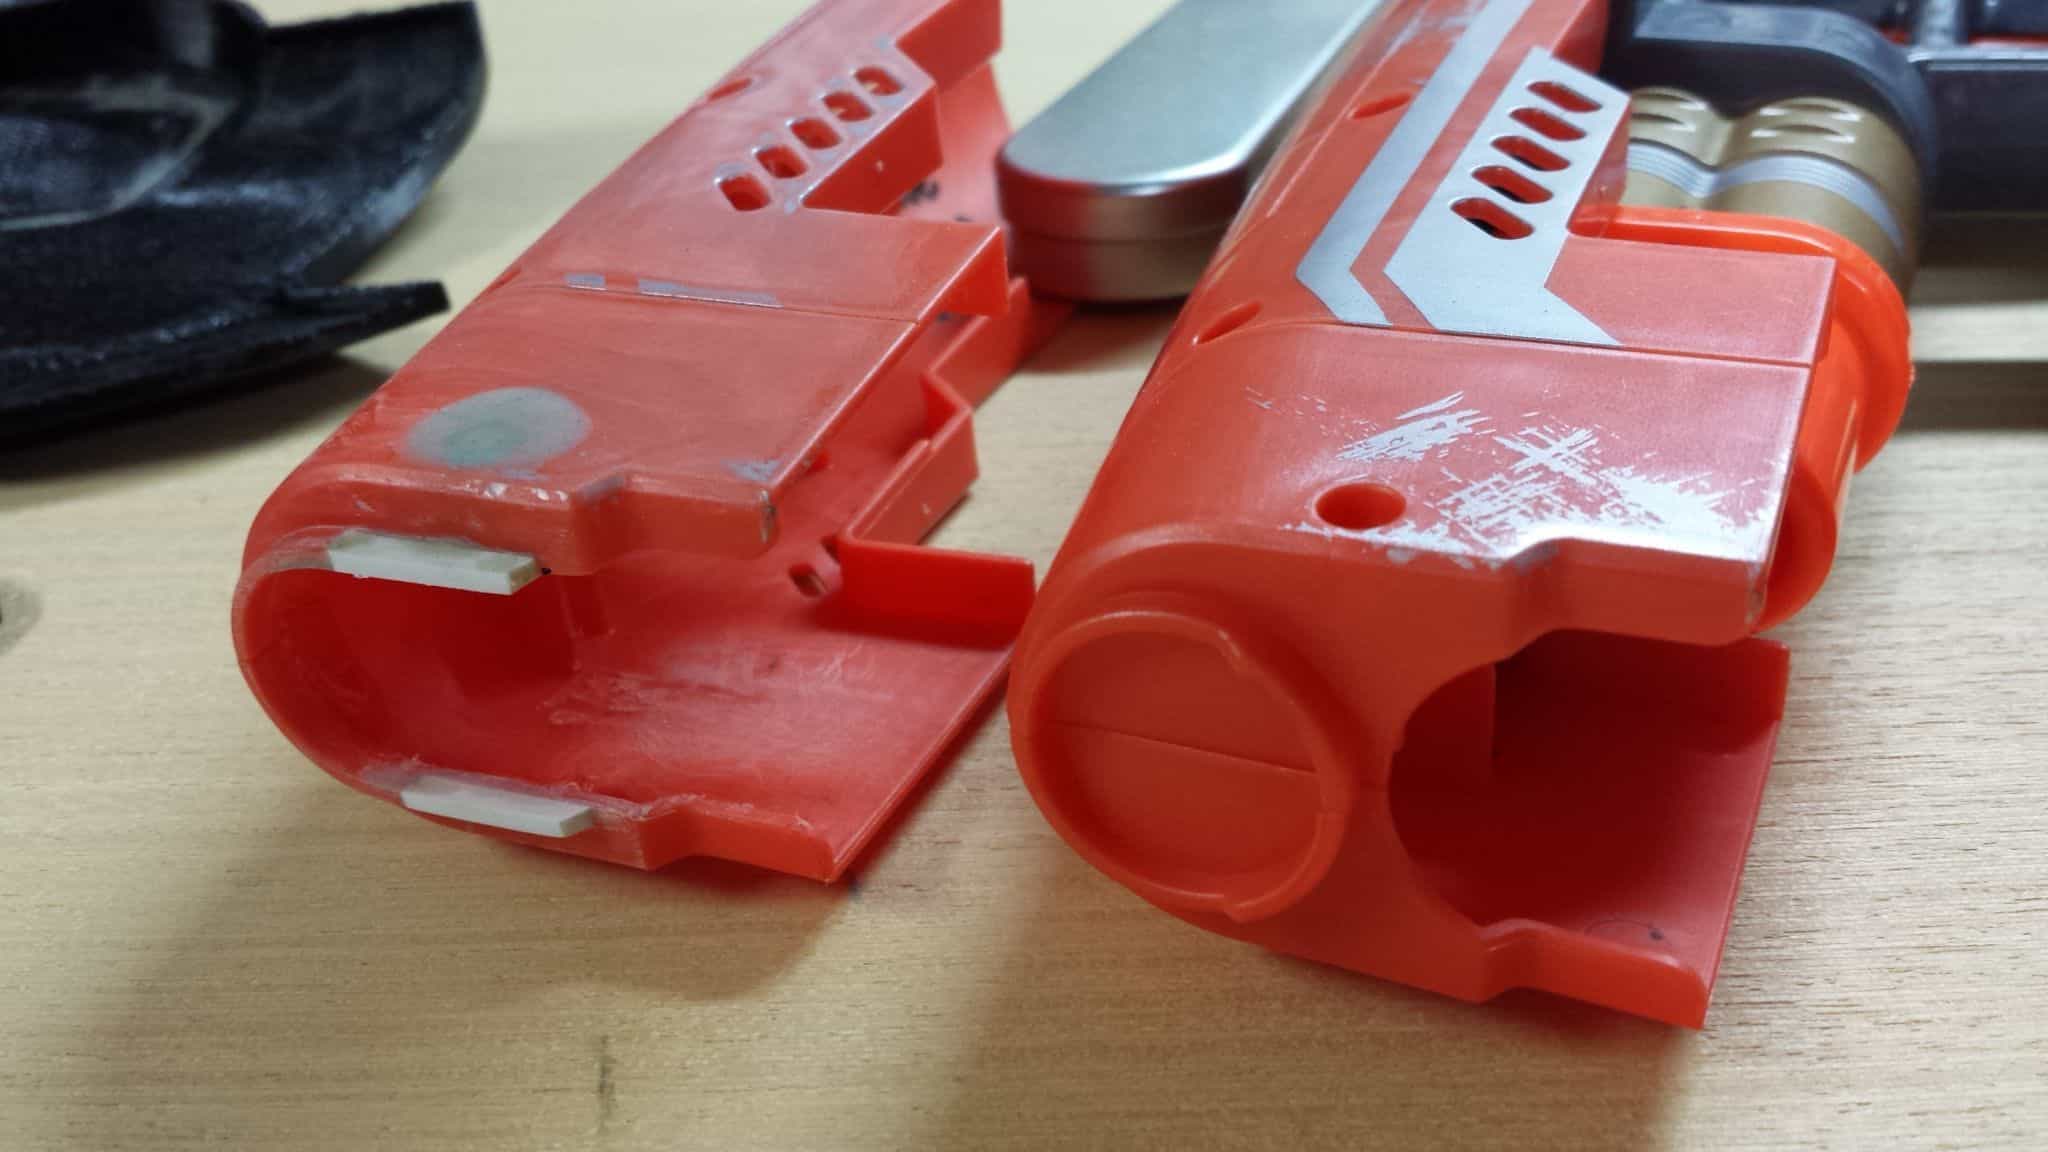
That’ll come along on its own. More interesting might be the blasters. I started with a pair of the Nerf blasters, as many people have. I looked at ’em and considered how I wanted to handle it, since a simple repaint seemed like it wasn’t enough. In my past experience at conventions, they frowned on working dart blasters, so right away I decided I could gut the guns and remove the firing mechanisms to buy a bit of space on the insides for me to play around with. To be more screen-accurate, the front and back sections of the outer shells of the gun should be connected, whereas the Nerf gun has a space in between with a bunch of plastic molded wiring detail.
I will say I really liked the physicality of how the blasters opened up when you pulled the secondary trigger – the top and bottom guards on the gun fan out. This is a detail that never, ever happens during the movie, as far as I can tell, but it is really cool, and I liked the explanation in my head that maybe they would open up in such a fashion if they overheated from too much firing.
This was the first change – making it so that the tops and bottoms of the guns would be one piece, while still retaining the ability to open up.
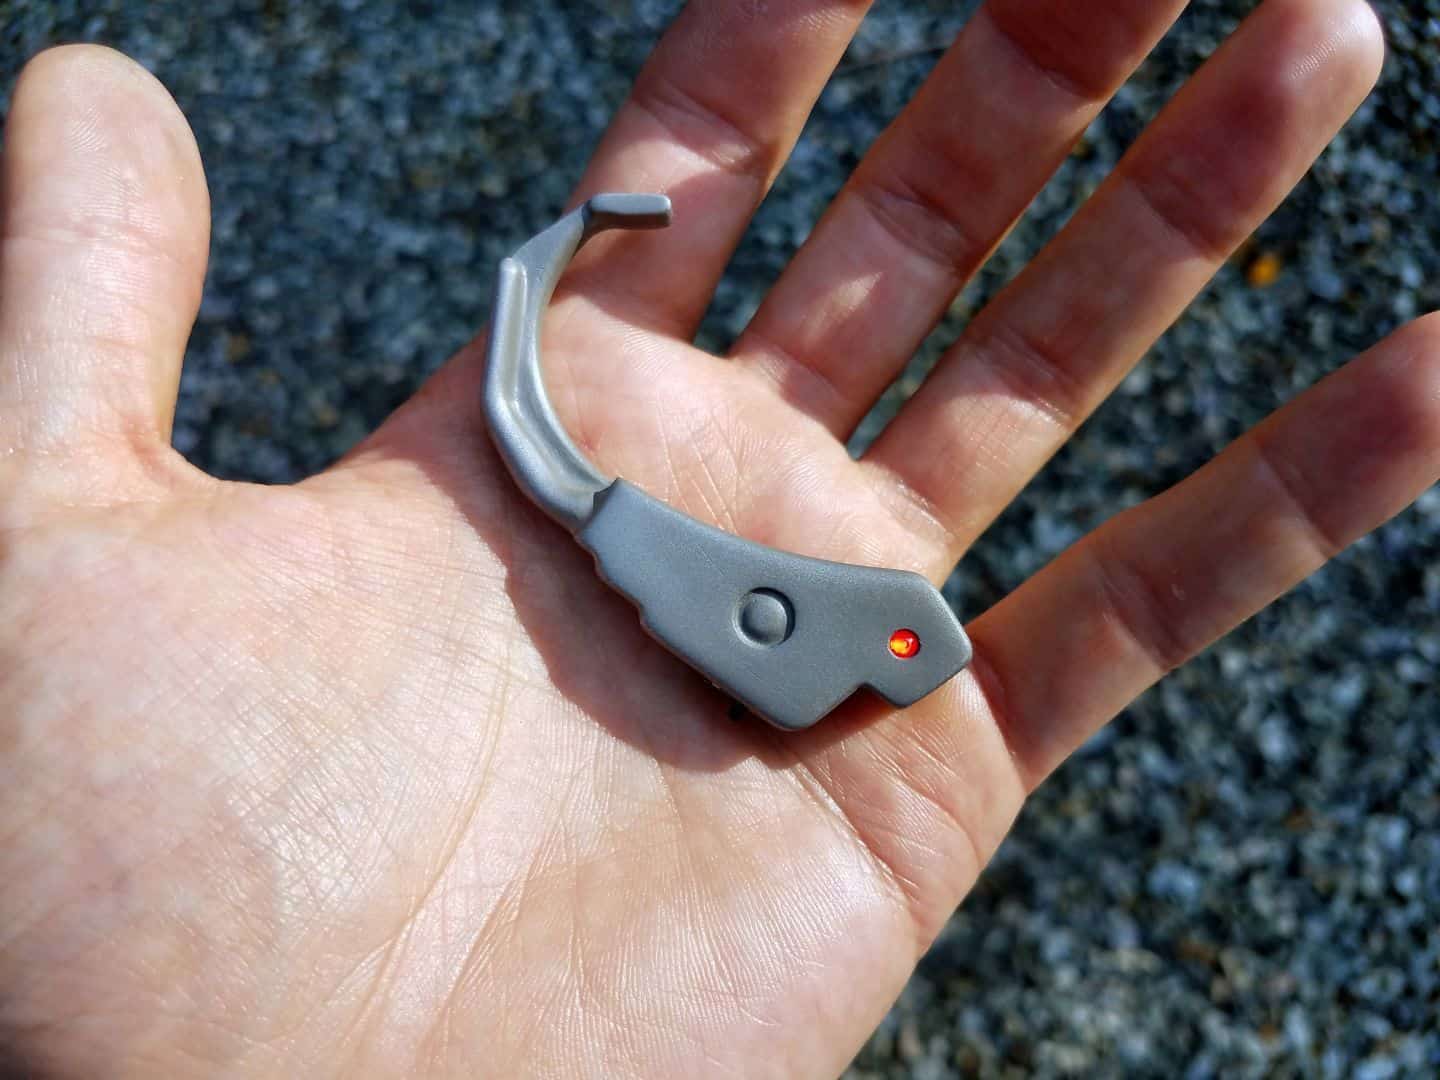
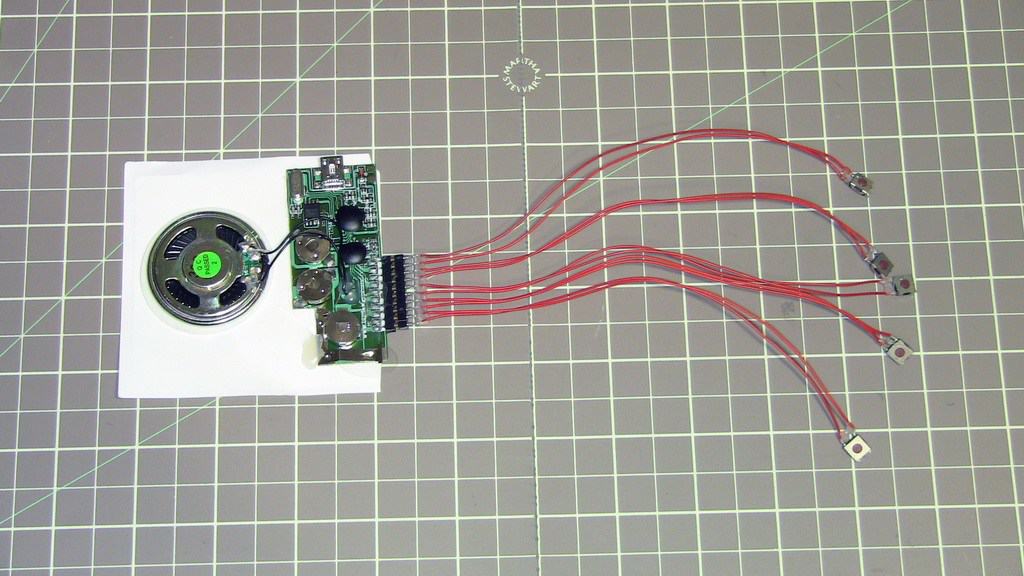
I’ve been cutting and shaping a plastic spacer to make the front and back orange sections into a single piece. I will be attaching them together shortly, then bondo’ing the whole thing and doing a lot of sanding to make sure they’re strong and smooth. I also cut the front end of the top barrel up so that I could extend a more screen-accurate tip out past the top guard. I’ll probably model this tip up and 3d print it down the line. Removing the actual nerf-dart firing pieces bought me a decent amount of space inside the guns, so I decided I wanted to add lights and sound to the blasters.
The lights are simple enough – tuck some batteries in, and put an LED on a switch. The sound is a bit more complicated. The solution I’ve decided to try – BigDawgs USB Multipush circuits.
They have an eBay account where you can get their product slightly cheaper – I bought three units because I figured I’d use them on something. They’re designed for greeting cards and hobby applications, and they looked small enough that I could probably get away with fitting one inside the guns. The fact that they have the ability to play 5 sounds on 5 different buttons is not lost on me – I’m going to hopefully design these so that pulling the trigger plays blaster audio, and the secondary trigger that fans the gun open will play an ‘overheating’ sound. I might go for a third, if I can figure out how, that will play when the gun closes back up. Aiming high, I guess. The coin cell batteries are going to have to be replaced with something with a bit more longevity, though!
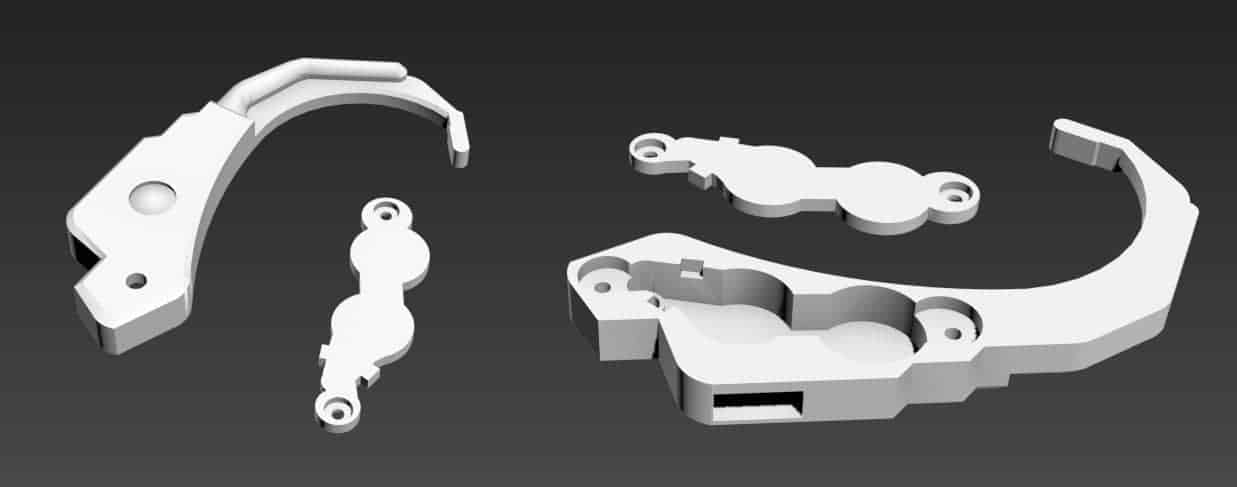
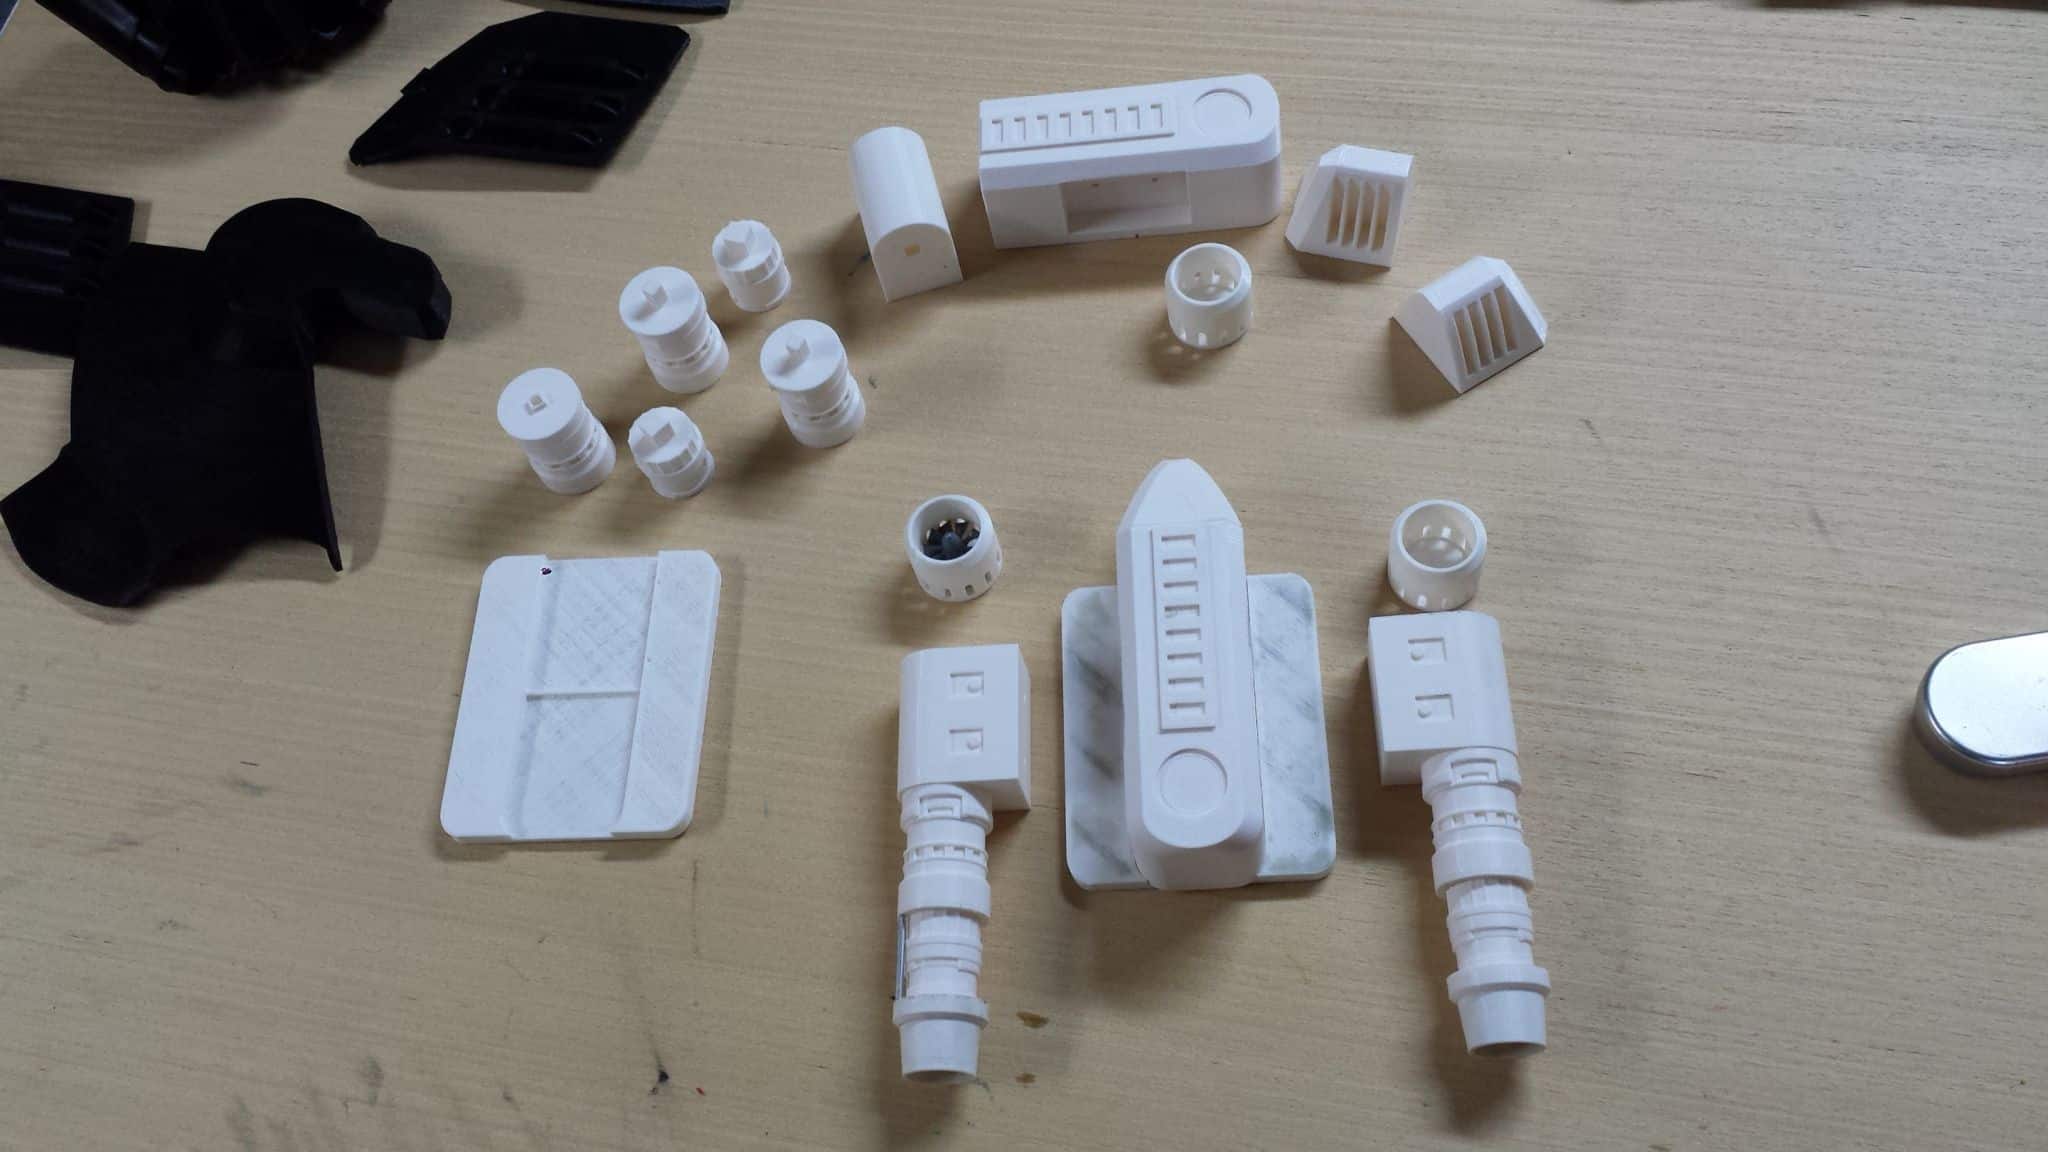
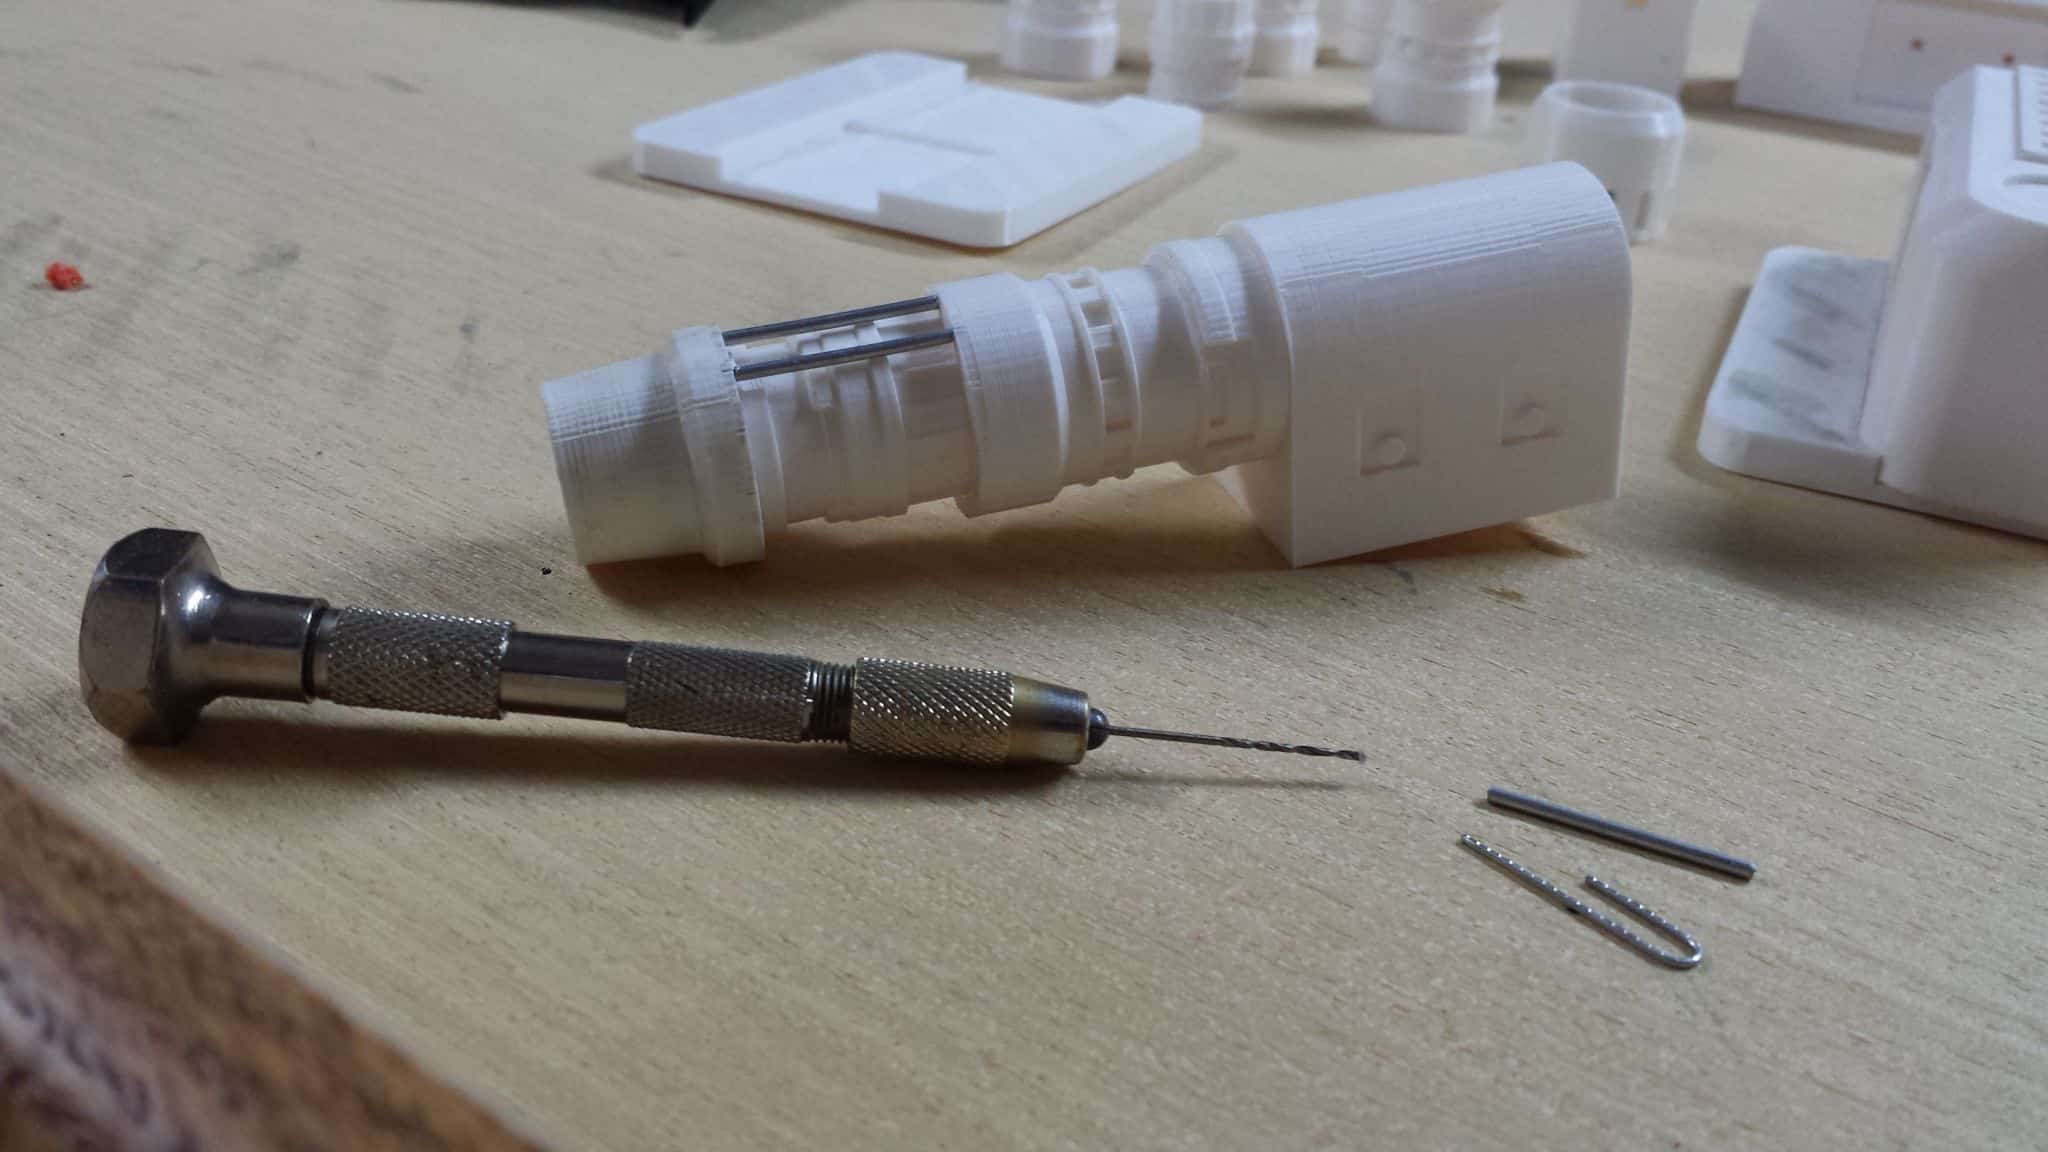
Last bit produced so far is the boot rockets, which are courtesy of xMENNENx at TheRPF.com, and the files that he generously released. I printed these on the Makerbot Replicator 2 at the architect’s office. Still churning out a couple parts in my spare time, but these print quick and easy.
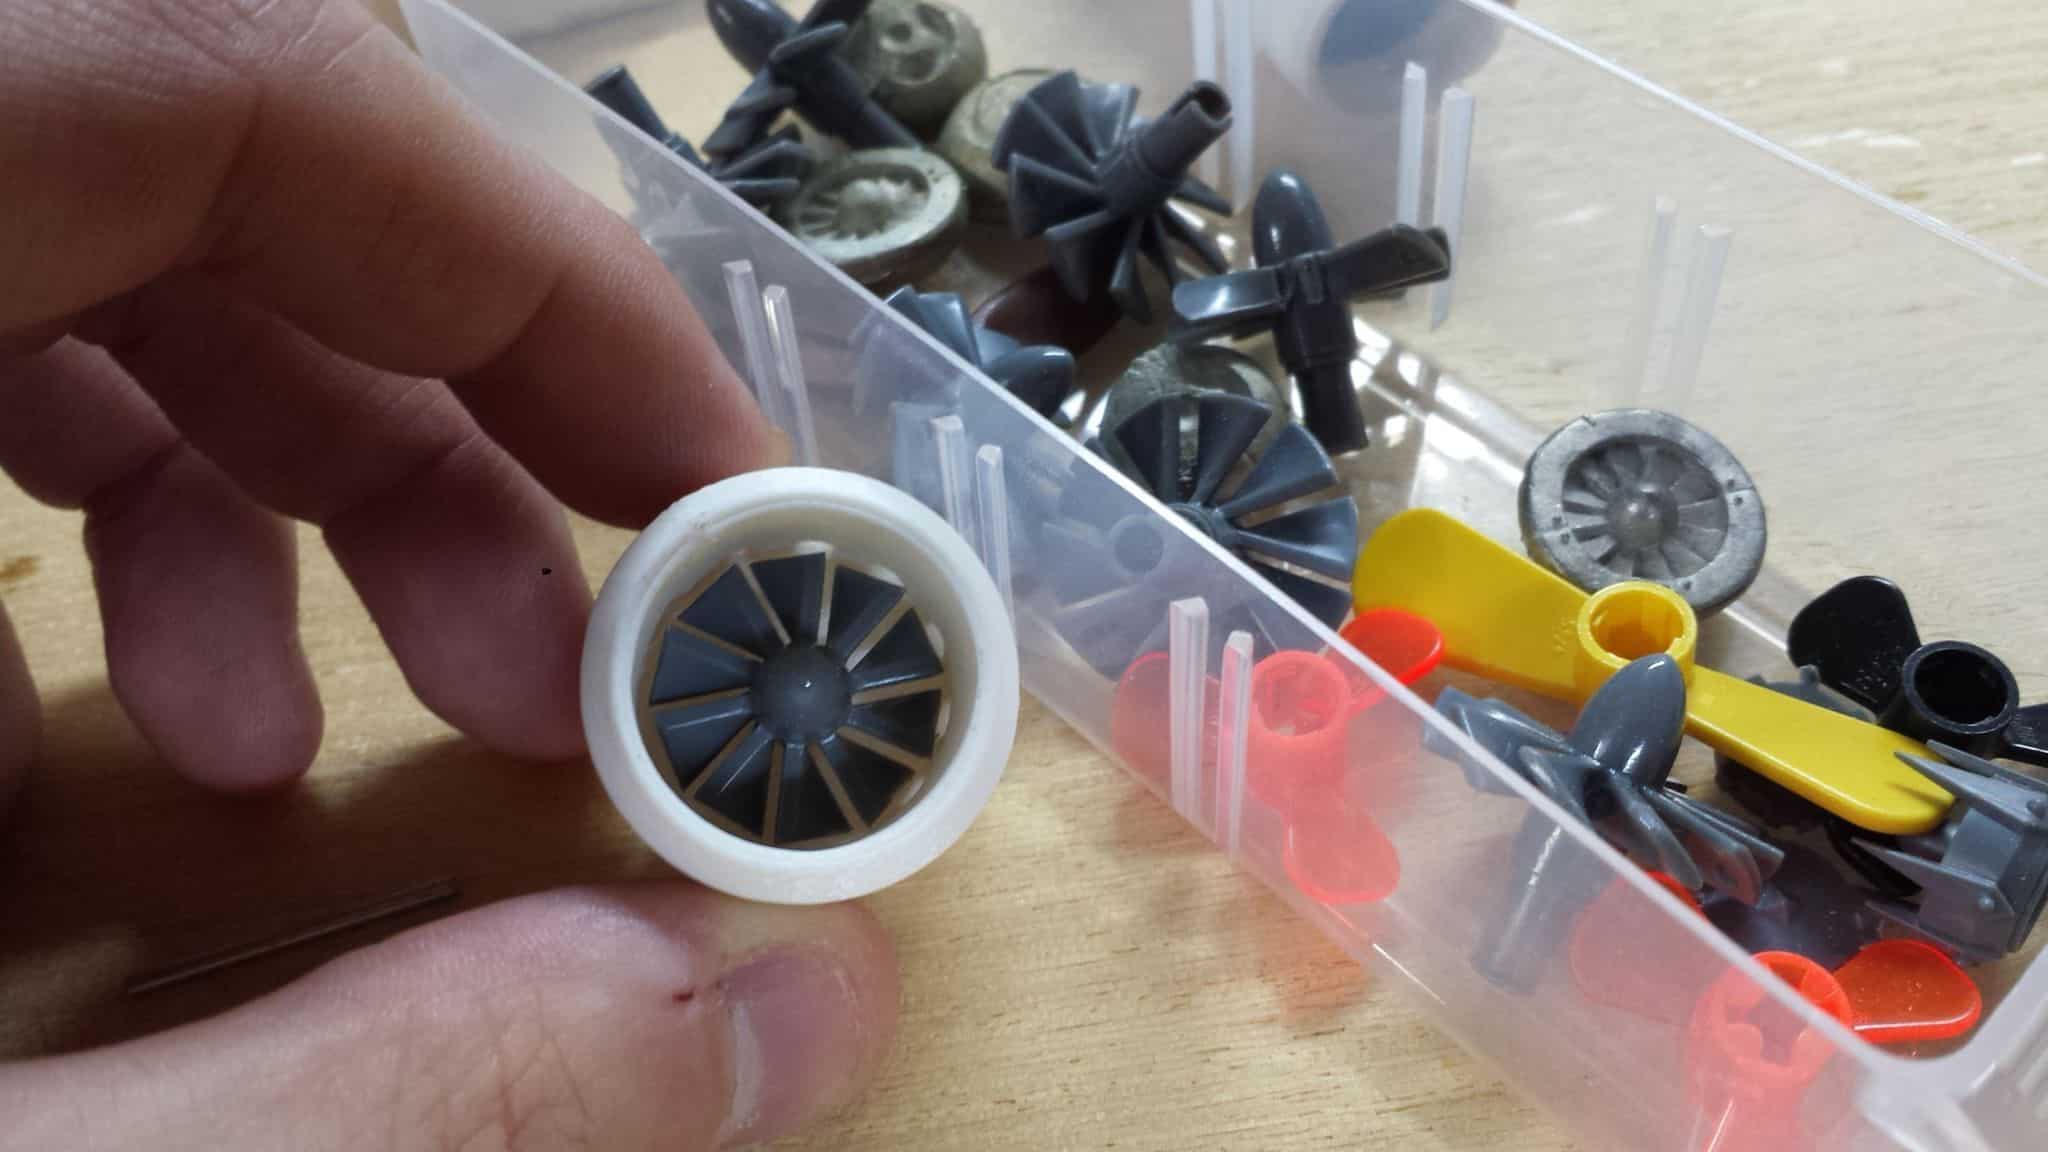
I had some lego turbines, and just on a lark I’ve started tucking them into the intake end of the rockets as an extra detail because, well, why not? I’m going to hopefully put some LEDs in the exhaust end of the boot rockets so I can light myself up for the sake of saying I did.
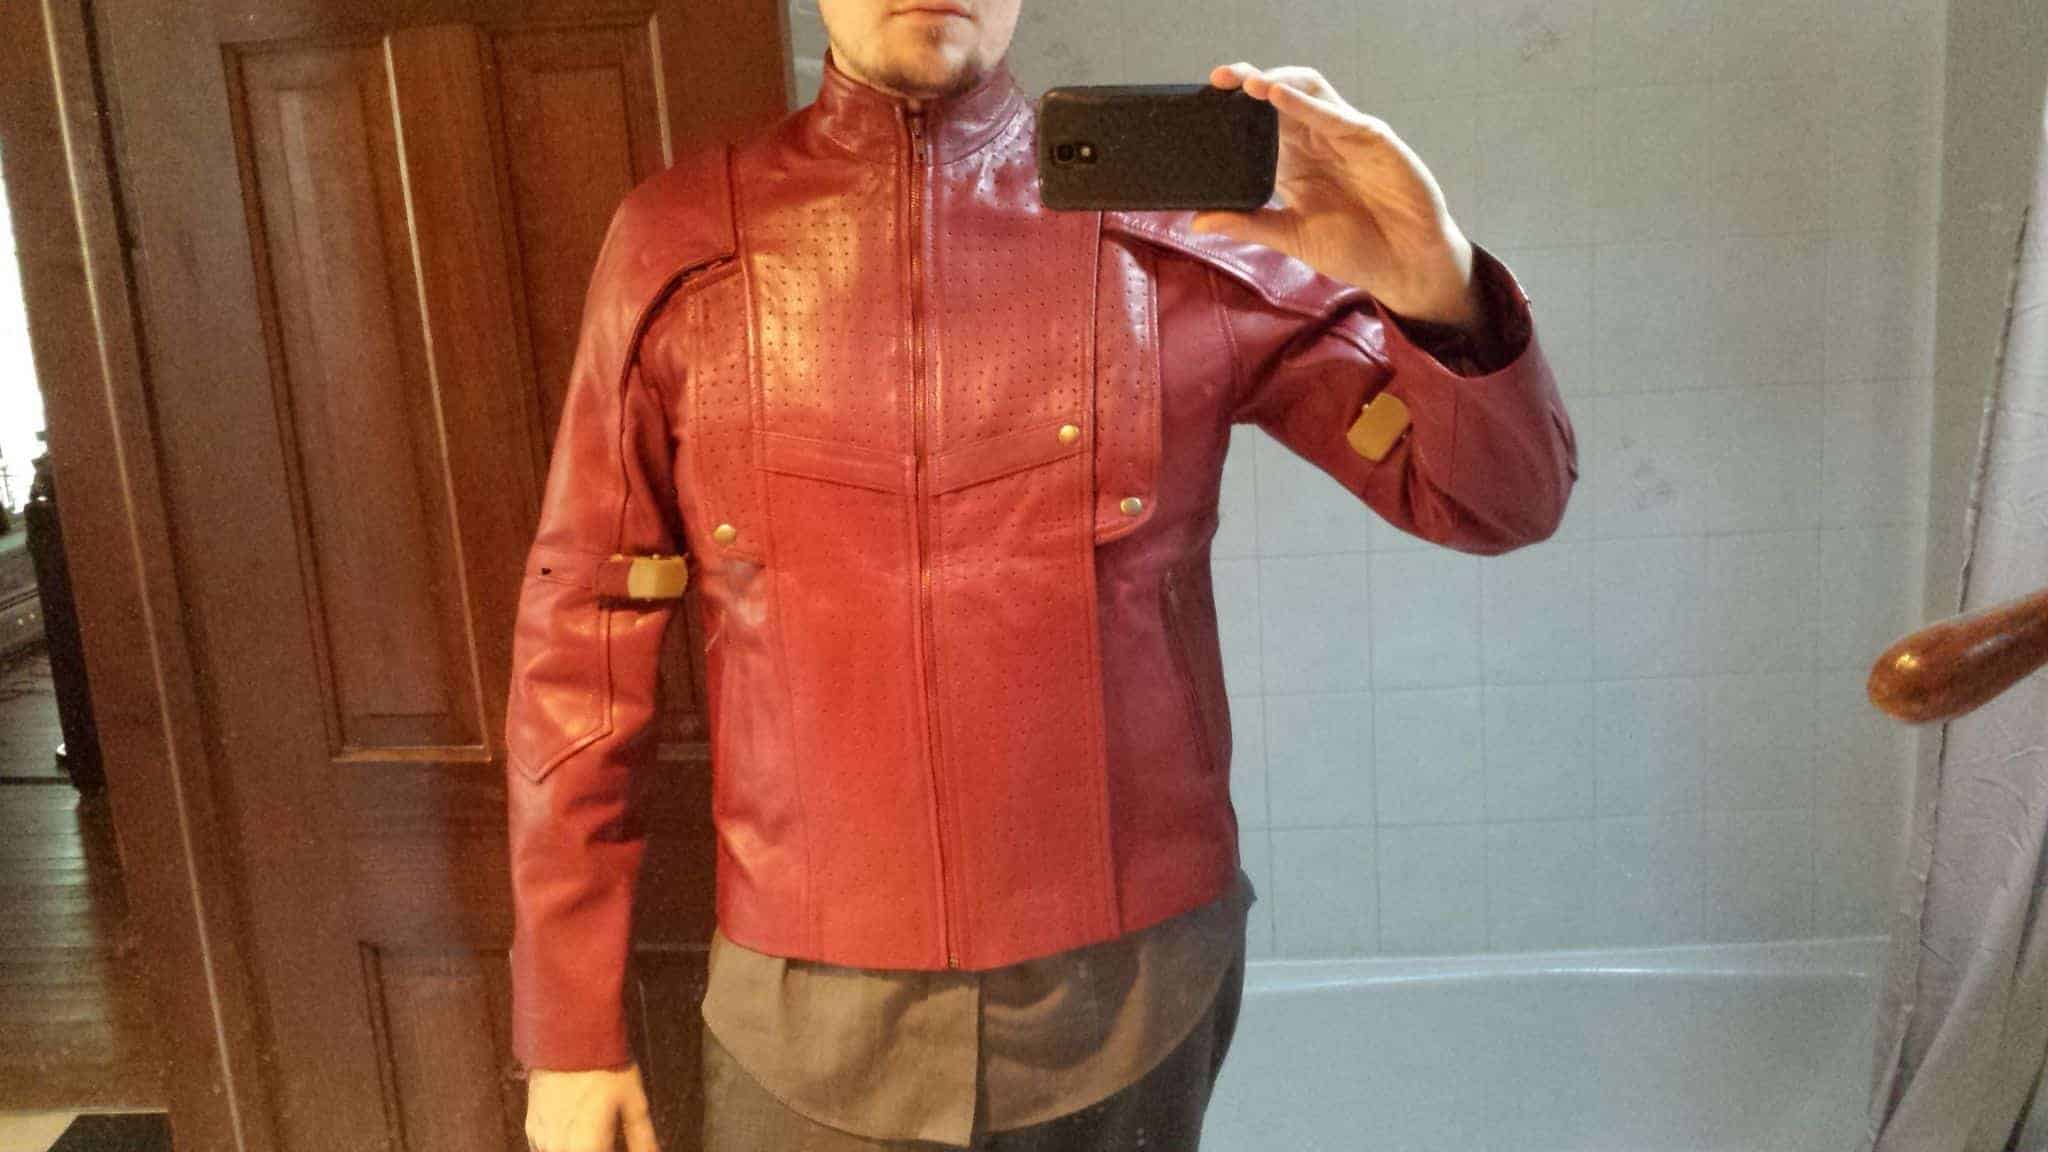
As far as the rest of the costume is concerned, I’m probably going to suck it up and buy the fjackets version of the Star Lord jacket, but in real leather so I can put it to dual use as a regular riding jacket for my motorcycle. The pants I haven’t figured out a satisfactory solution for yet, but I might be looking for a seamstress to help me create ’em from scratch so they’re close enough to screen accurate not to nag me.