As some readers may know, I occasionally work on assets for streaming games. This started because I used to have a display that ran at 1920×1200, which is a bit off-ratio from the normal 1080p output that streaming expects. This led to black bars on either side of my gaming footage that I tended to fill in with additional graphics. Over time, a number of these assets were included in our webstore, and they’ve sold reasonably well. I got a number of e-mails from visitors to the site asking if I would be updating things for Fallout 76, and it got me thinking of a few fun ideas.
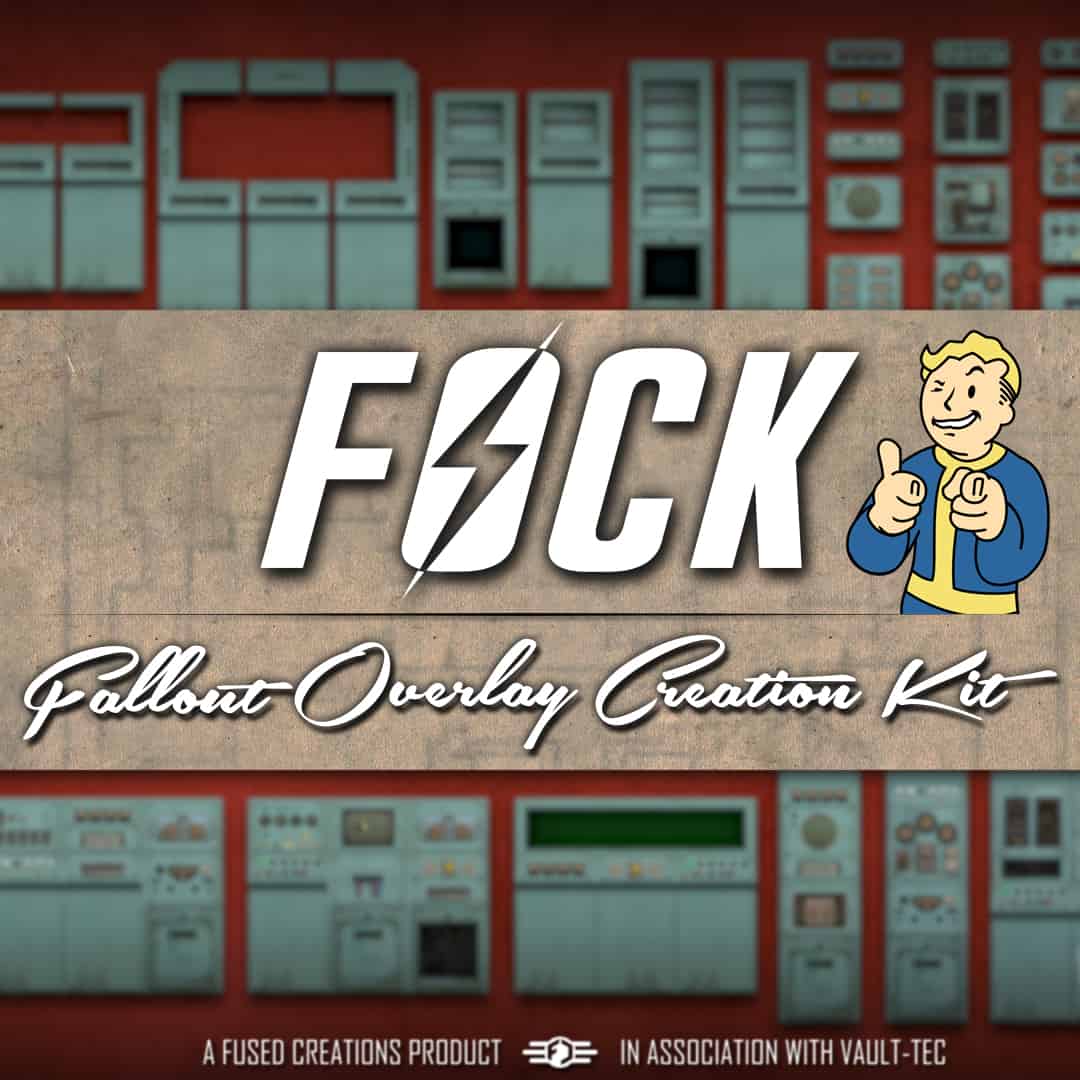
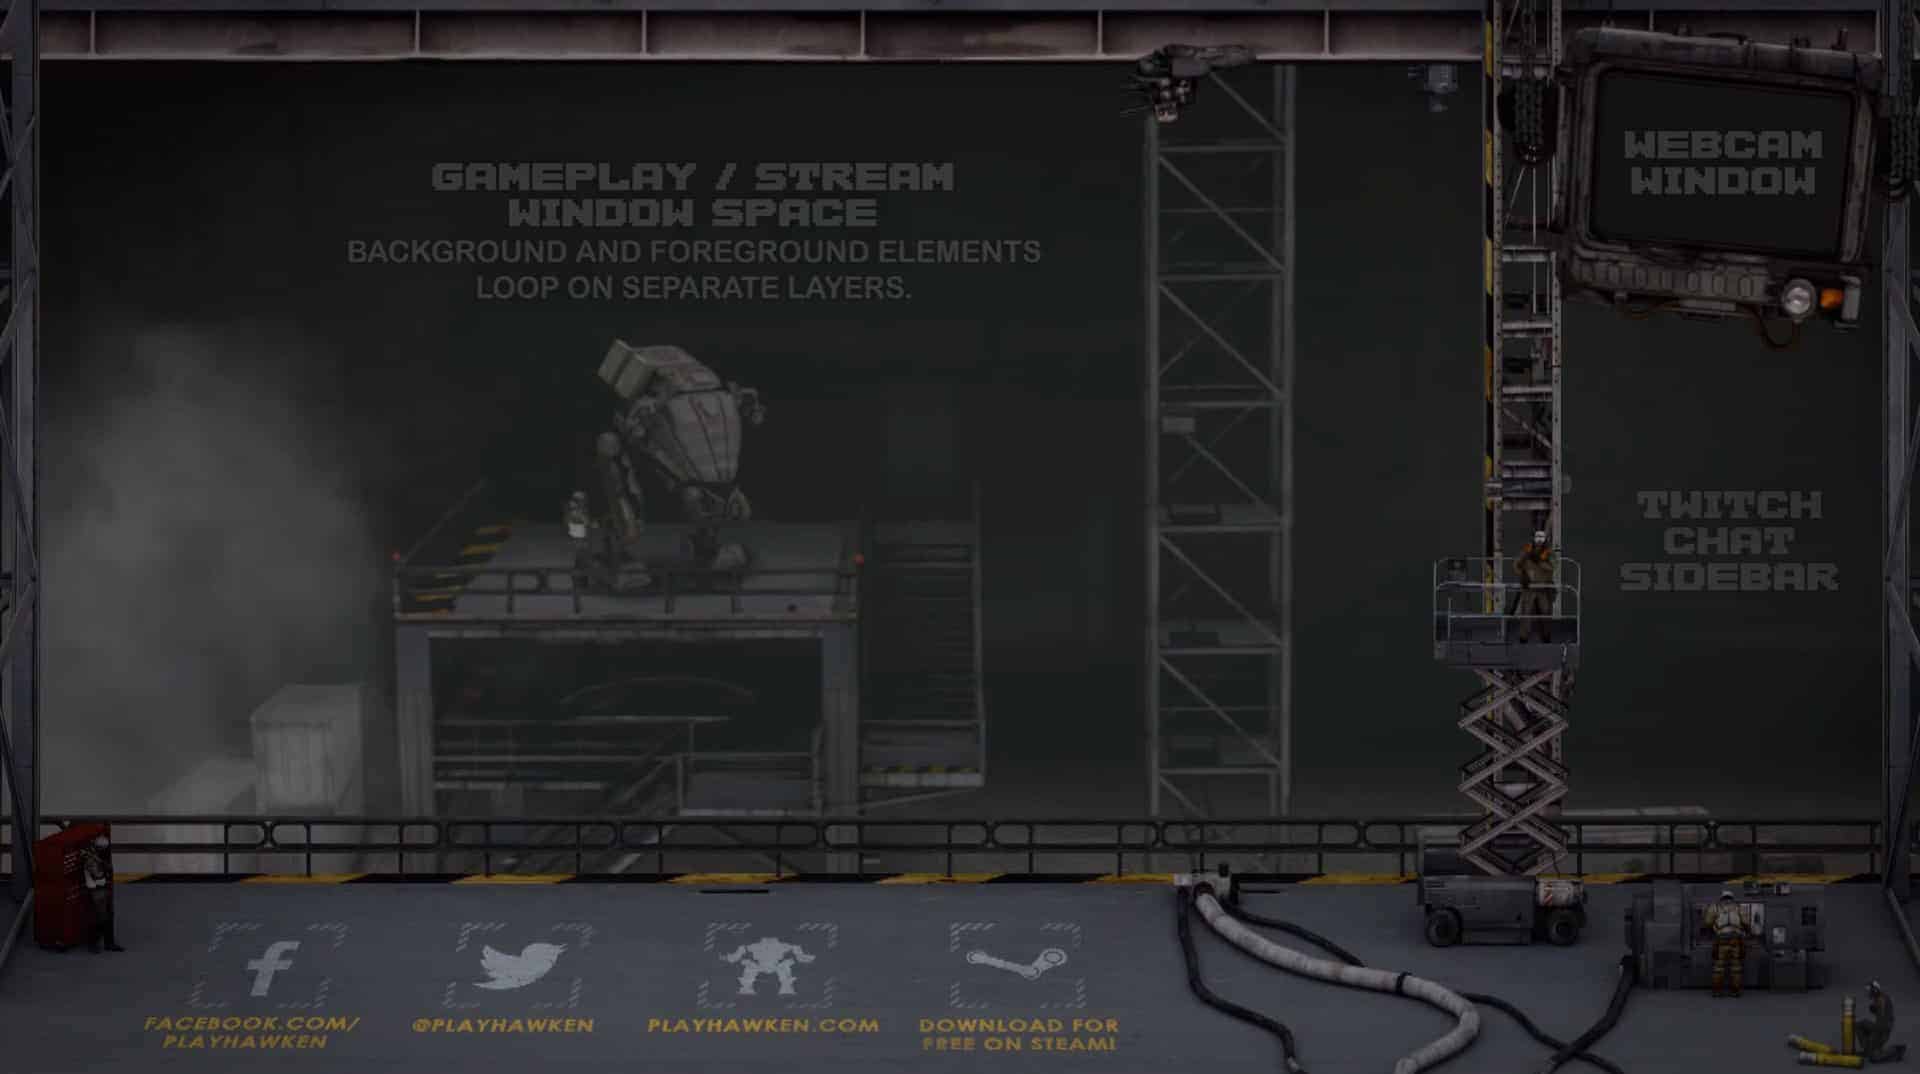
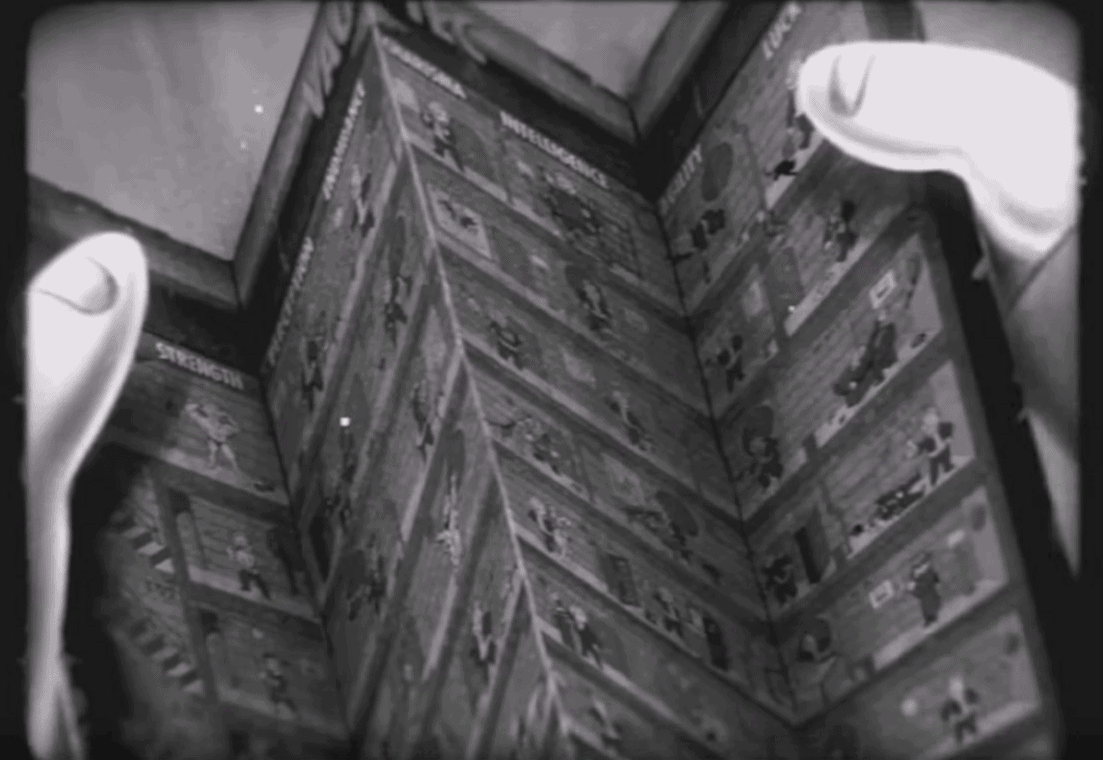
I figured it’d be interesting to talk about methodology on this a little bit. I decided I wanted to produce something configurable, because it’s hard to produce a one-size-fits-all streaming solution that works for everybody. Gamers stream at different resolutions; some stream without cameras; some have constant feeds of information running with things like their chat or schedule. In light of this variety, I opted to make something that had a lot of discrete, configurable pieces that a user could piece together to their satisfaction. After a bit of head-scratching, I decided I’d do something that resembled the ubiquitous computer display cabinets that you can find littering the Fallout world, with the general theme that perhaps the layout could lend itself to something like a vault security monitoring room. This had the added benefit of leading to the acronym ‘F.O.C.K.’ as a play-on-words reference to the in-game G.E.C.K.
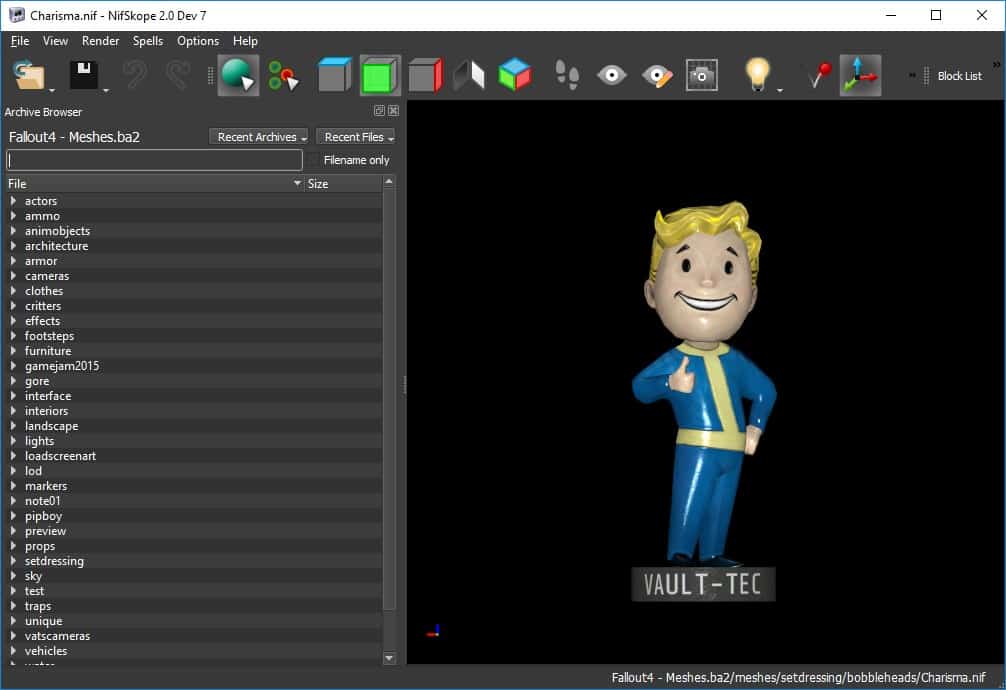
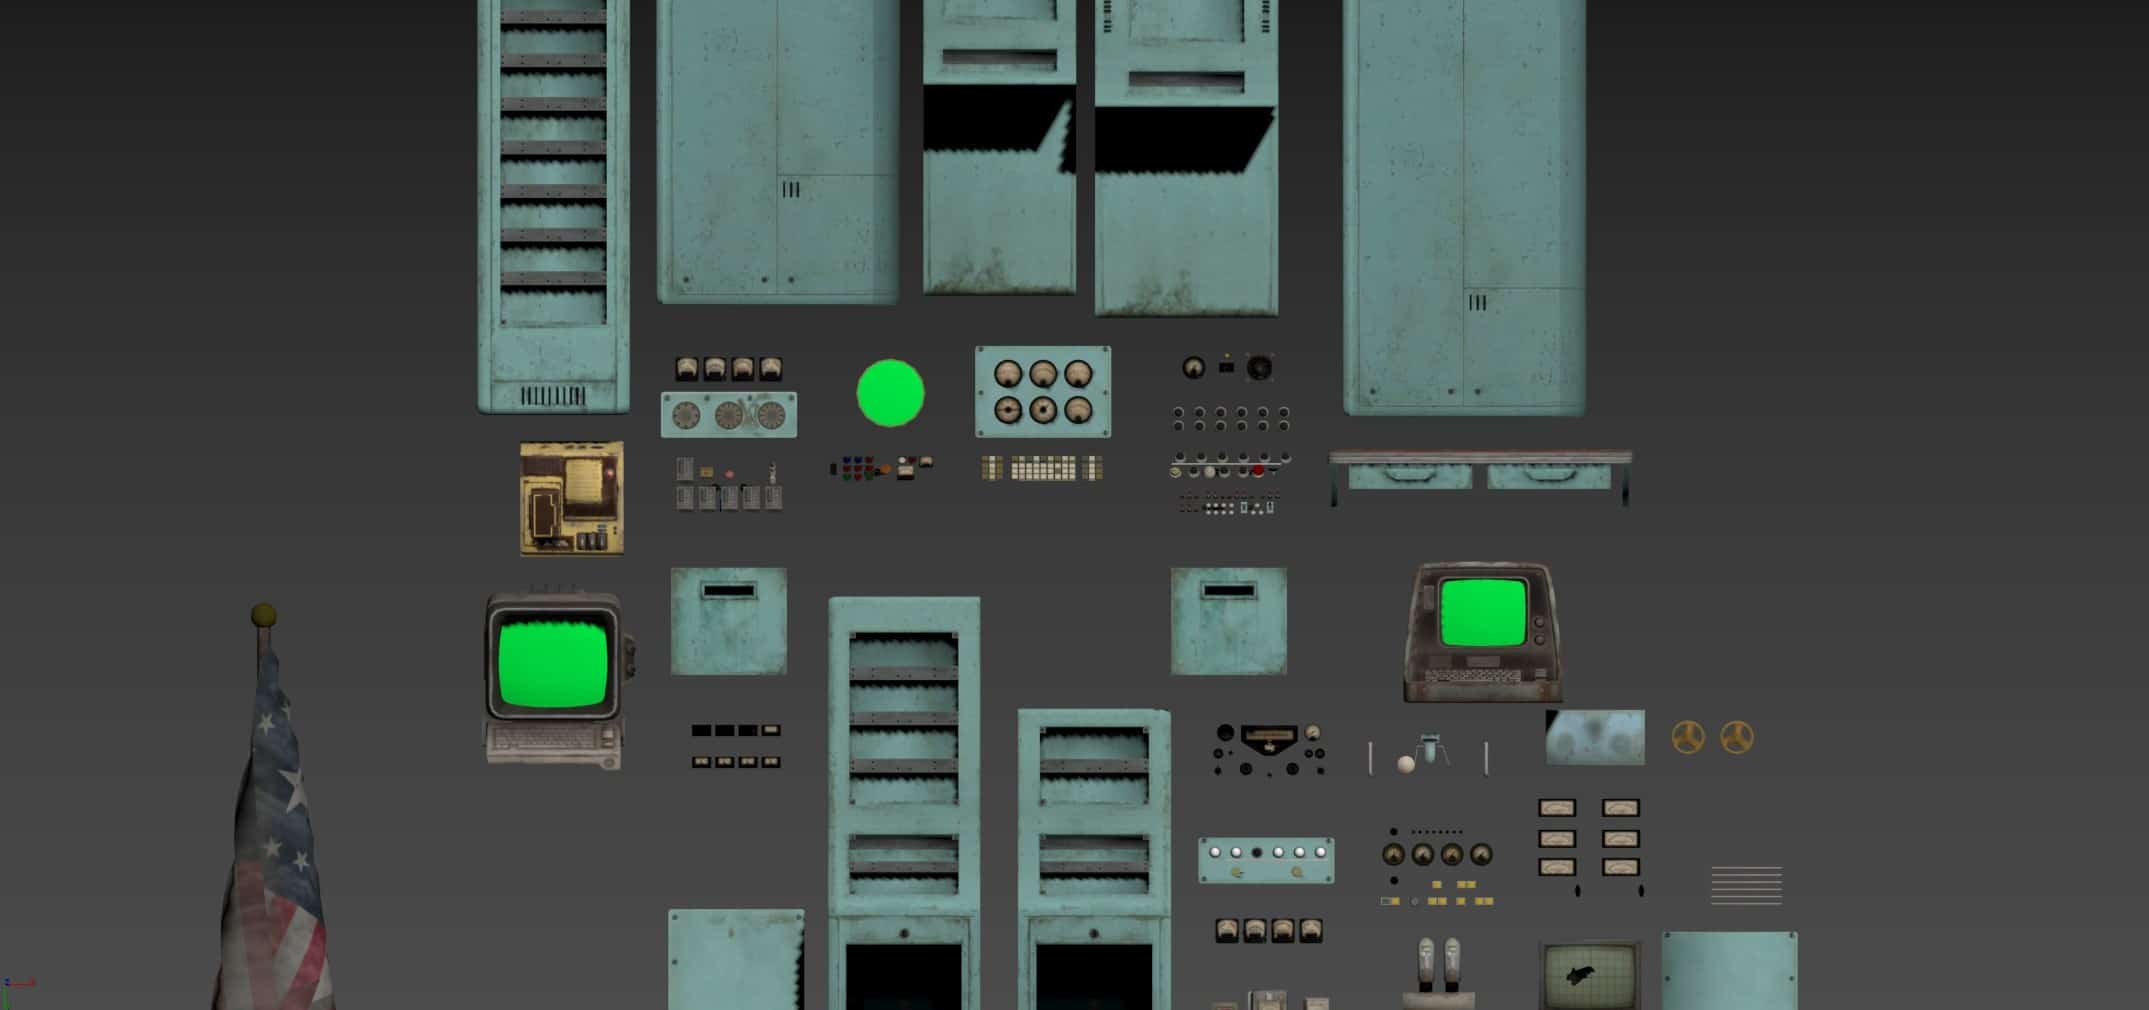
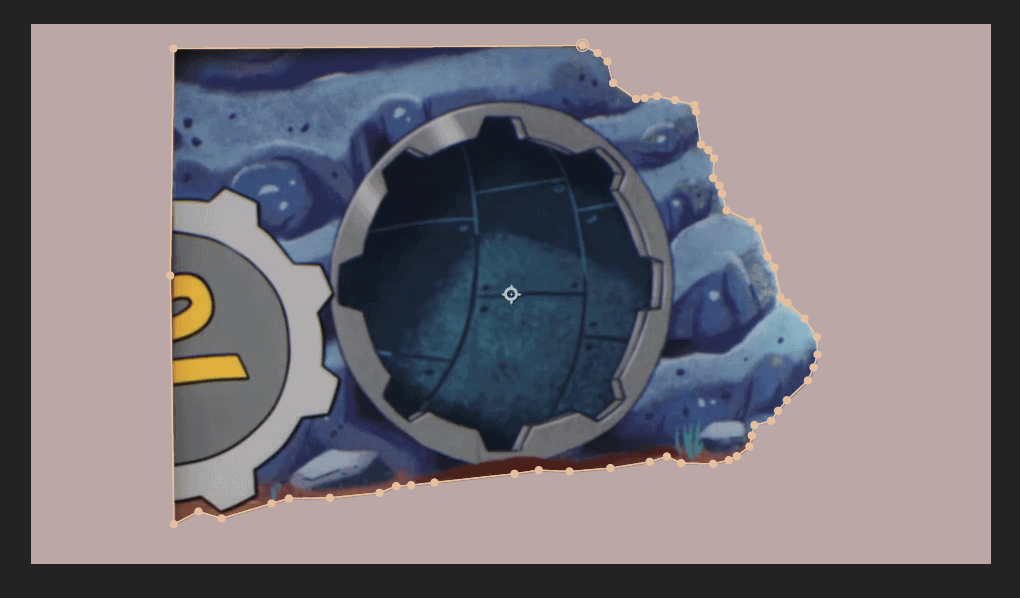
In order to get started, I extracted a bunch of the assets from Fallout 4’s core game files using the Bethesda Archive Extractor. Once I ripped the mesh files and textures out into separate folders, I was able to use Nifscope Viewer to go diving through them to look for ideas.
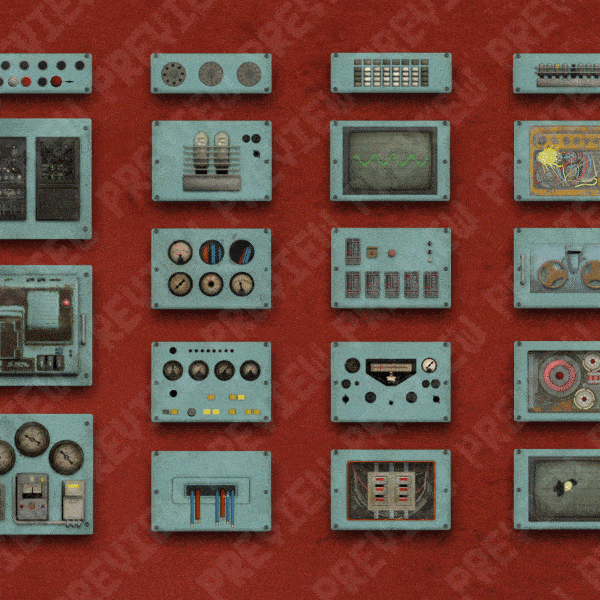
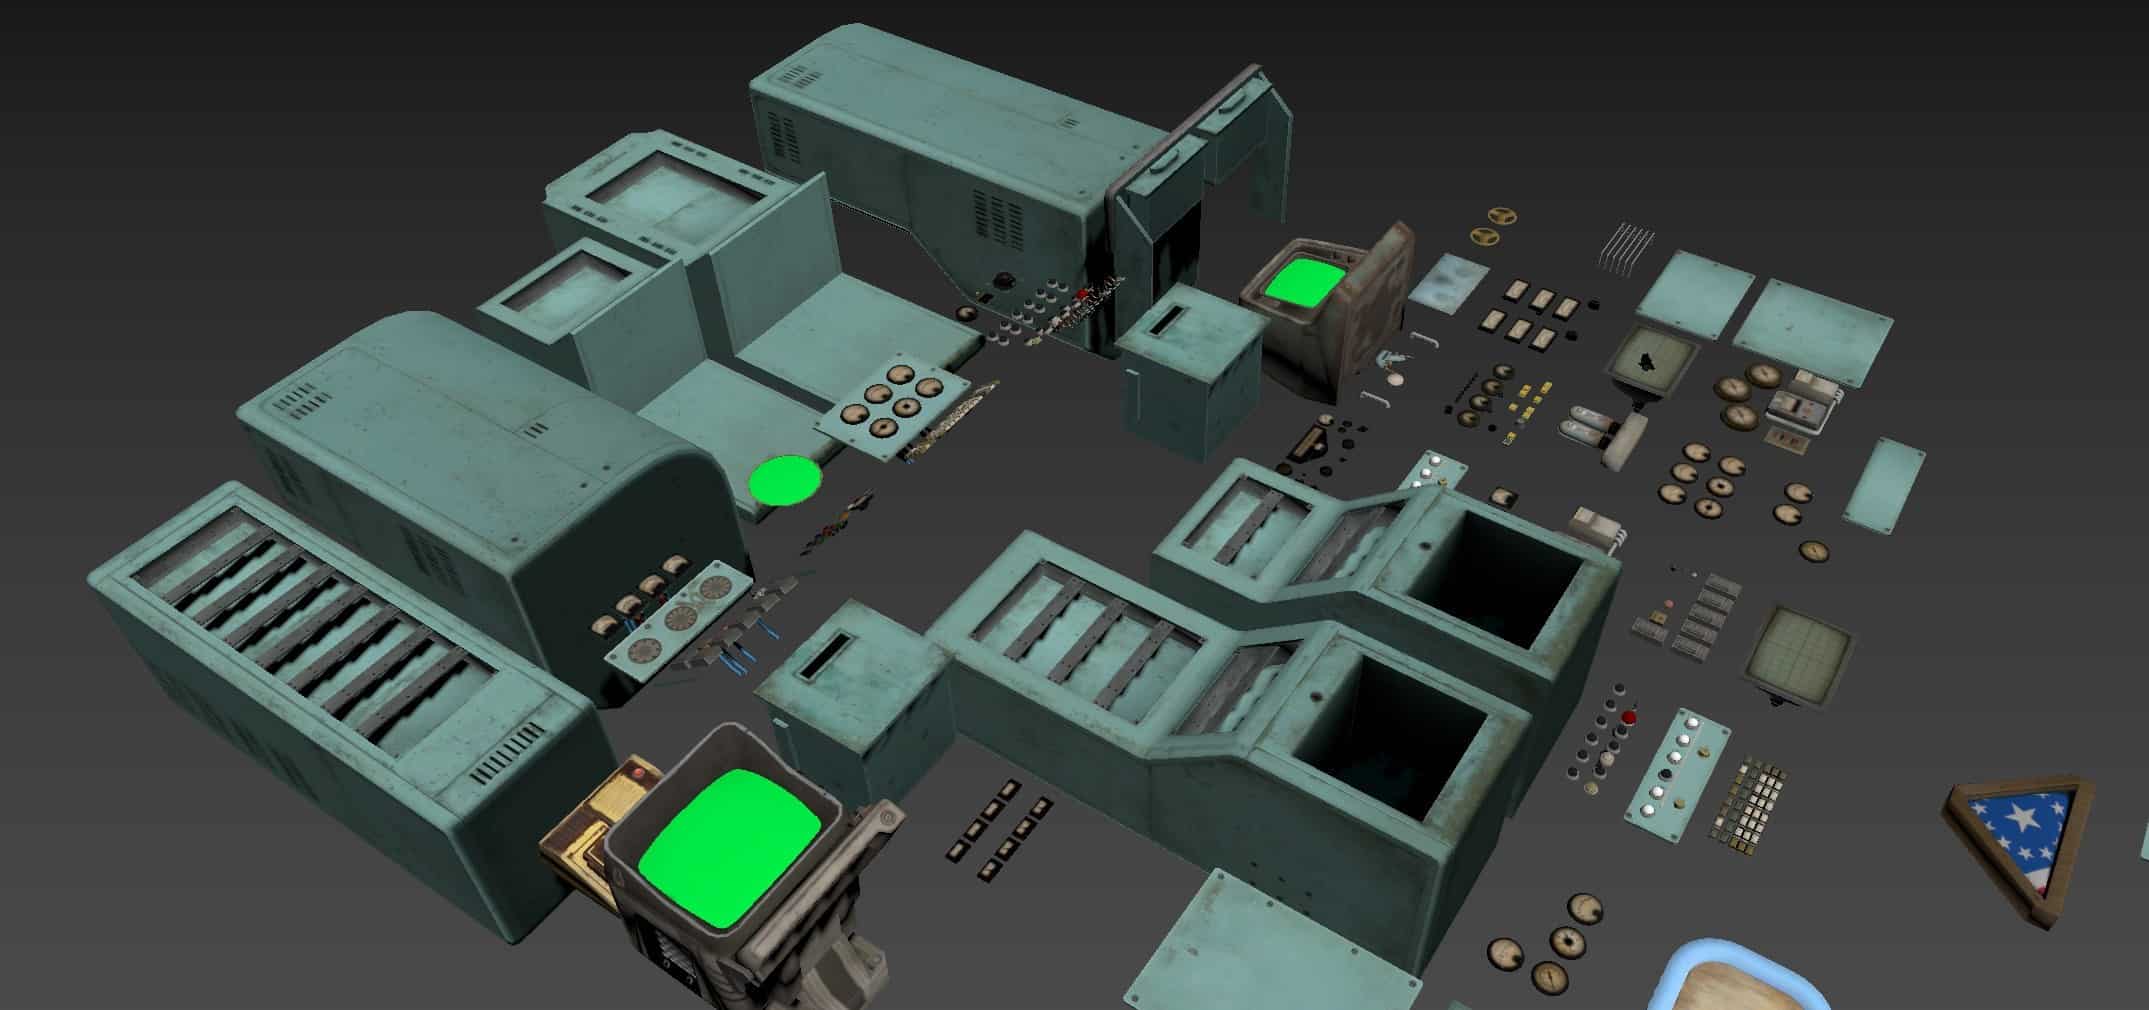
It didn’t take long to find some useful assets, and Nifscope has the ability to export files in .obj format, along with references to the correct texture maps (usually). I dragged them into 3d Studio Max and started playing around with the bits I had extracted. It didn’t take too long to realize that I could arrange certain elements to a consistent scale and render them out in an orthographic projection, which made them look roughly consistent when viewed head-on.
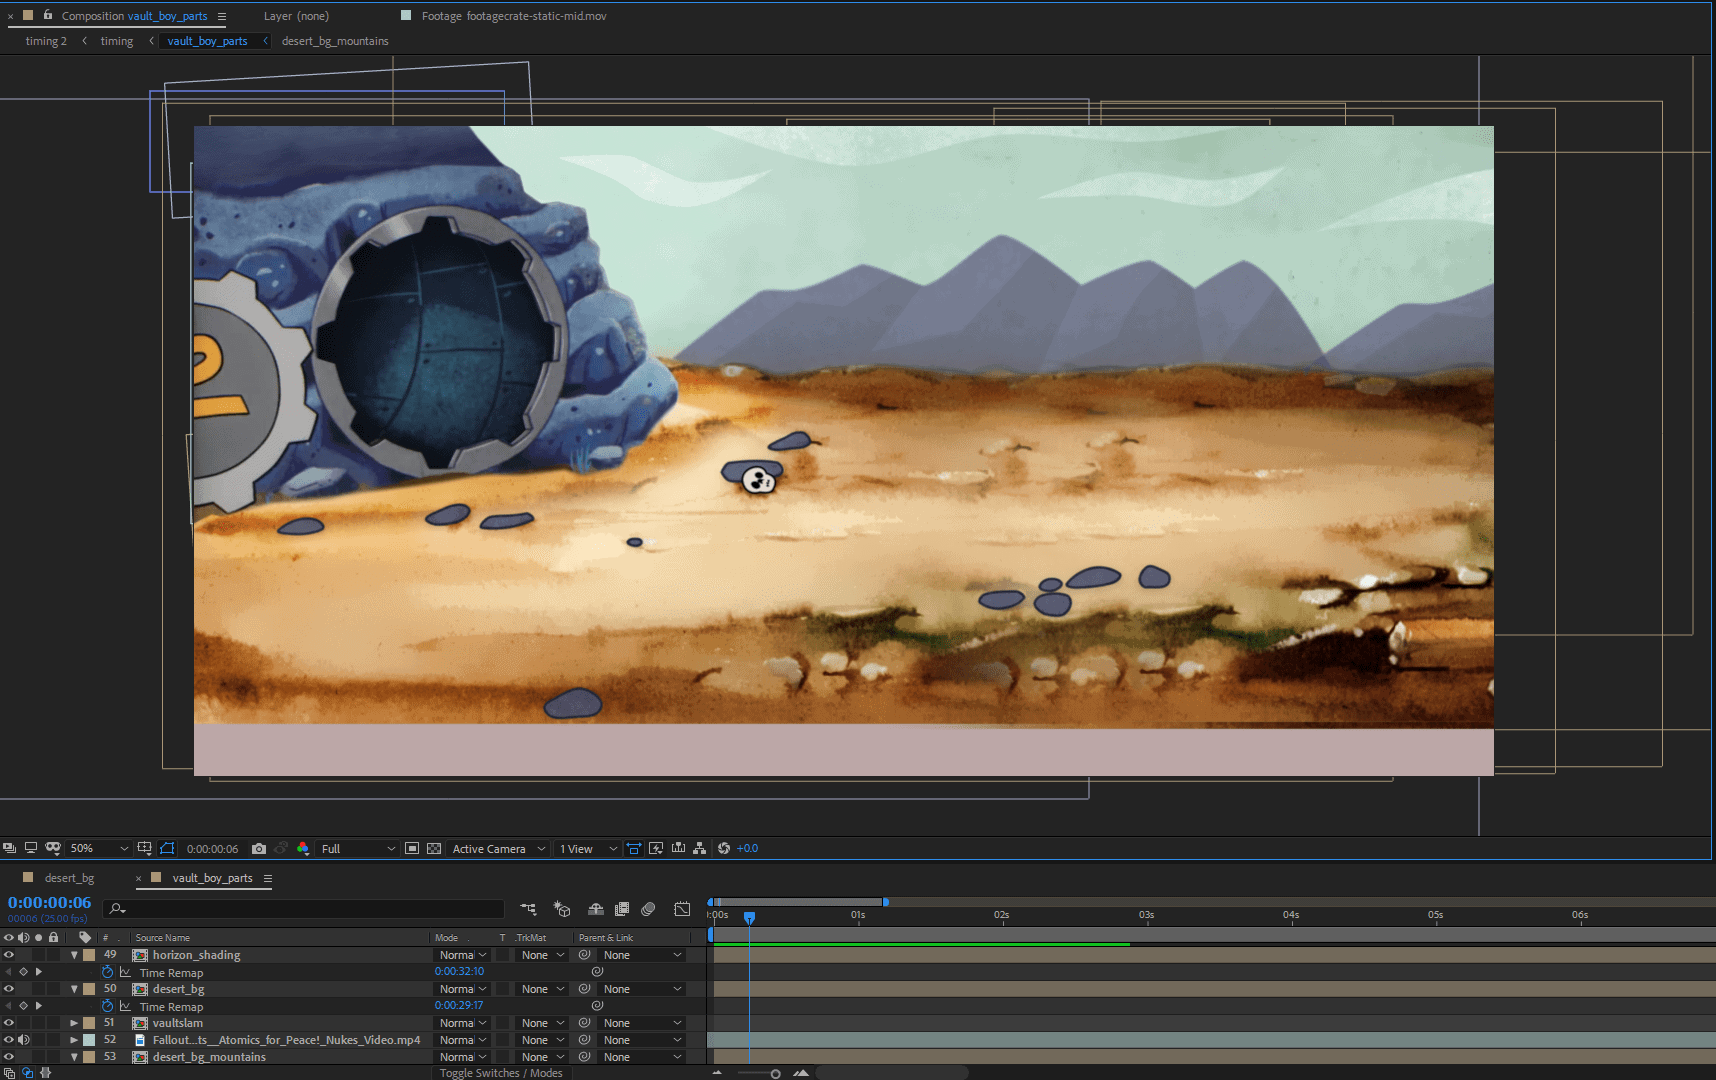
From there, I standardized each ‘cabinet’ width at around 200 pixels wide, did some cleaning-up in Photoshop, and dragged the assets into After Effects for some fun animating work. I standardized the panel sizes into ‘small’, ‘medium’, and ‘large’ designs so that I could produce numerous options for each type. Most of these components ended up being fairly easy to animate, as they boiled down to making lights blink and buttons flash, but occasionally some more complex pieces were needed. I discovered FootageCrate.com as an excellent source of VFX and motion graphics components, and leaned on their free libraries for sparks, smoke, and some other small details. I took care to make sure the panel animation lengths were all a little varied – if they were all, for instance, 5 seconds long, you’d start to notice patterns very easily when all of the panel animations looped in synchronicity. By varying their lengths (5 seconds, 8, 12, even as much as 40 for some!) you end up making elements that can be placed adjacent to one another without betraying their looping nature in an obvious way.
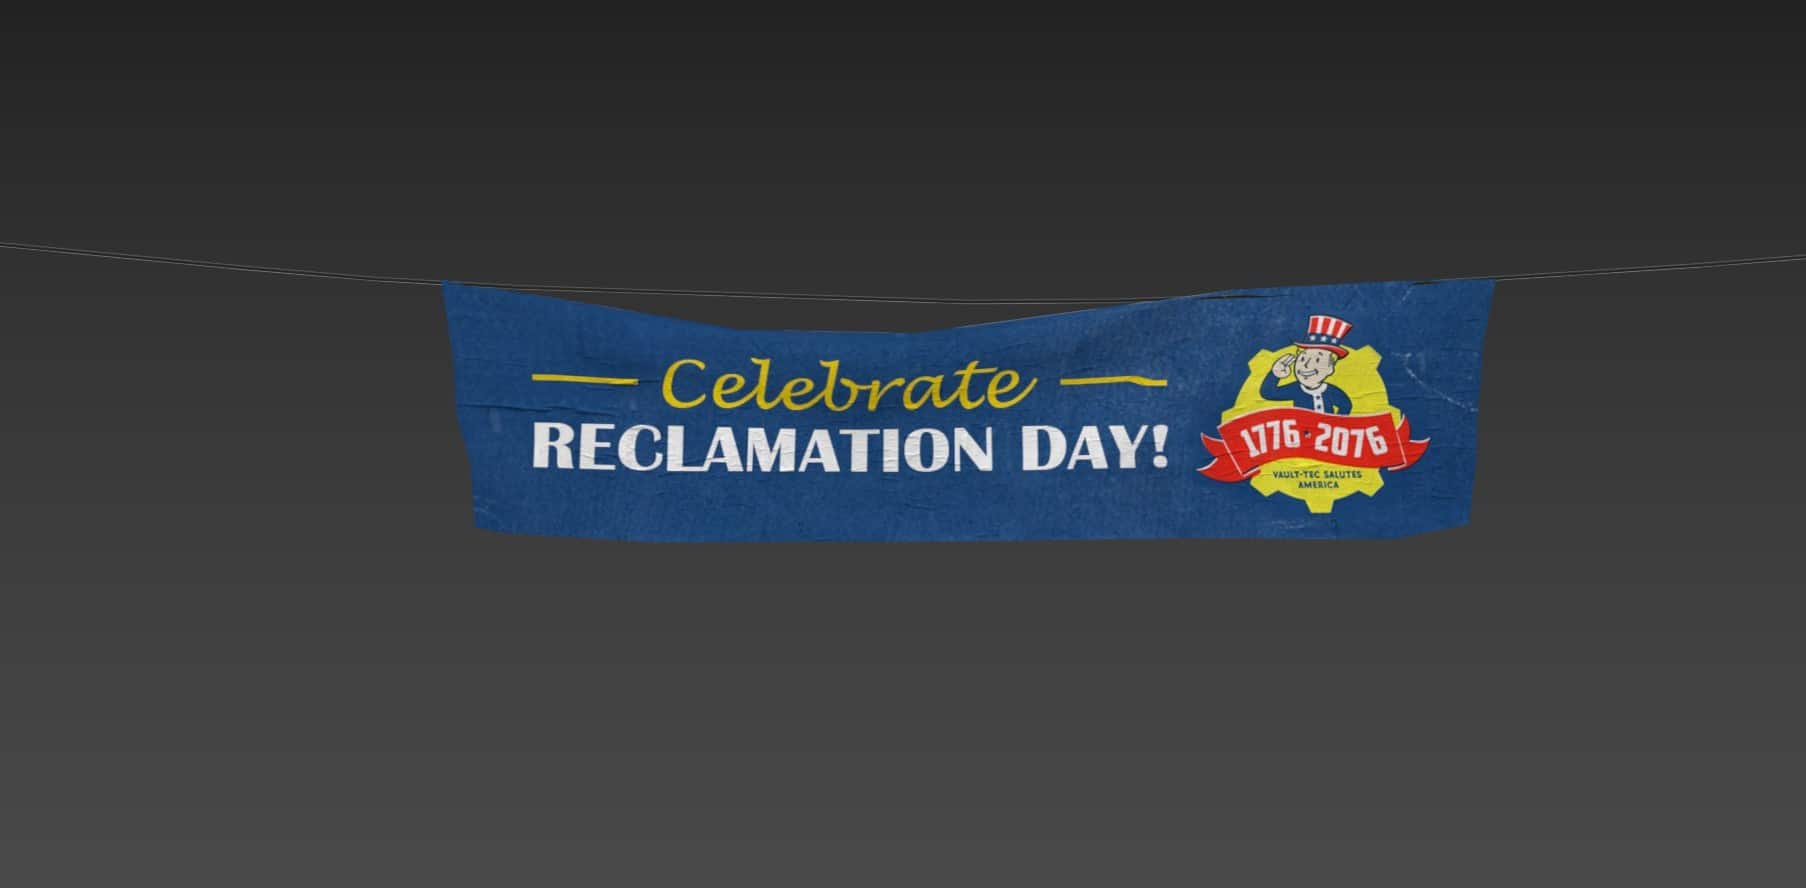
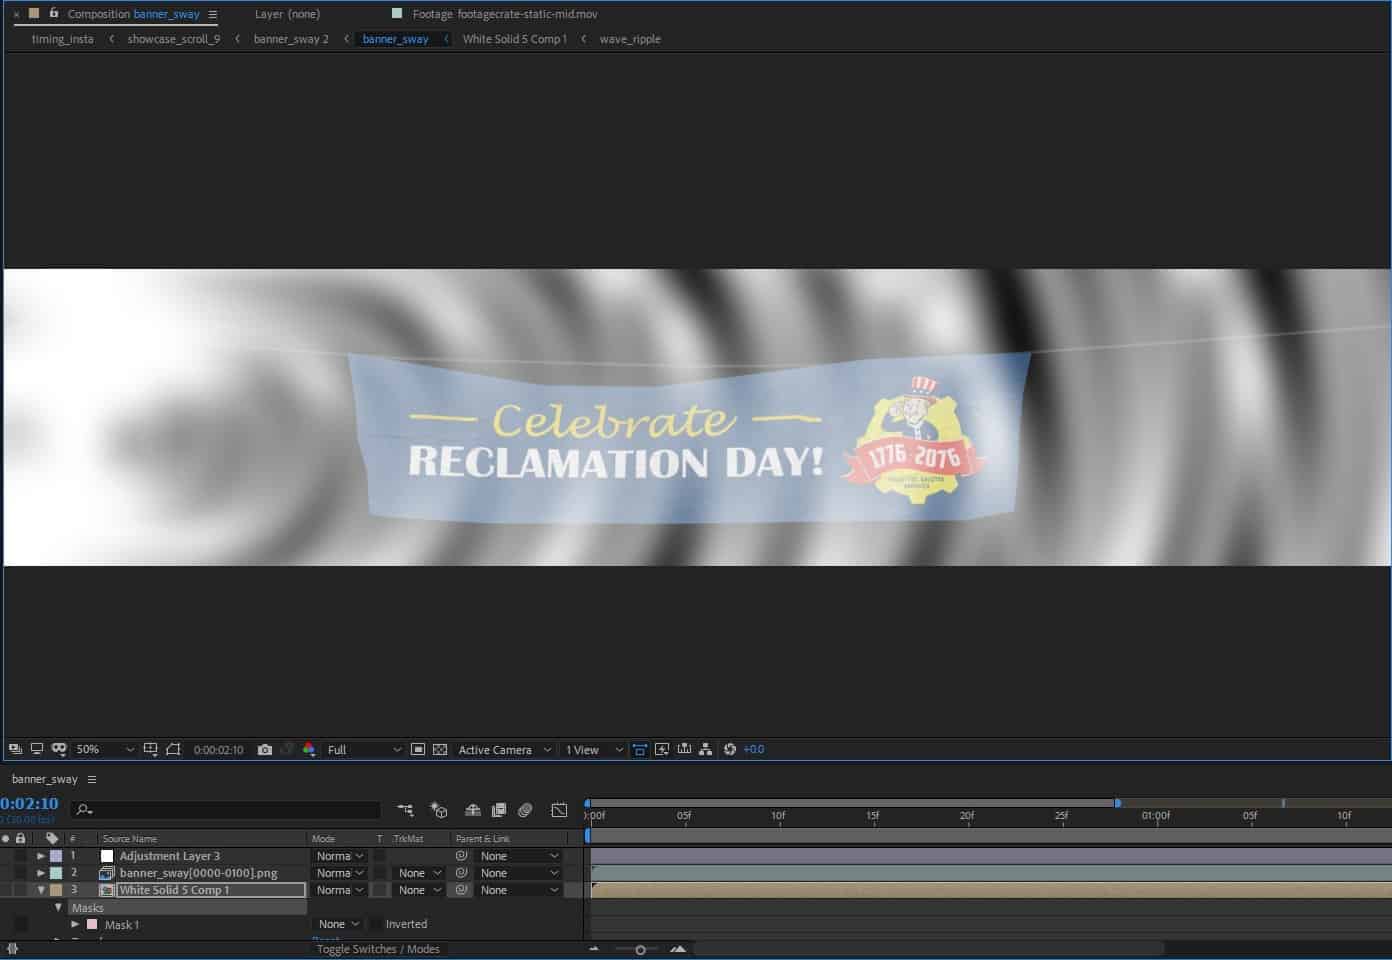
I also took an opportunity to re-make some of the banners I had seen in the Fallout 76 trailers – most specifically, the Reclamation Day banner. This was done by ripping one of the patriotic banners from Concord in Fallout 4, making a new texture to match Vault 76, and then rendering the banner out with a waving animation in 3D Studio Max.
I ended up adding to the waving effect in After Effects with a radio-waves displacement map so that it looked a bit more like it was rippling in moving air.
NOTIFICATION ANIMATIONS
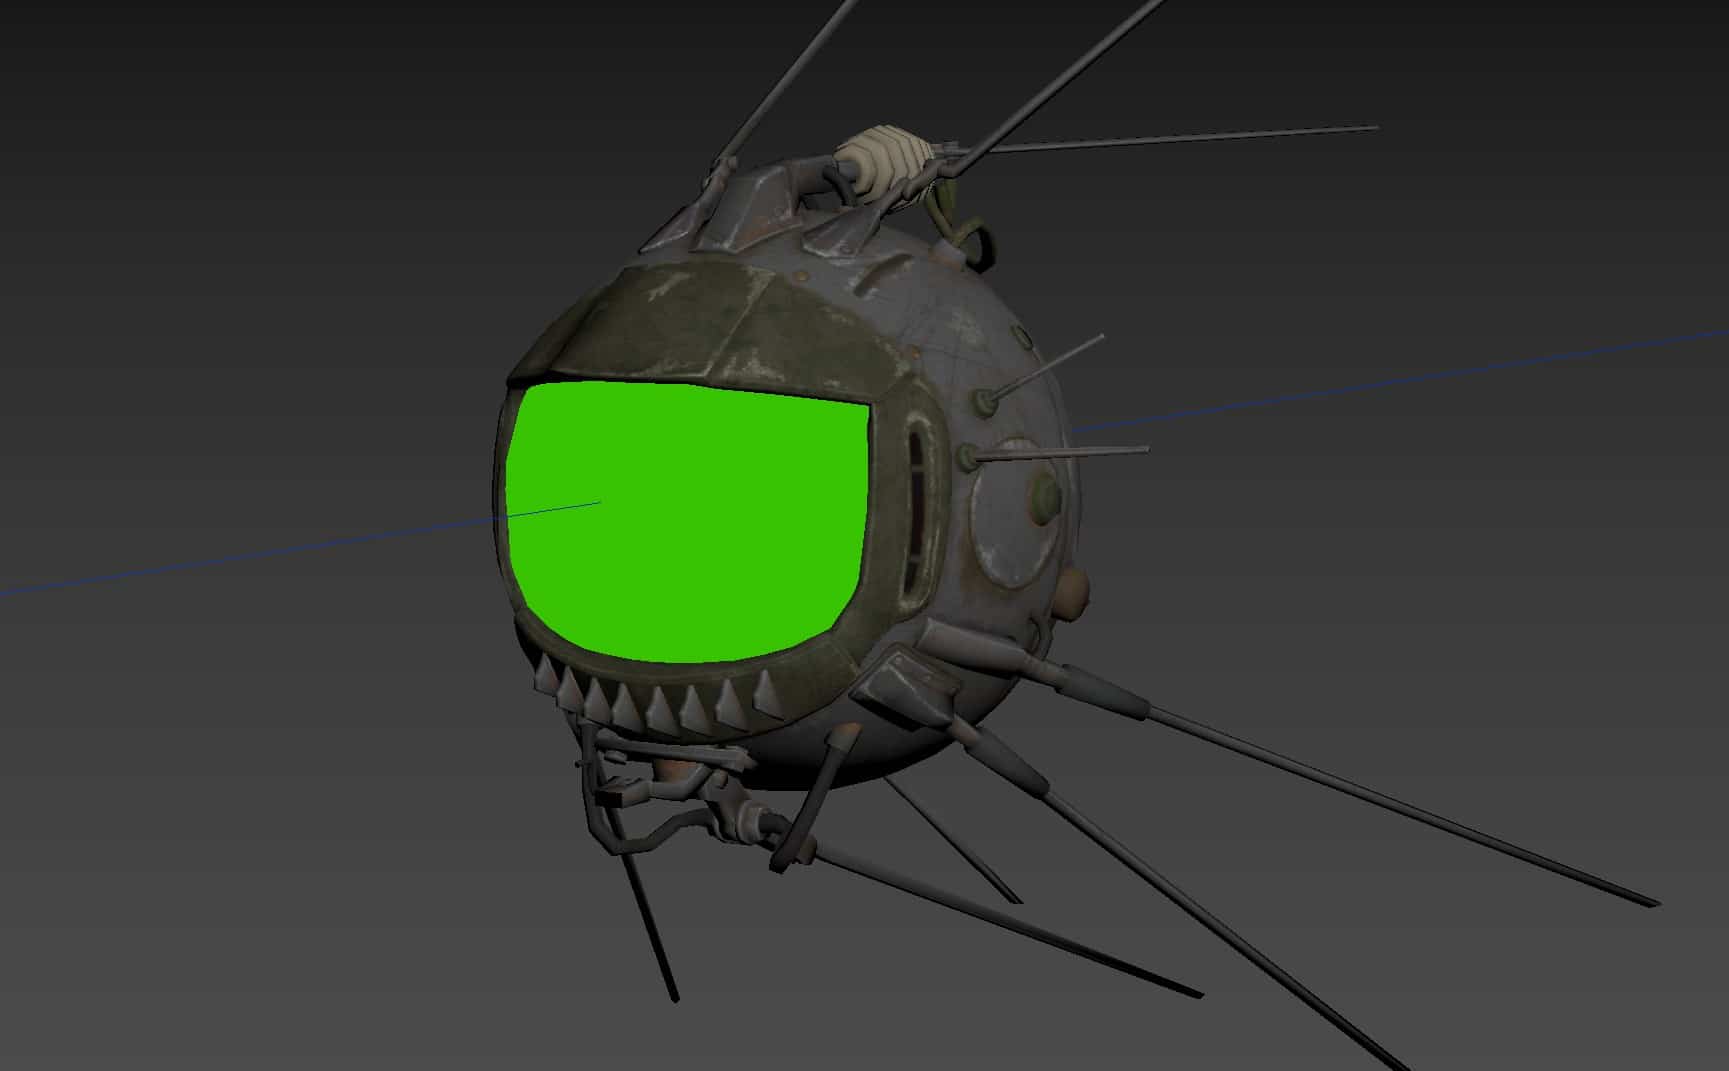
One of the models I ended up finding during my time digging with Nifscope viewer was an Eyebot, one of those Fallout staples. I remembered ED-E in the Fallout: New Vegas debut trailer and felt like it might be fun to turn him into a notification system. I dragged him into 3D Studio and did a bit of tinkering to make the ‘face’ a bit more screen-like so that follower or subscriber information could be displayed on him.
I rendered out a few different animations with this little guy, but I think my favorite ended up being the one where the eyebot lingers a bit too long and ends up getting shot from off-screen for its trouble. By rendering it with a green screen texture, I was able to key and track different graphics onto the display as the eyebot moved across the screen. However, since the text is generally driven by overlay integration (StreamElements, or Streamlabs OBS), I did my best to make sure that the screen held steady and square to the ‘viewer’ for an appreciable length of time so that words could be inserted by whoever ended up using the animations.
The actual implementation of the notifications is a bit more on the user’s side of things. I have to say, I’ve been quite impressed with how far a lot of streaming tools have come since I first looked into it a few years ago. Tools like Streamlabs OBS let you run custom CSS, JavaScript, and all sorts of other goodies to handle the incoming data. I spent a bit of time devising some rough CSS-based animations to make the text track with the screen with each different Eyebot graphic and included that code with the Kit, but I expect there will be users out there that opt to have their own information displayed differently!
THE SALES PITCH
The ‘advertisement’ video I ended up making for the Overlay Kit (pictured at the top, here) took… well, probably as much time as actually making the overlay itself. In truth, it became more of a thing where I wanted to prove to myself that I could actually effectively copy the style of the “You Will Emerge!” and “What Makes You S.P.E.C.I.A.L.” videos. I actually ended up learning a lot about path-tweening and animation in After Effects, which is what I used to make the whole video.
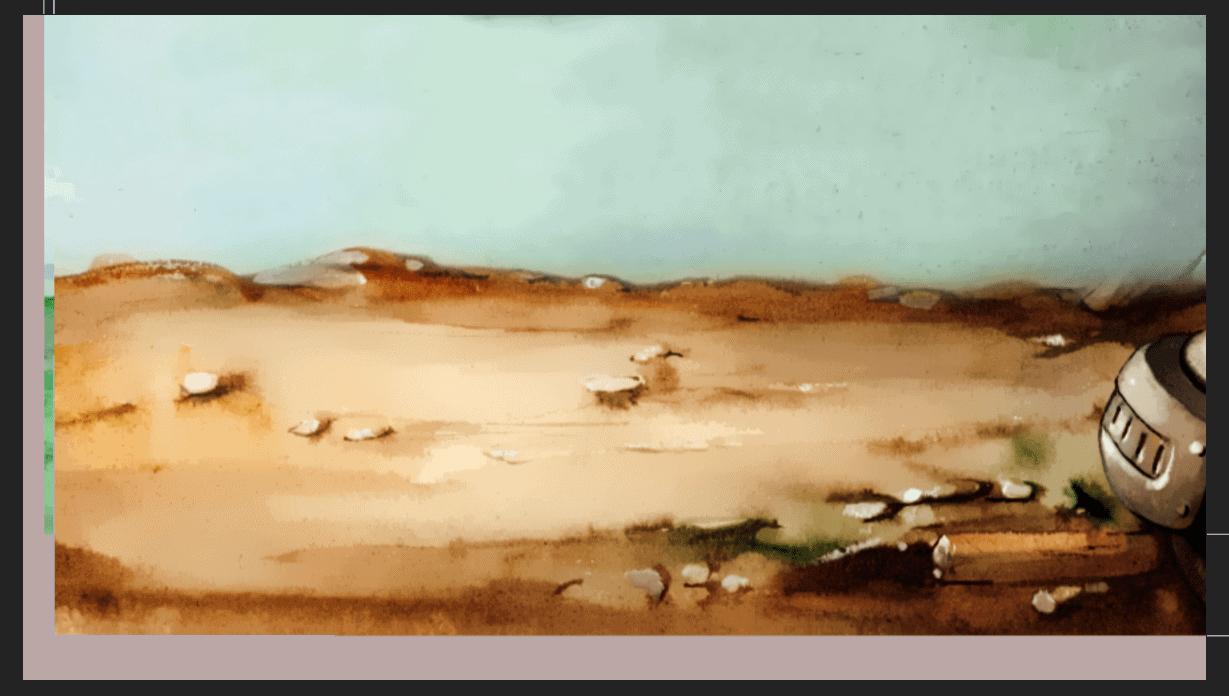
I actually started by stumbling into a bit of good luck when I found an image of an old Mighty Mouse Production Background which ended up being fairly high-resolution.
It was not hard to look at this and imagine a desert landscape being made out of it (with, admittedly a fair bit of tweaking), so that’s exactly what I did. I filtered and re-colored the parts I wanted and created a mask of the ‘horizon’; the back wall was tinted to be my sky and the wall paneling lines were removed. I ‘borrowed’ the Vault 76 section of the stage from the You Will Emerge! videos, because it felt silly to spend a ton of time re-creating the wheel. I put some basic colors behind it to extent it upwards a bit, and added some very basic mountains, clouds, rocks, and other little details to fill the rest of the scene in.
The final ‘stage’ ended up being 2600px by 1300px, which was more than I needed, but simply gave me room to pan around and change focus on things. I laid a bit of a watercolor/grunge texture over things to try and make them look ‘painted’ in the style of old cartoons, but I think it probably wouldn’t have mattered in the end.
With these elements in place, I had to do some characters. The Vault Boy design is, thankfully, one of those things that has a lot of source material to pull on. I do mean a lot. If you need a hand, expression, or pose for a particular scene, it probably already exists. Mind you, I still re-drew everything so that it was all consistently styled, but having so much material to work with made animating the Vault Boy pretty straightforward.
I will admit that some of the quality of the animation on the characters, in particular, is all over the place – this is mostly because I was learning as I went, and by the end of the video I had figured out how to do most of what I was after a bit more effectively. Still, I had fun with a lot of it, even if it was incredibly time-consuming.
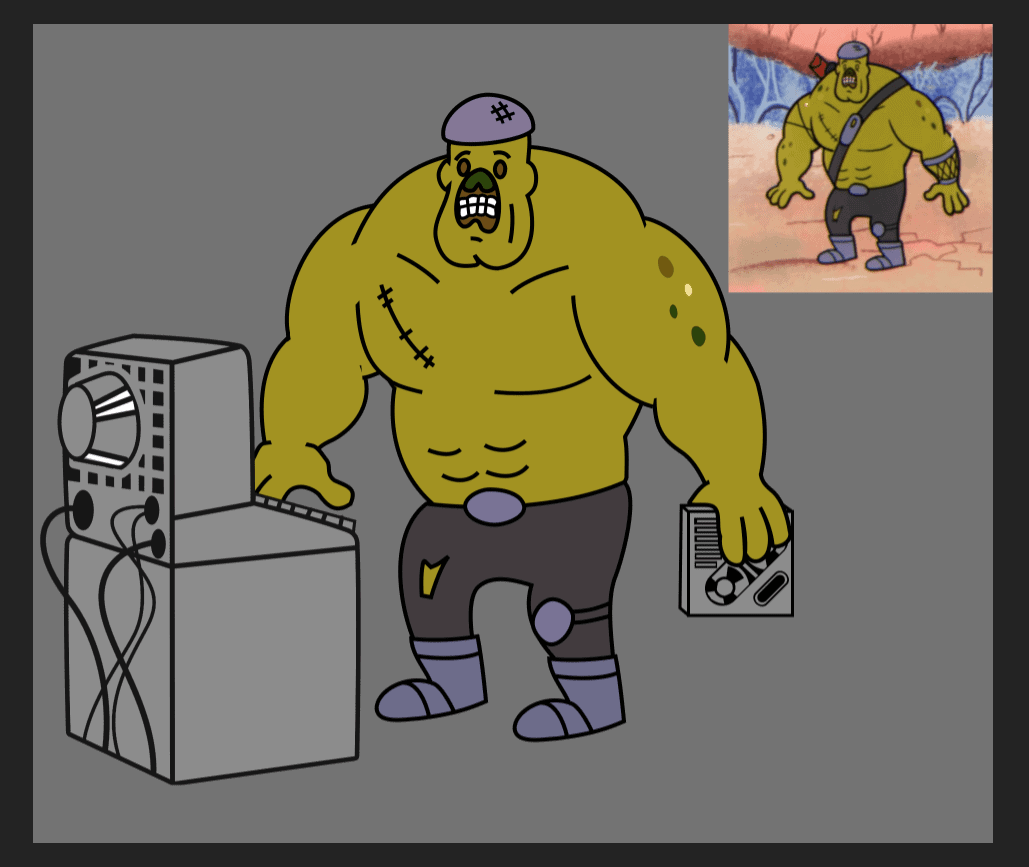
The Super Mutant, in particular, was one of my favorite bits to actually do. Again, I was fortunate in that I had a good chunk of reference material to work from, this time from the more recent You Will Emerge! videos. It took a bit of work to get the timing I was after, but comedy is its own reward.
The background Vault Dwellers are also something I spent a bit of time on, though realistically I know they’re never going to get noticed. They had a cheering animation which I never actually ended up using, but it also became the basis for them recoiling in horror from the Super Mutant and slamming the vault door shut (which was, essentially, just Bethesda’s own cartoon footage played in reverse).
The last little bit worth mentioning is how the Kit itself is presented in the cartoon. I remember from my own youth that cartoons would occasionally go for what is apparently referred to as an “art shift” for close-ups or detailed looks at things. In something like the old Ren and Stimpy cartoons, it was more appropriately referred to as a “gross-up close-up“, usually for obvious reasons. Bethesda’s own video previewing the “C.A.M.P.” does this to an extent, as well.
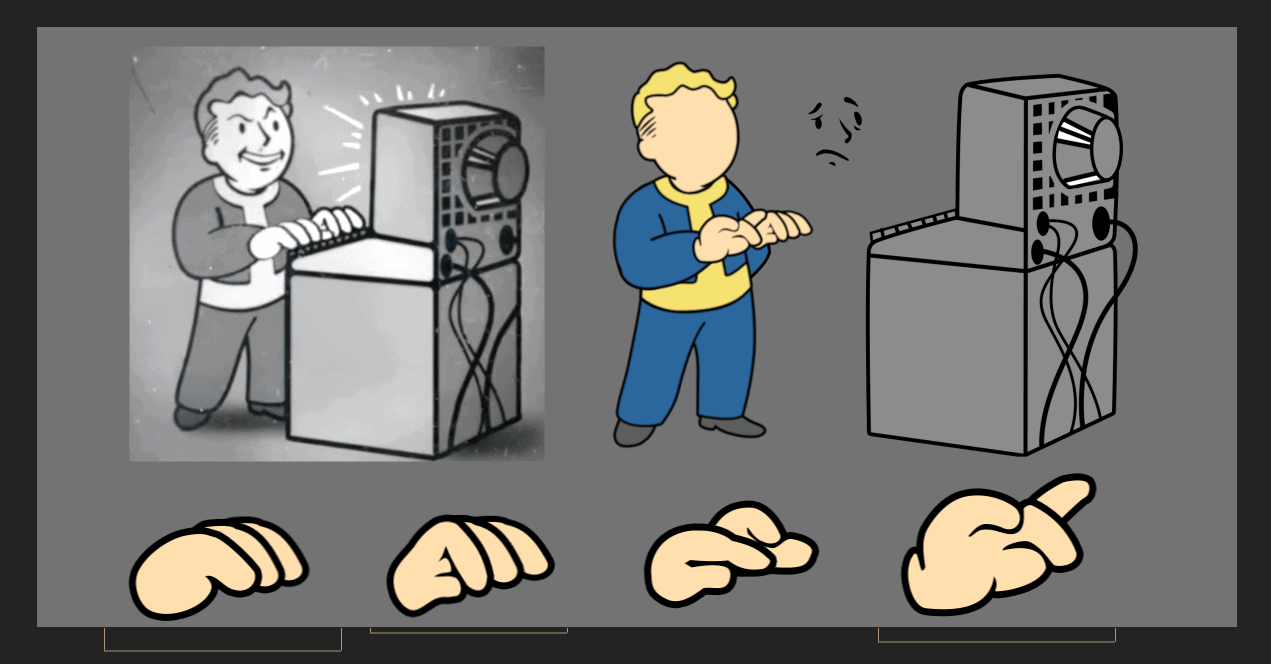
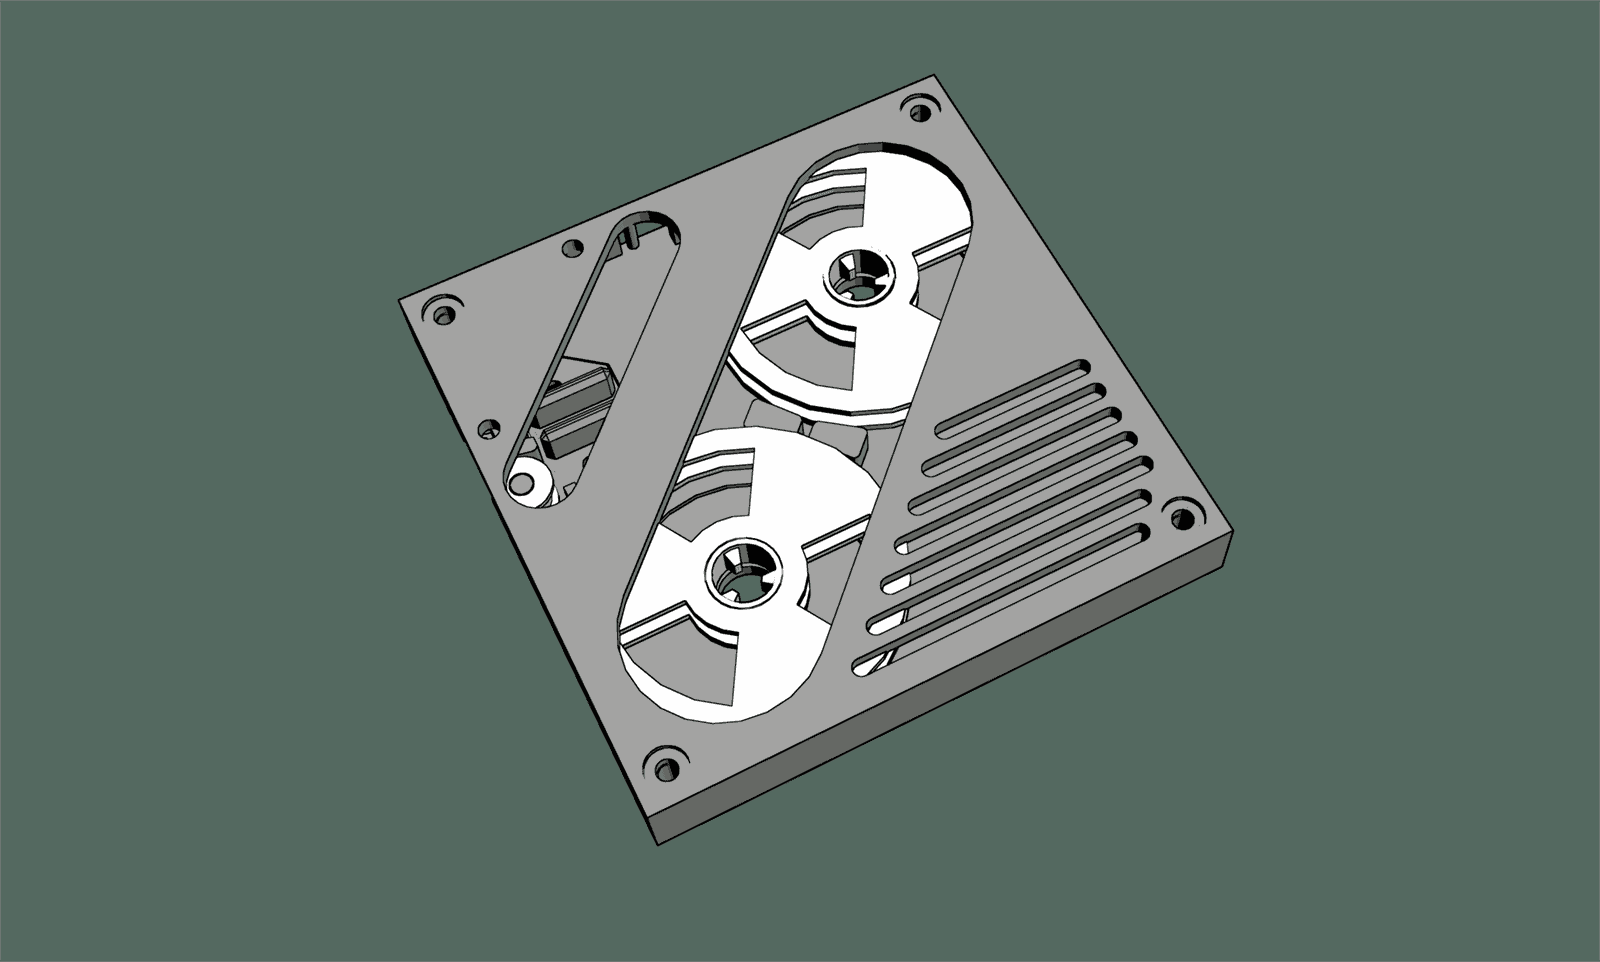
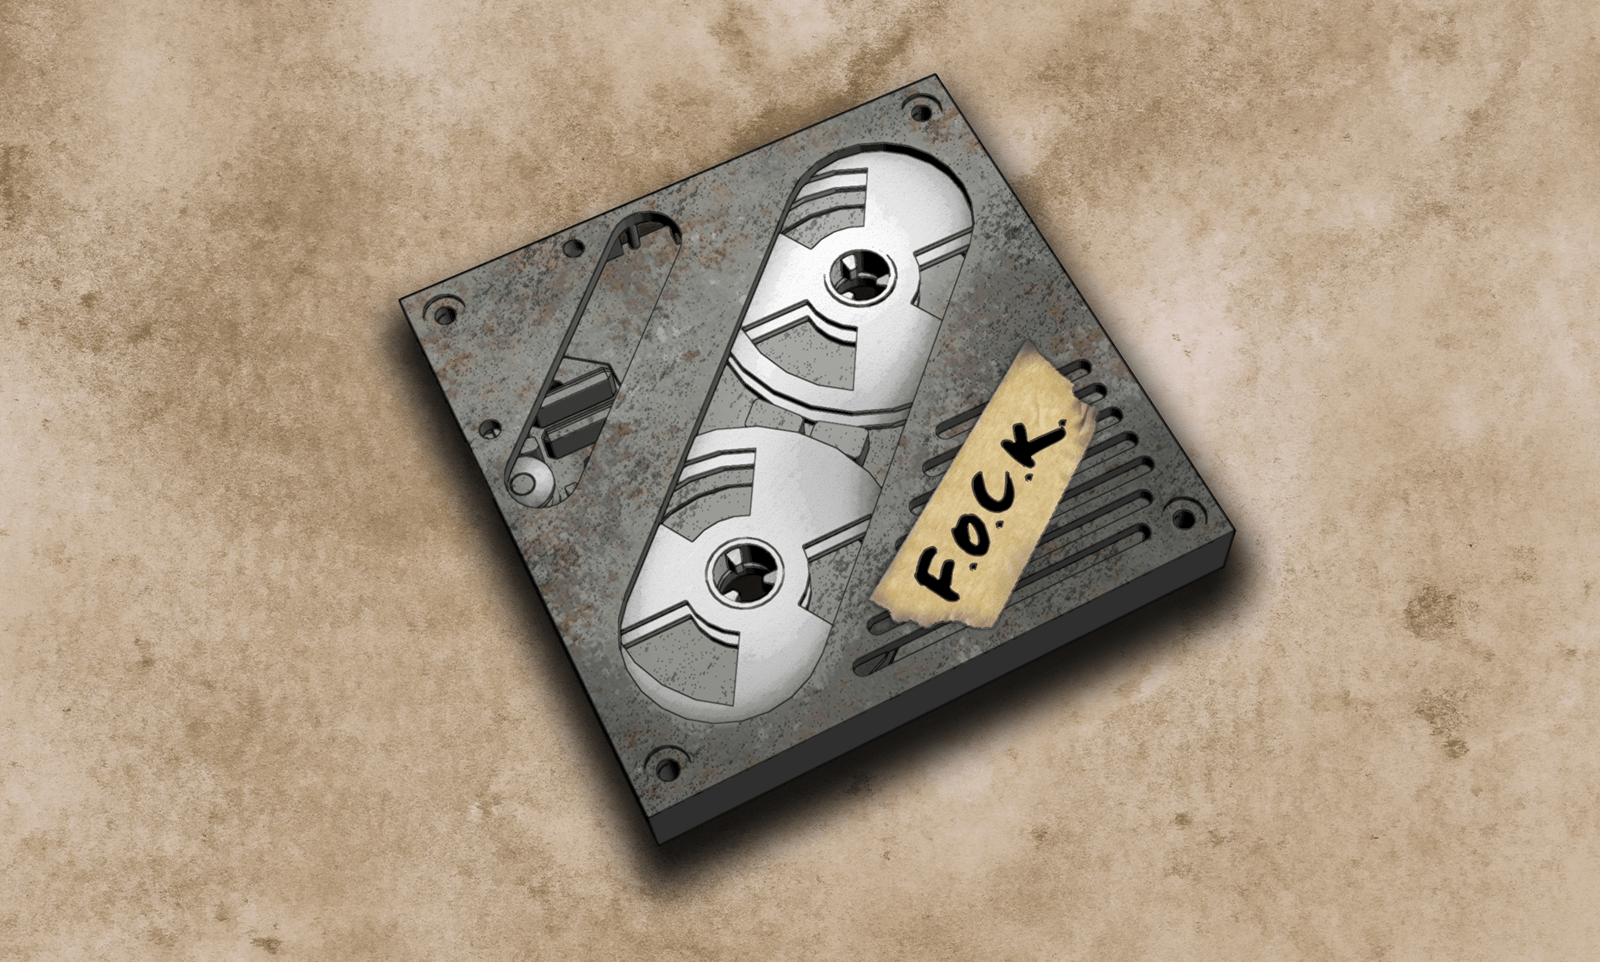
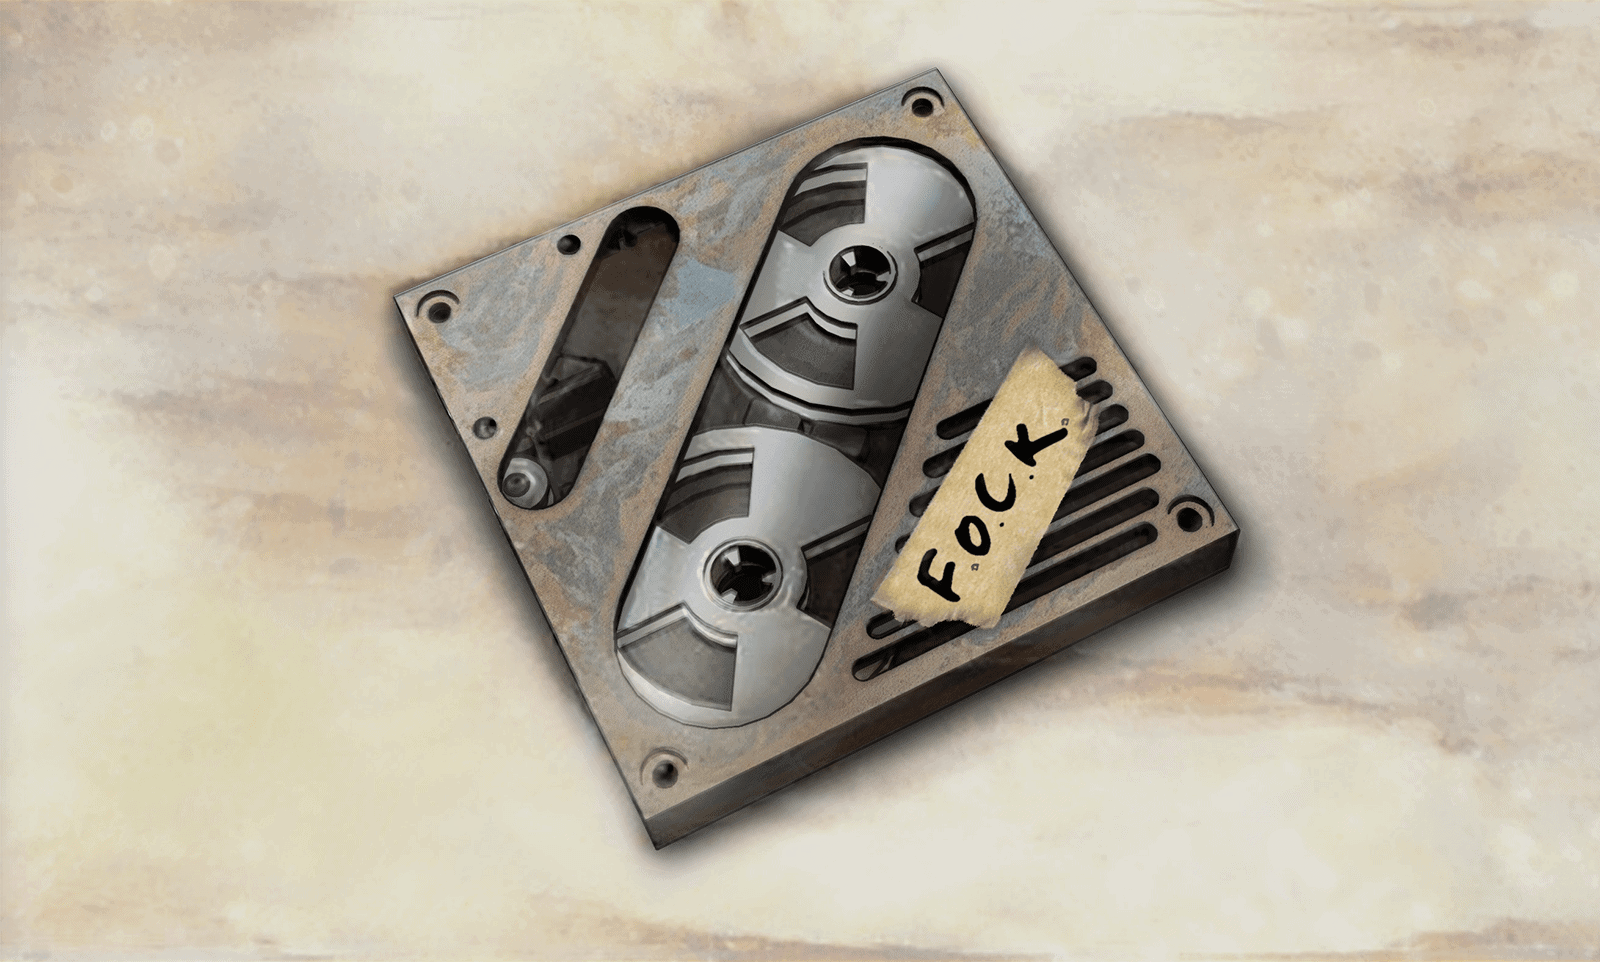
I imagined that in-universe, something containing data like the Overlay Kit would be kept on a holotape or other similar storage device. Given how I usually approach creative work (and the fact that I can’t draw for shit), I felt like my best starting point might be to actually put the holotape together in a 3D environment so that I had an easy way of getting a ‘detail’ view of the thing. From there, I photo-bashed my way to what I needed in Photoshop. I grunged the whole thing up, added masking tape with the name of the kit, and after fiddling with it for long enough, came up with something I thought fit the style I was looking for well enough.
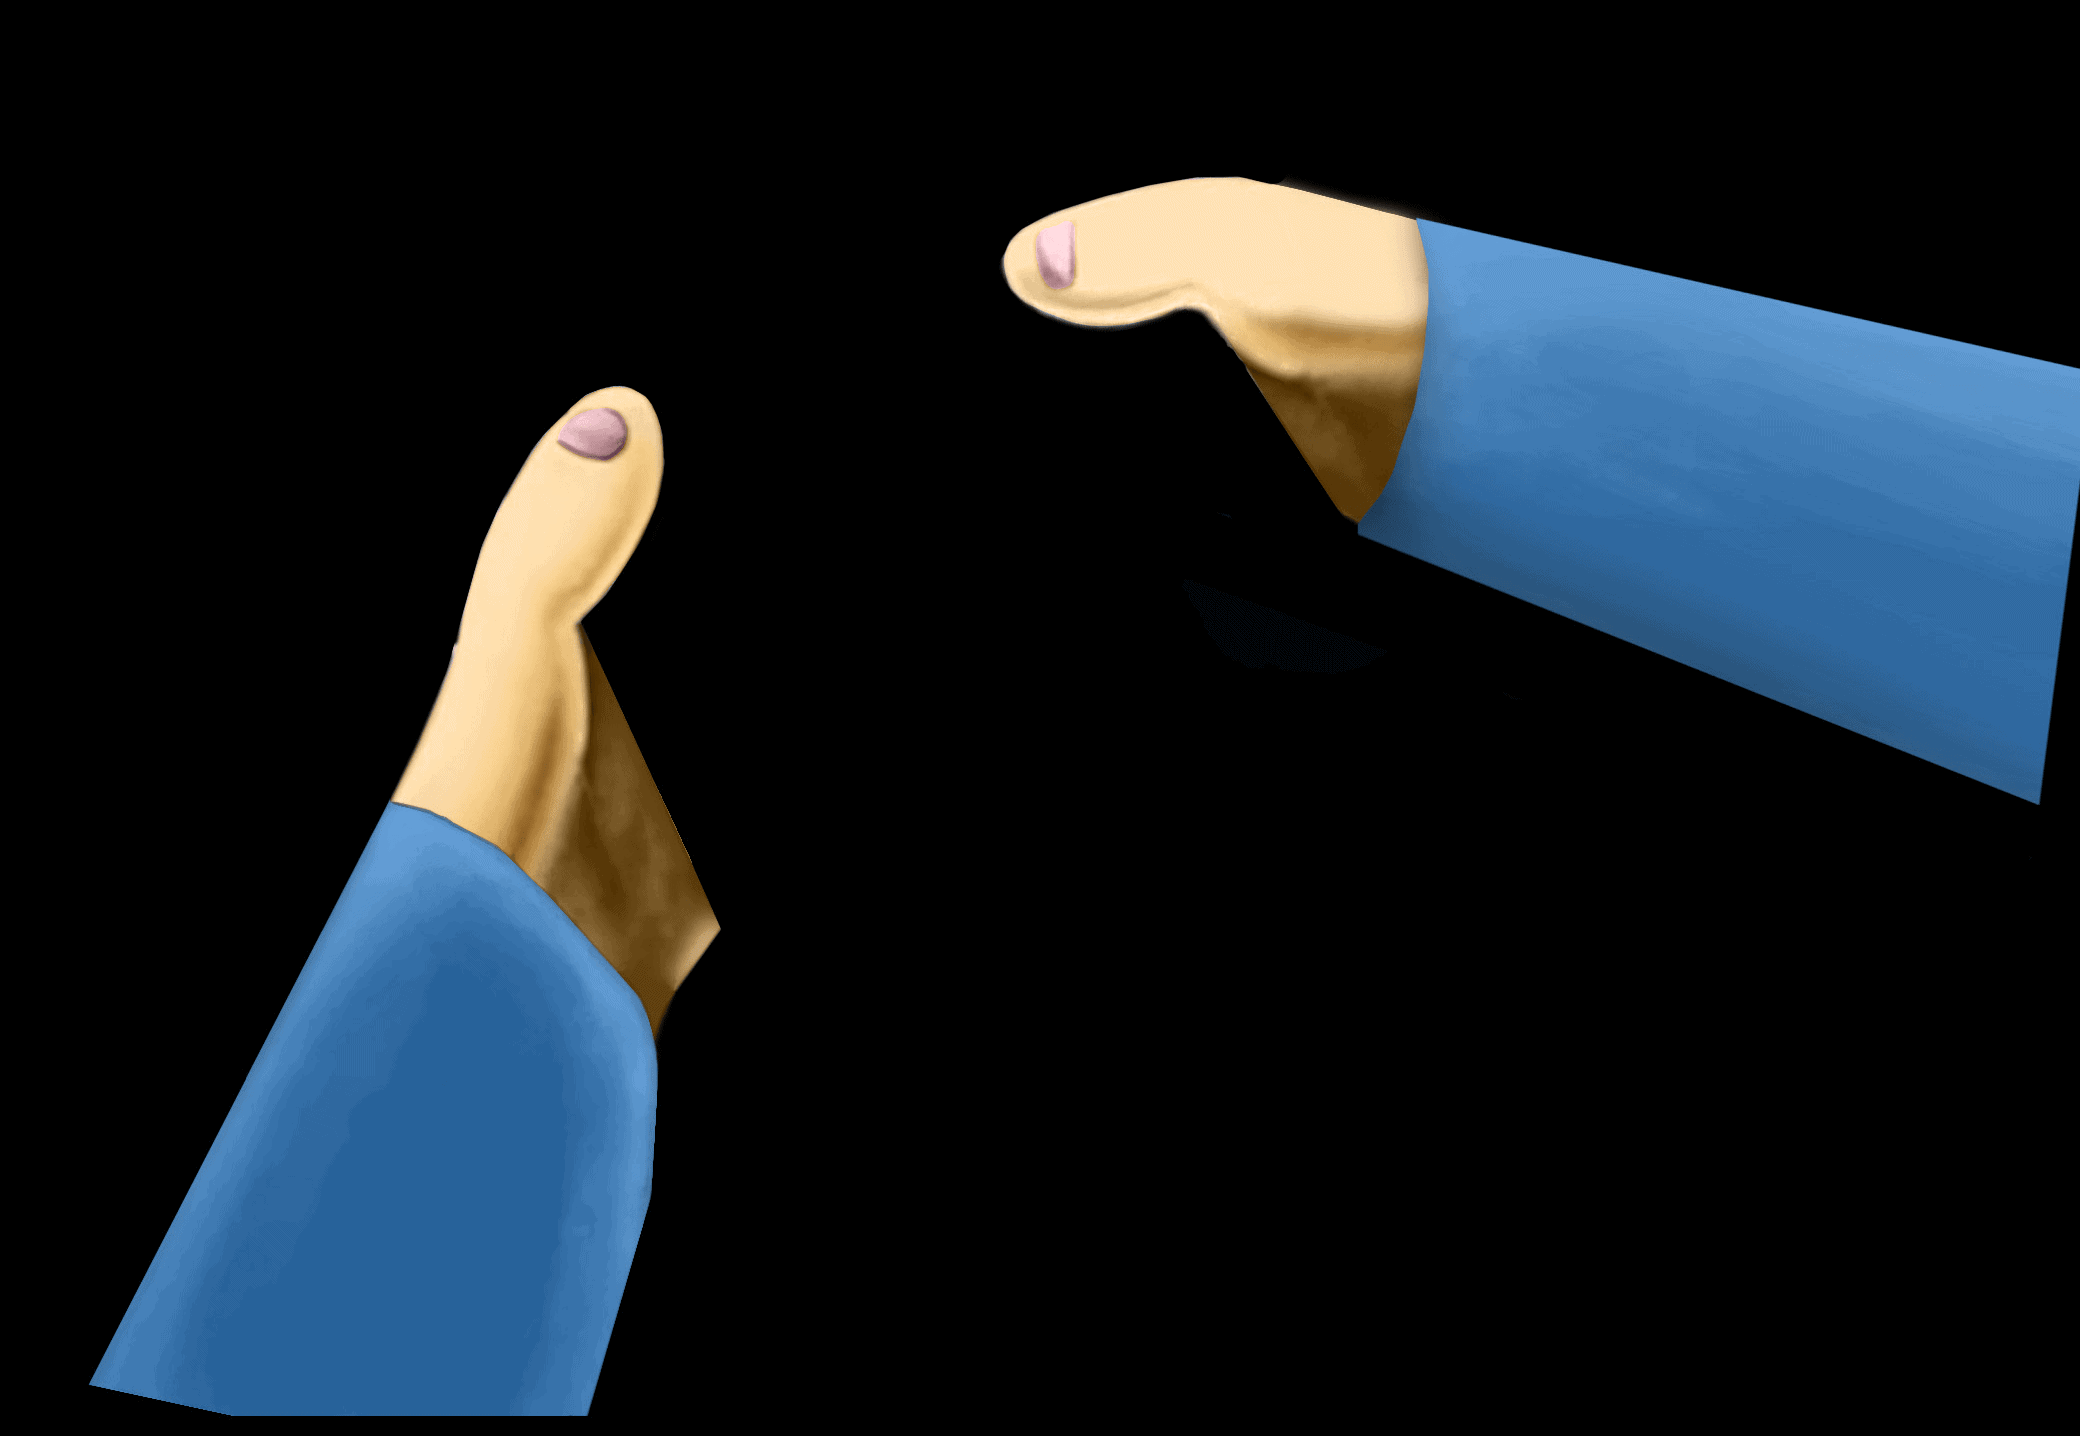
It didn’t feel like it worked well on its own, so I started thinking about other options. While watching the old S.P.E.C.I.A.L. videos, I noticed a scene at the end of each where the Vault Boy’s hands were in-frame and used to close a brochure. Although it was low-resolution and in black-and-white, it was enough to give me a starting point for how to add the right style of hands I was looking for. I did a very quick-and-dirty job of Photoshopping my own hands to fit around the holotape I had already made.
Again, I got a bit lucky with the overall nature of this project. Although my illustrated hands weren’t particularly good, the blurry focus, film and noise effects, and other generally ‘vintage’ elements of the final video go a long way towards concealing my mistakes.
With all these elements out of the way, I just had to deal with the audio. I probably spent a full day digging around the internet listening to various melodies until I settled on “Nostalgia TV” by LynneMusic, which had the sort of bouncy attitude I was after.
A friend of mine was also kind enough to lend his voice for the dialogue. I will readily concede that I don’t know much about sound engineering, but thankfully the task of making audio worse for this video did not appear to be particularly challenging. I ended up finding a few settings after trial-and-error that seemed to get me close to the sound I was looking for without making it totally unintelligible.
It seemed like a lot of the ‘fuzzy’ sound comes from clipping off the higher frequencies. I tried not to clip too much of the other end of the spectrum because the bass still seemed important, particularly with how deep the narrator’s voice was to start with. By giving myself some peaks in the middle ranges, the volume of some words got a blown-out or overmodulated quality that also suited what I was after. I ran the music through a similar filter, though I did tweak some of the points to fit things better to the instruments being used.
FINAL THOUGHTS
Given that I am actually not all that artistically inclined, the thought of putting a something like this together was a task I was none-too-certain about. In truth, most of the process was not actually creating, but probably more akin to editing, which is something I feel I’m much better equipped for. Because I had ample source material to work from (Bethesda’s own cartoons, decades of Vault Boy art circulating on the internet, assets from the games themselves) I was able to essentially Frankenstein my way to what I was looking for. Candidly, I think that if I were the type of person who could sit down with a tablet and pen and whip illustrations out, this whole process would have been done in half the time.
There are many other elements to this project that I haven’t covered in detail, but overall I think I’ve touched on the biggest parts. In any case, the Fallout Overlay Creation Kit is now available both on Etsy or our own webstore (though I would recommend using our store over Etsy, as Etsy makes downloadable products a huge pain in the ass).