Author's Note:There was a period of time where the content of most of the projects that I completed ended up on Instagram, rather than receiving full blog posts here. This had the unfortunate effect of making the project logs for some of these pieces incomplete. The date of this post is not accurate, as it was written substantially after the work was finished.
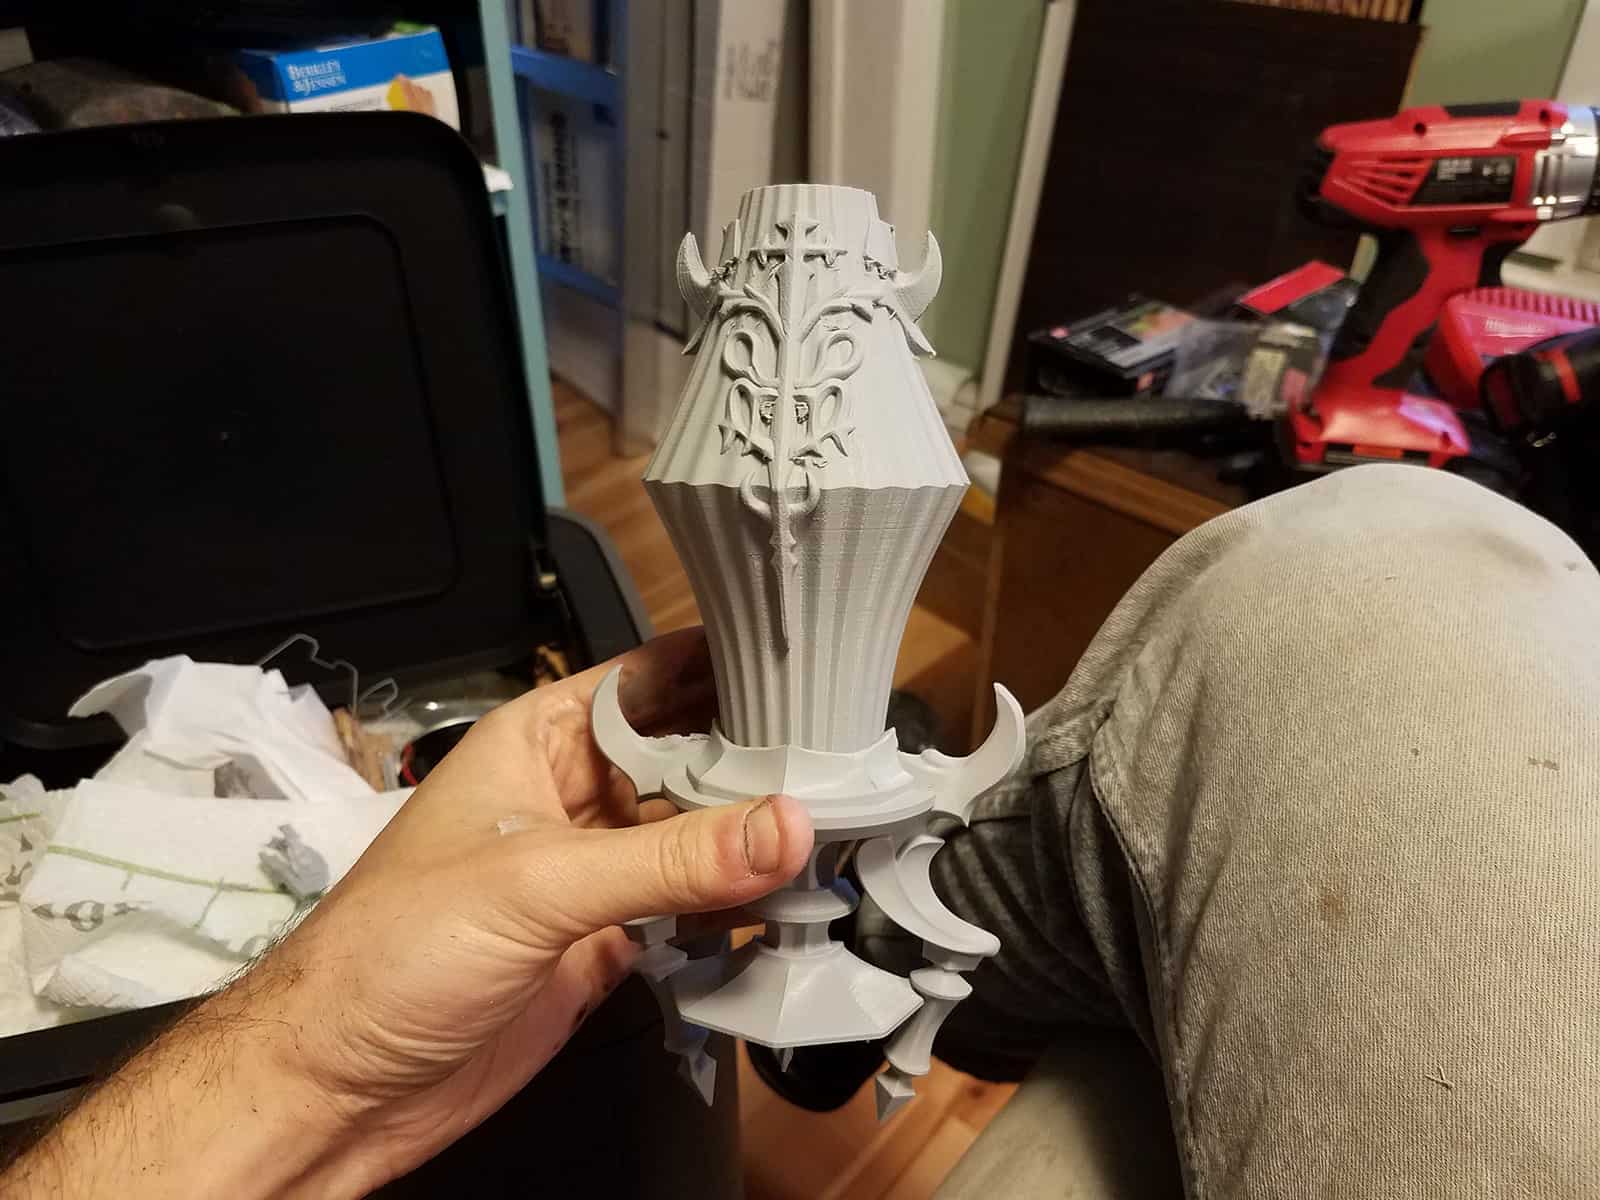
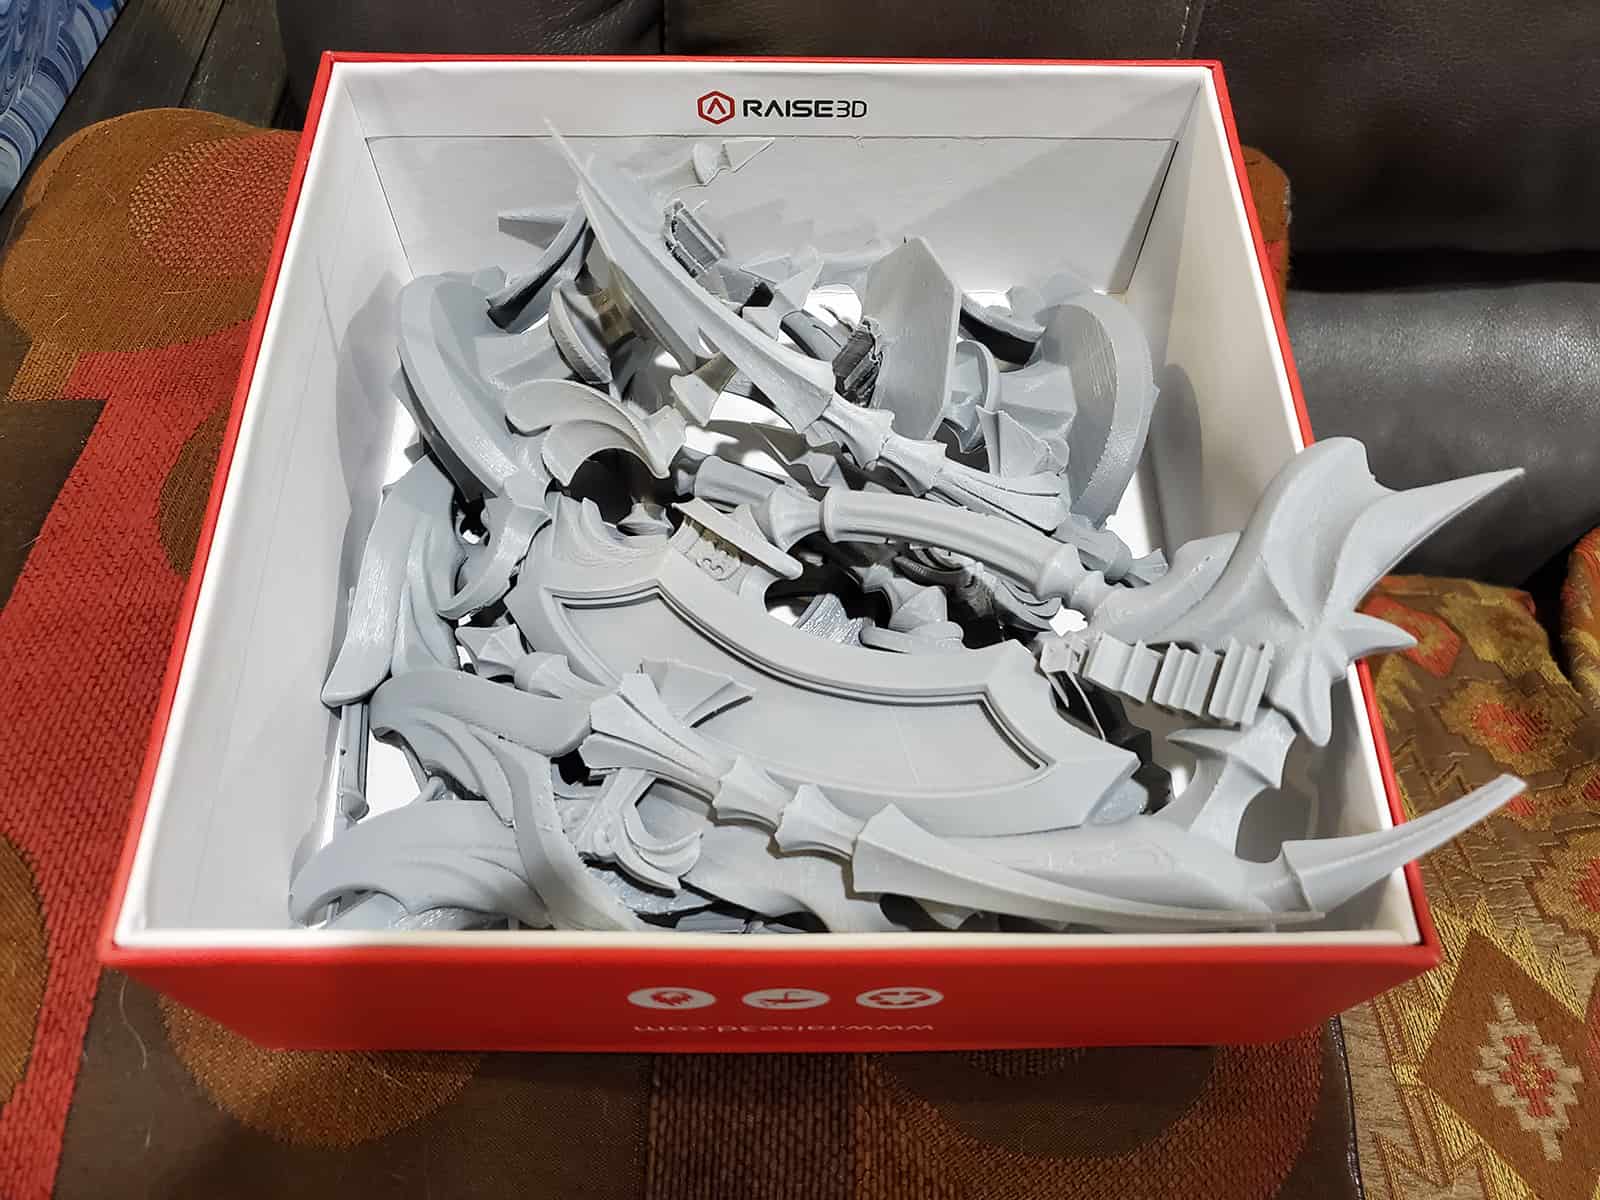
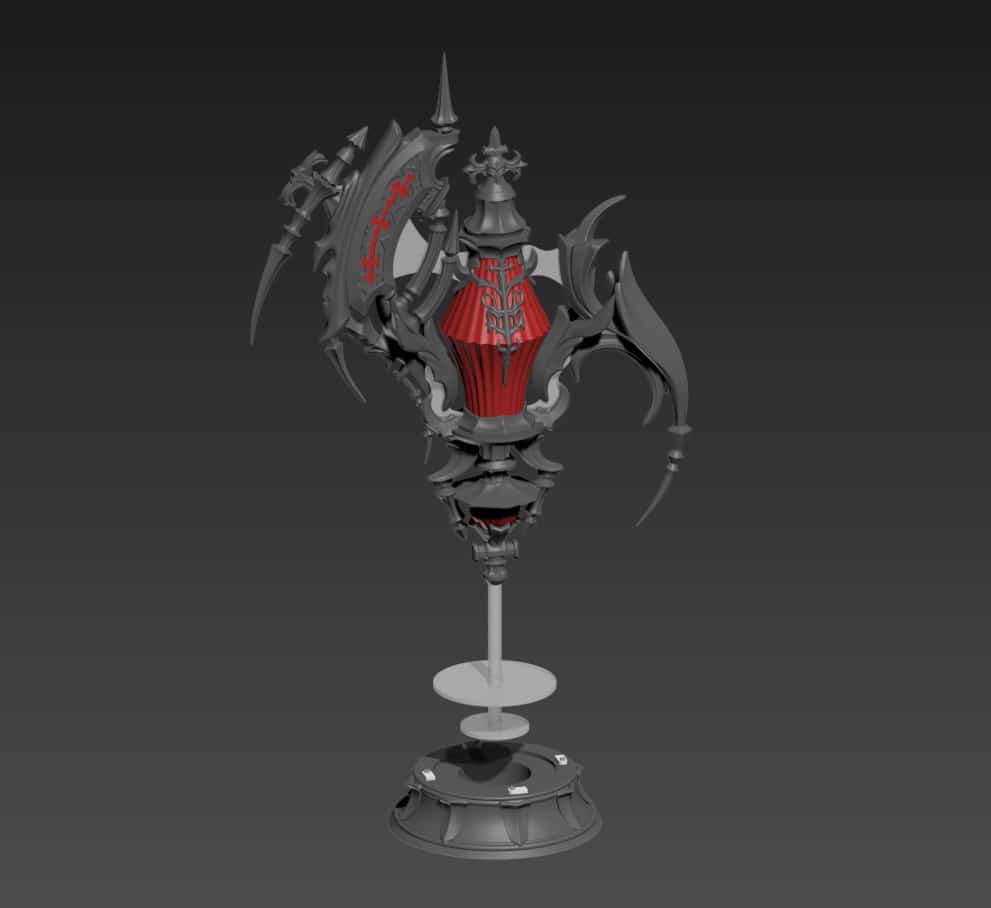
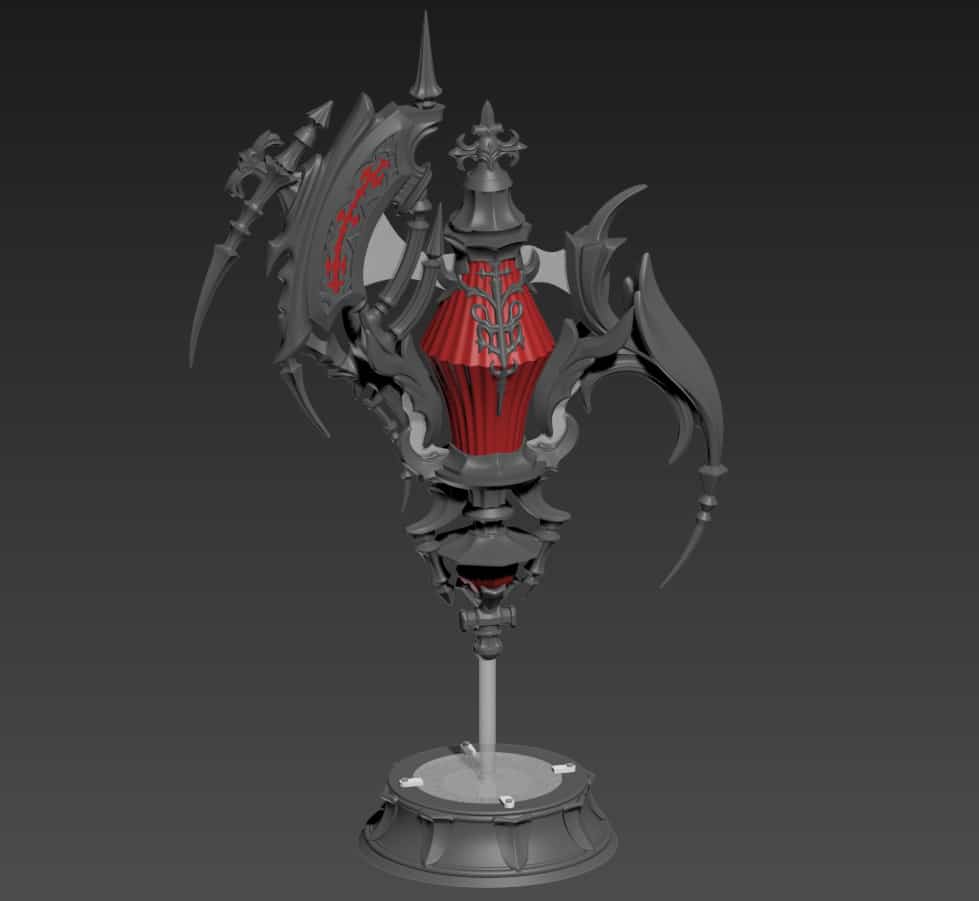
Following on the heels of my work designing the Antiquated Murgleis Focus, I churned the parts out on my Makergear M2 printer. There’s a lot of little fiddly pieces that need to get made to complete this piece, but fortunately most of them were able to be printed in left and right halves to simplify the process a bit.
I ended up using my K40 Laser Engraver to cut out most of the necessary clear acrylic pieces that would be used to help make the ‘flying’ effect work. As I expected, the parts needed to be embedded prior to the painting process so that I could also sculpt the seams between the left and right halves of the orb parts closed, but masking the clear acrylic off didn’t end up being too difficult!
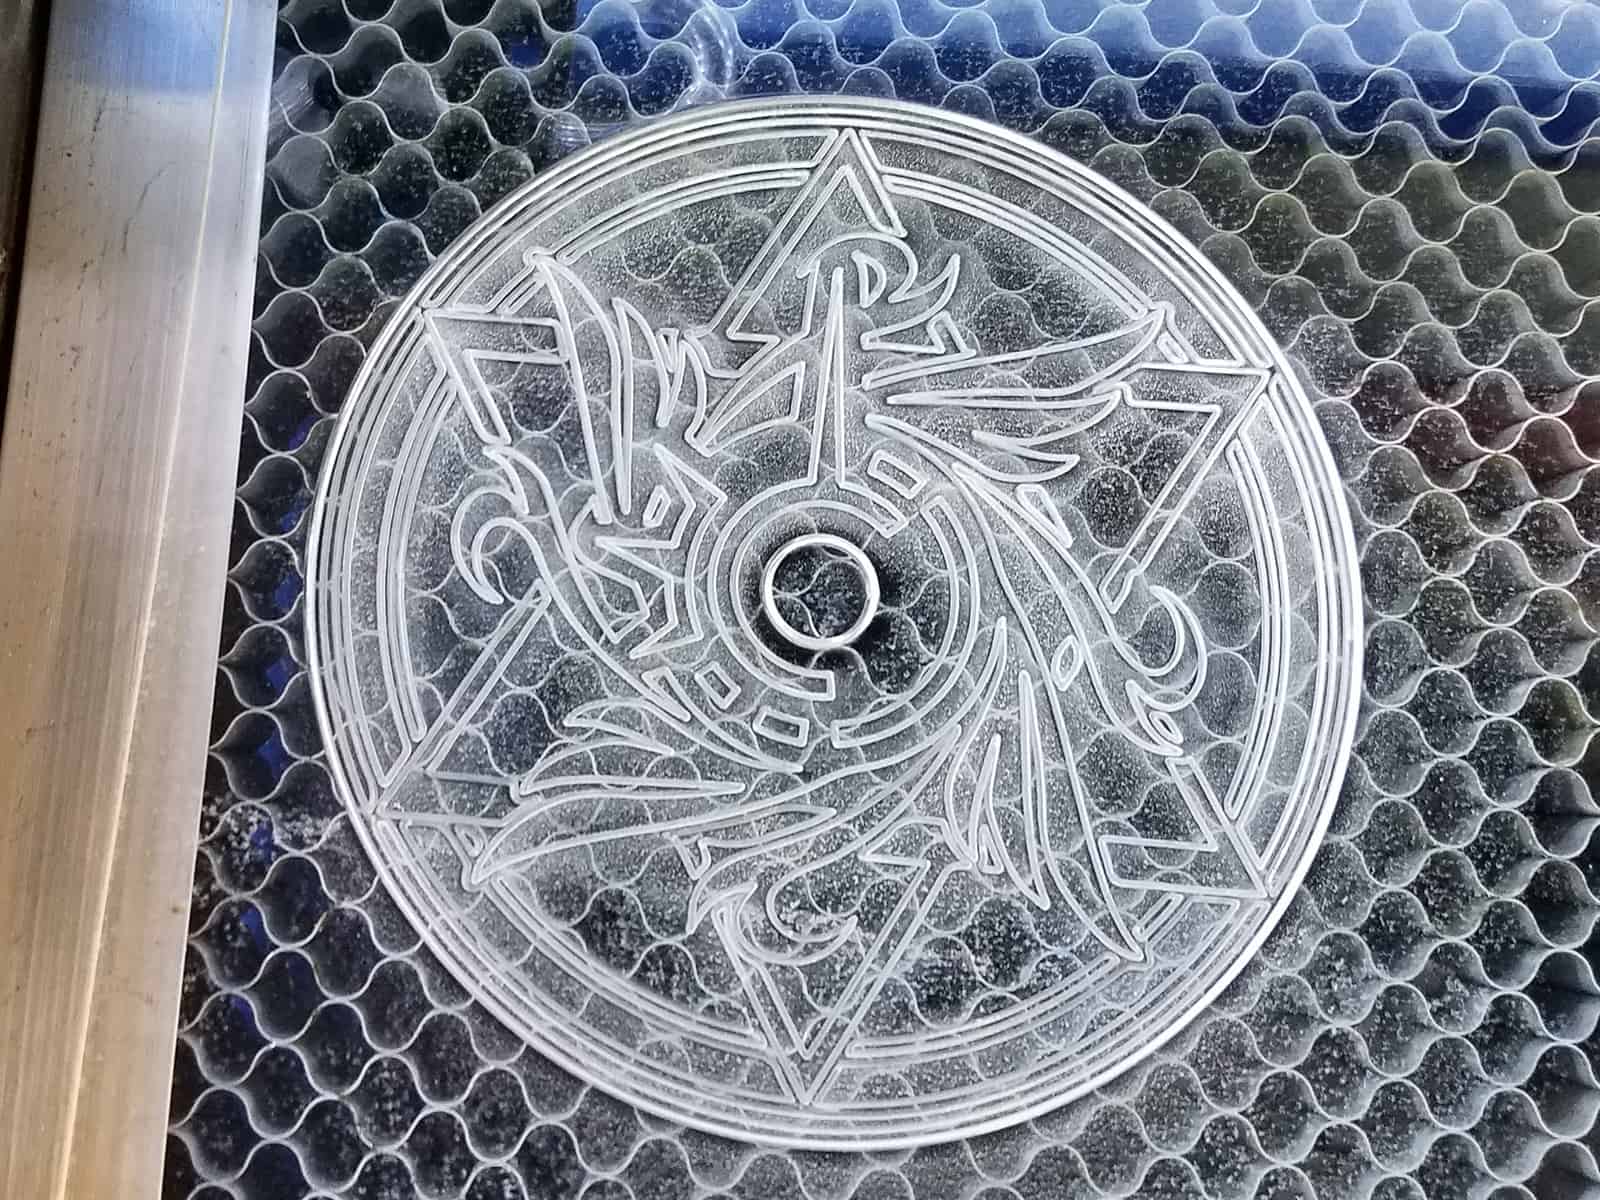
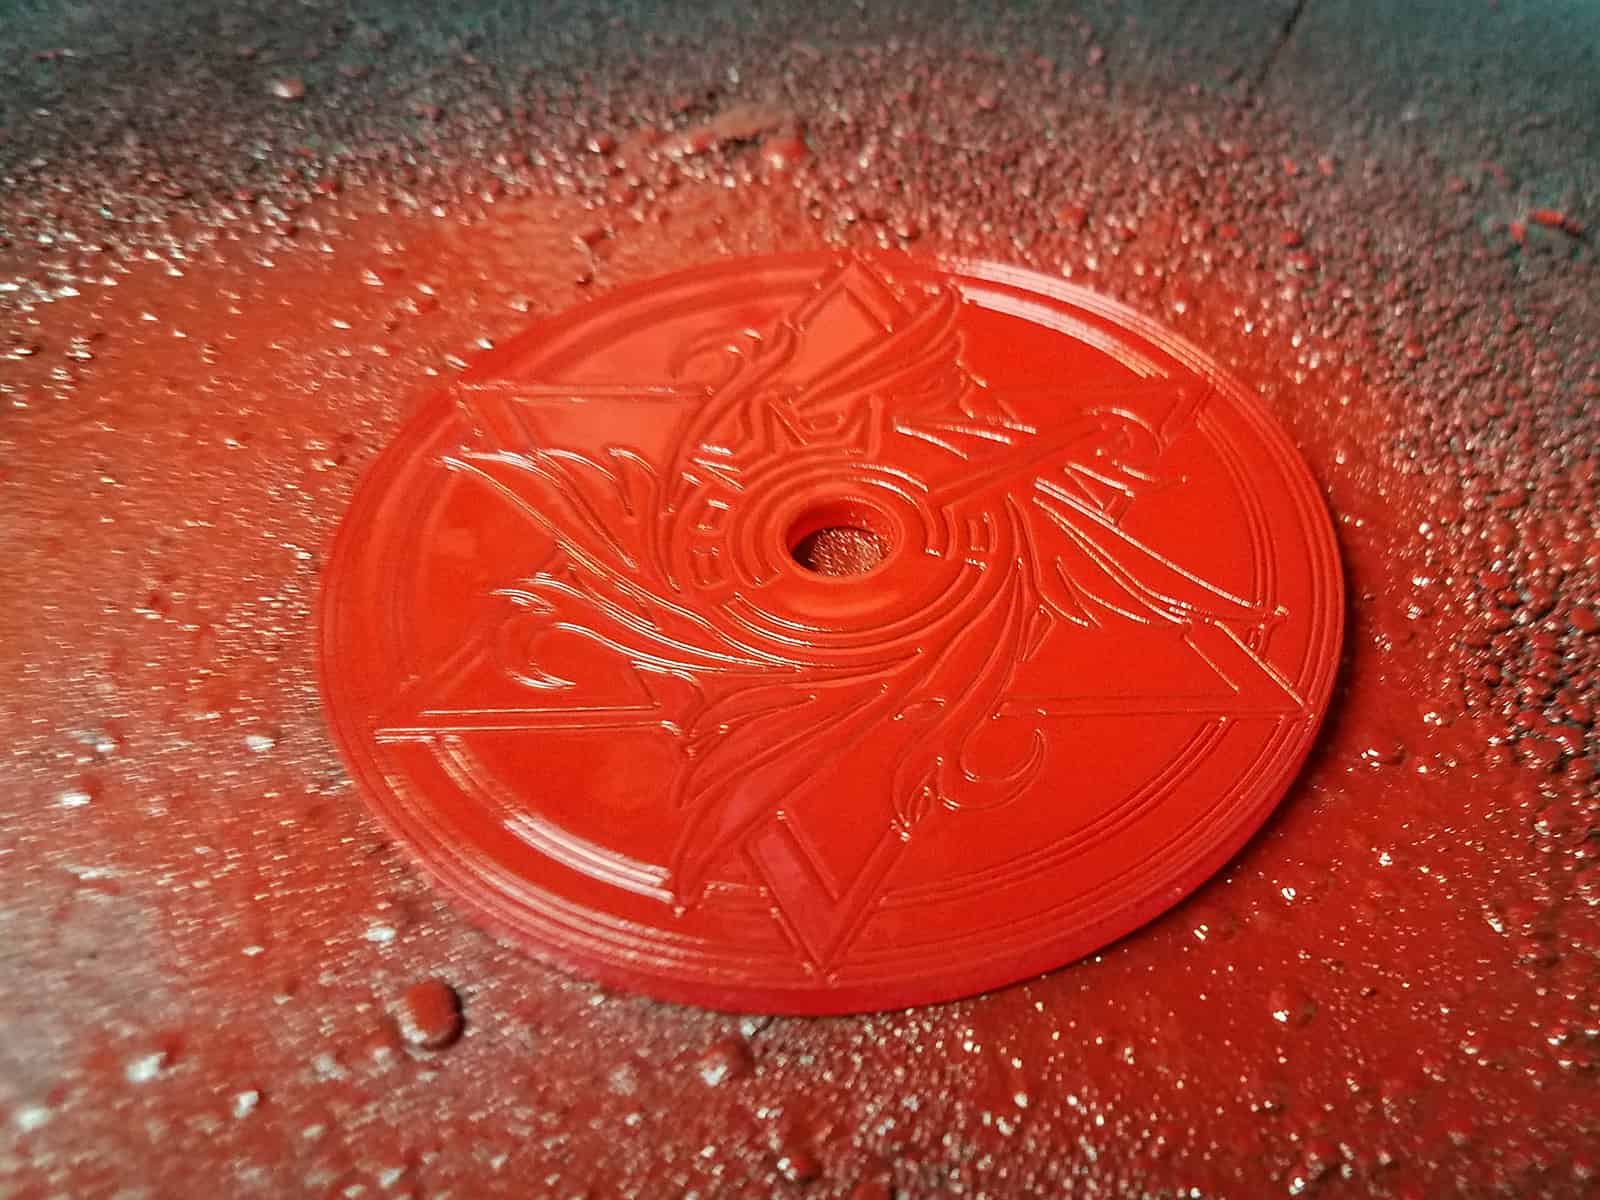
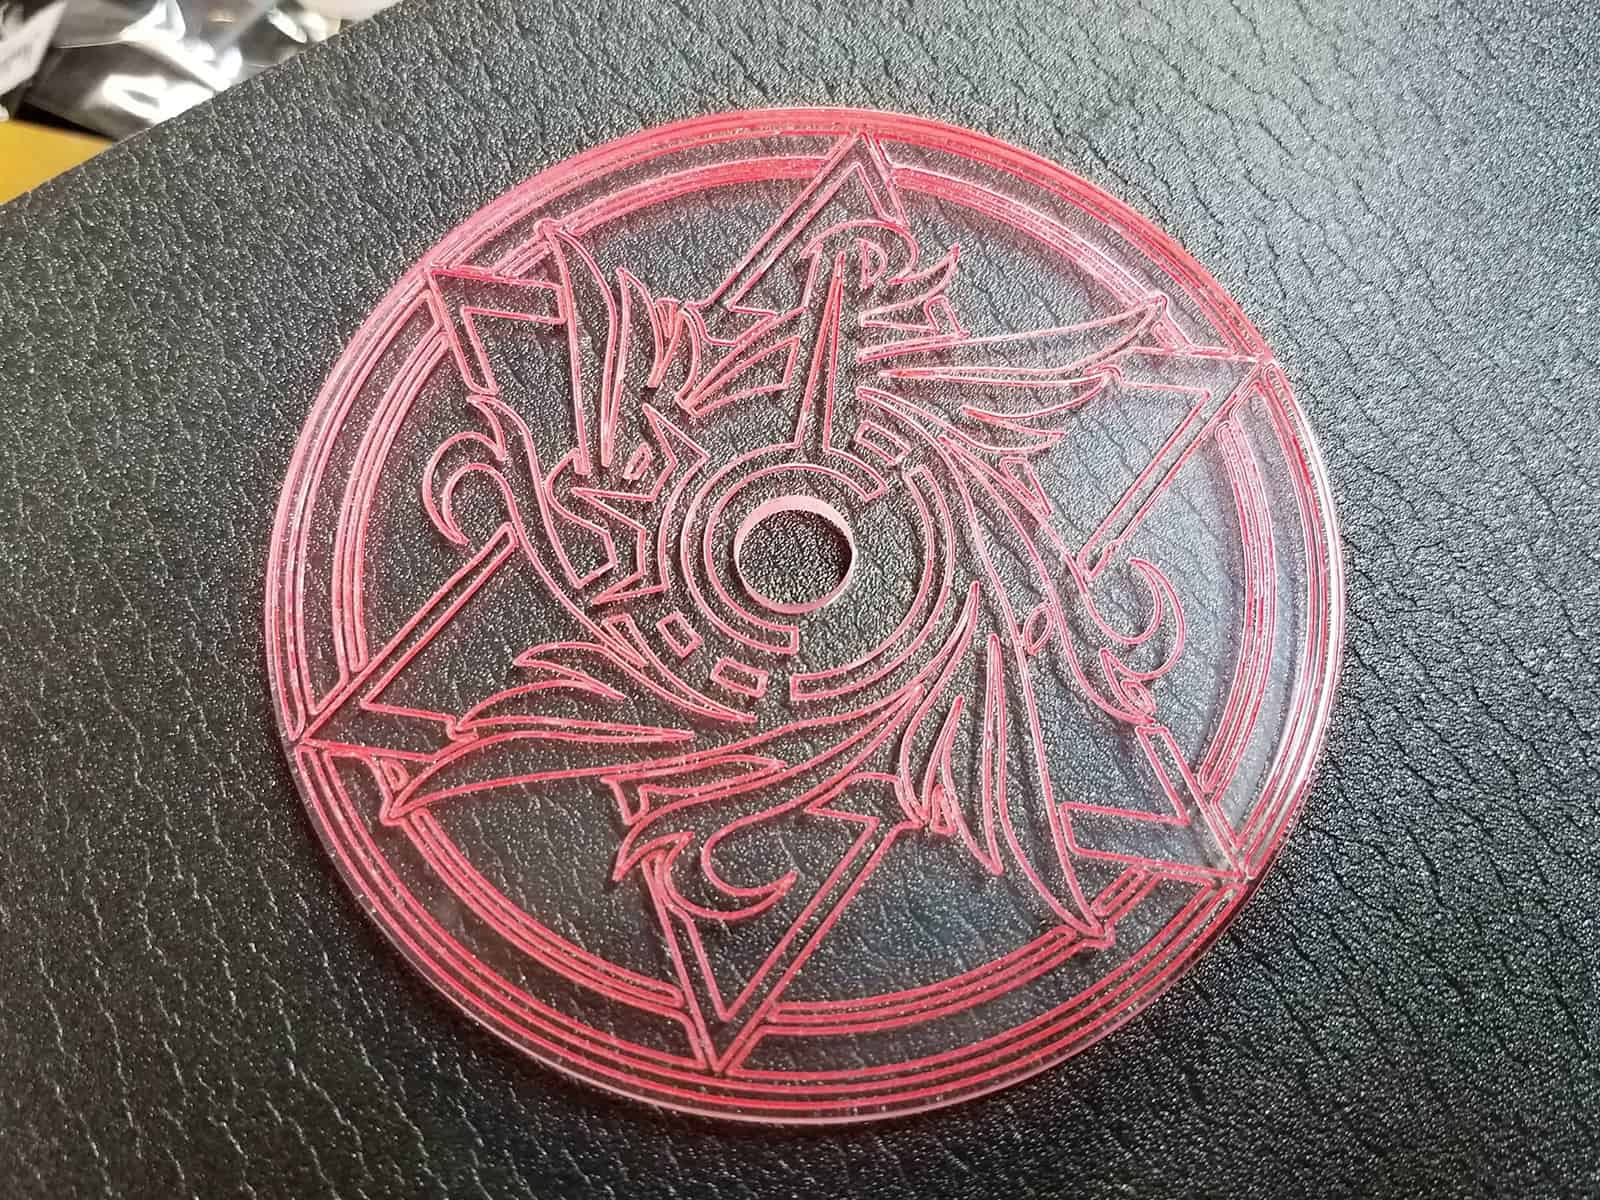
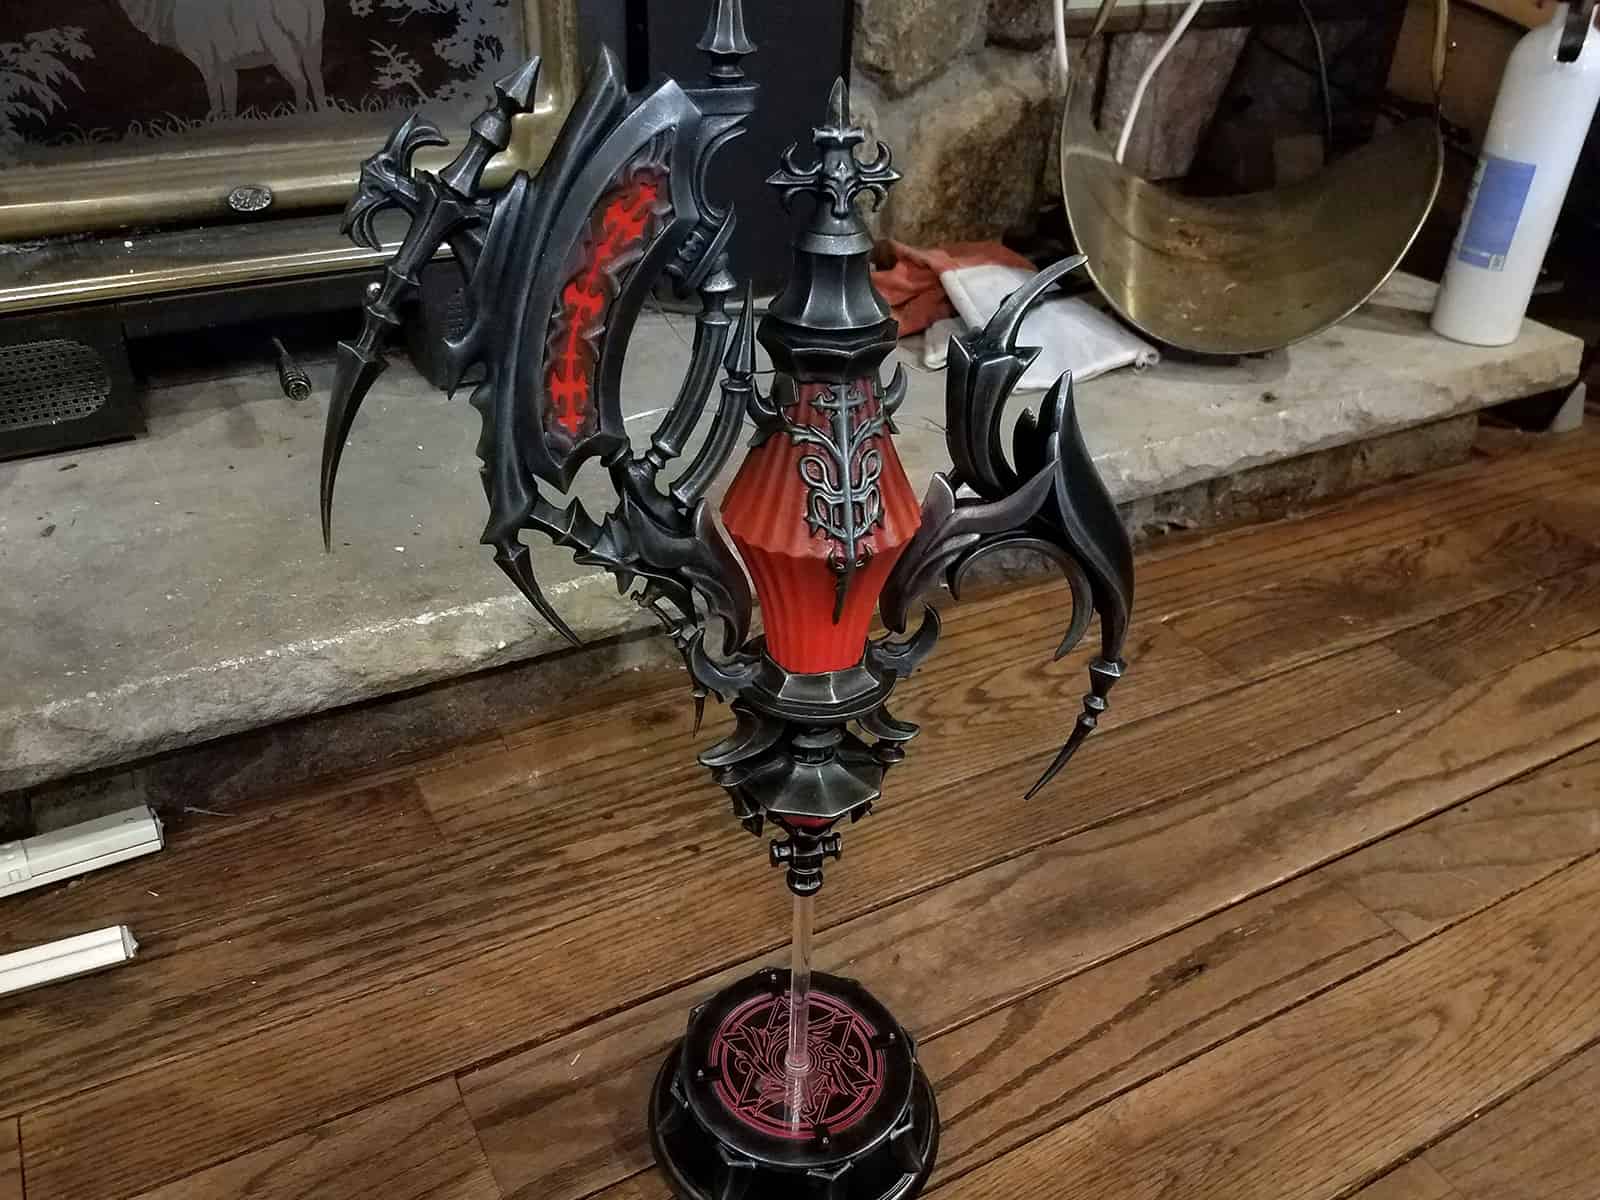
While I was lasering out the parts for the hand-hold, I had a flash of inspiration and decided that I wanted to engrave a design onto the piece that rested in the user’s palm. I figured if I did it right, I might be able to make it look like there was a magical ‘sigil’ or something being cast in your hand that was making the orb float. I dug up a symbol for the Red Mage job icon from FFXIV’s art and turned it into a more spherical design that looked a bit like magic being cast.
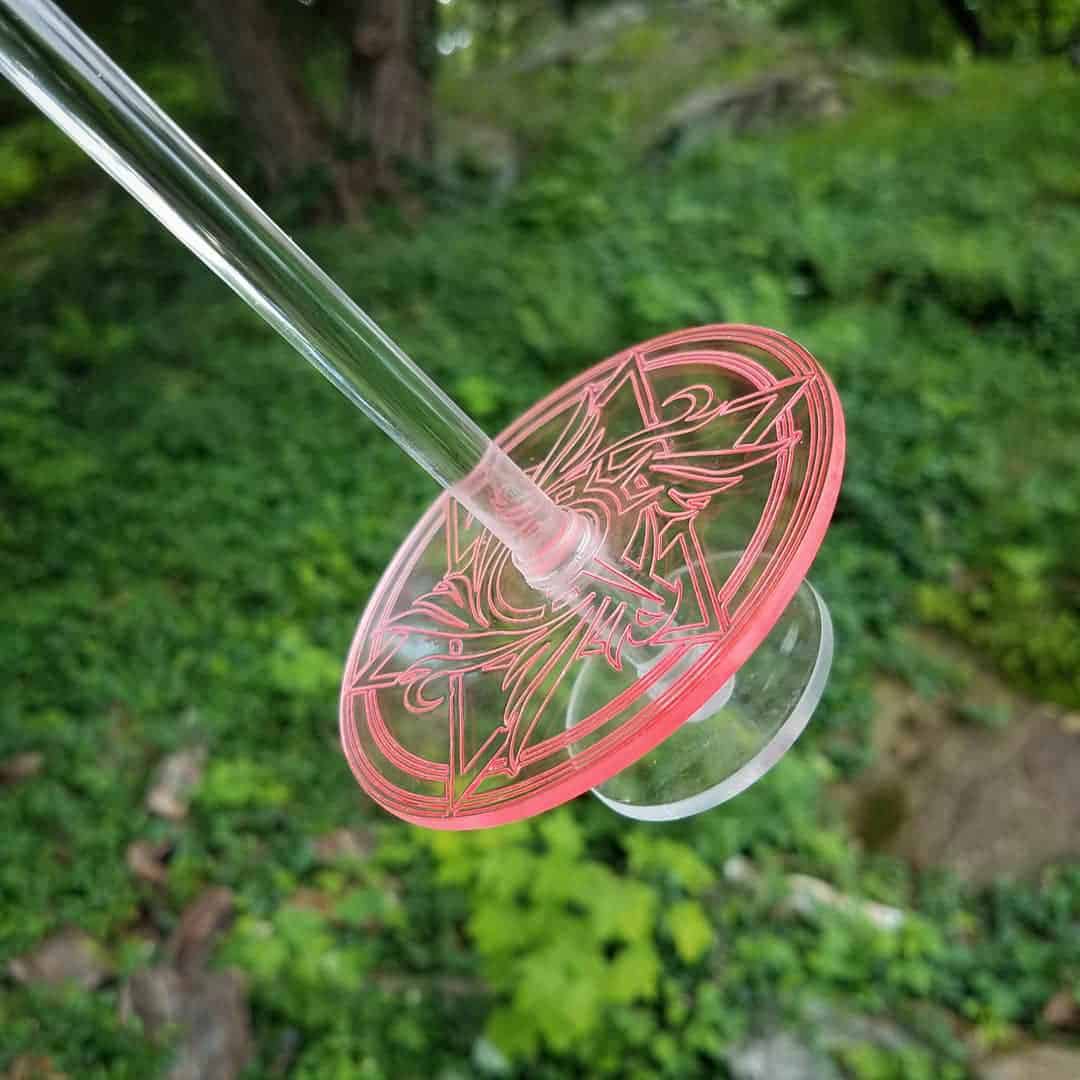
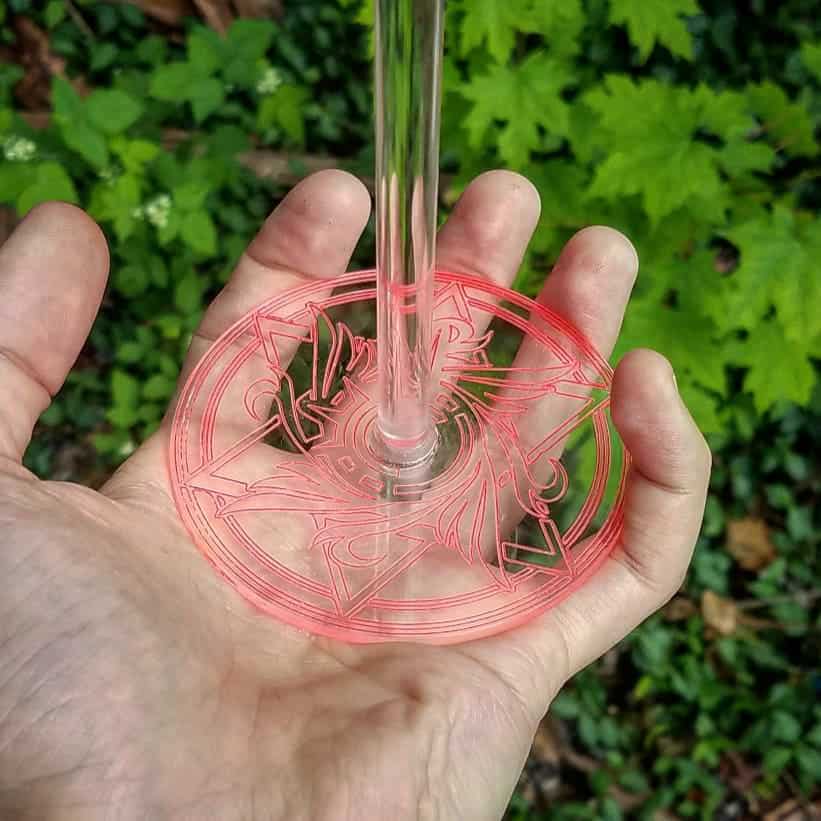
I spray-painted the engraved design with a fluorescent red and let it dry for a good, long while. Afterwards, I took a polishing kit and basically used it to strip the red paint back off all the flat areas, which left me with a clear disc that had red only in the recesses. This was mounted to a clear acrylic rod with Gorilla Clear Epoxy glue, which set up a reasonably strong hold.
I ended up adding some small rings above and below the discs on the acrylic rod and epoxying those in place, too, just to make sure there was a bit more surface area for the glue to grab onto and lock the parts into place.
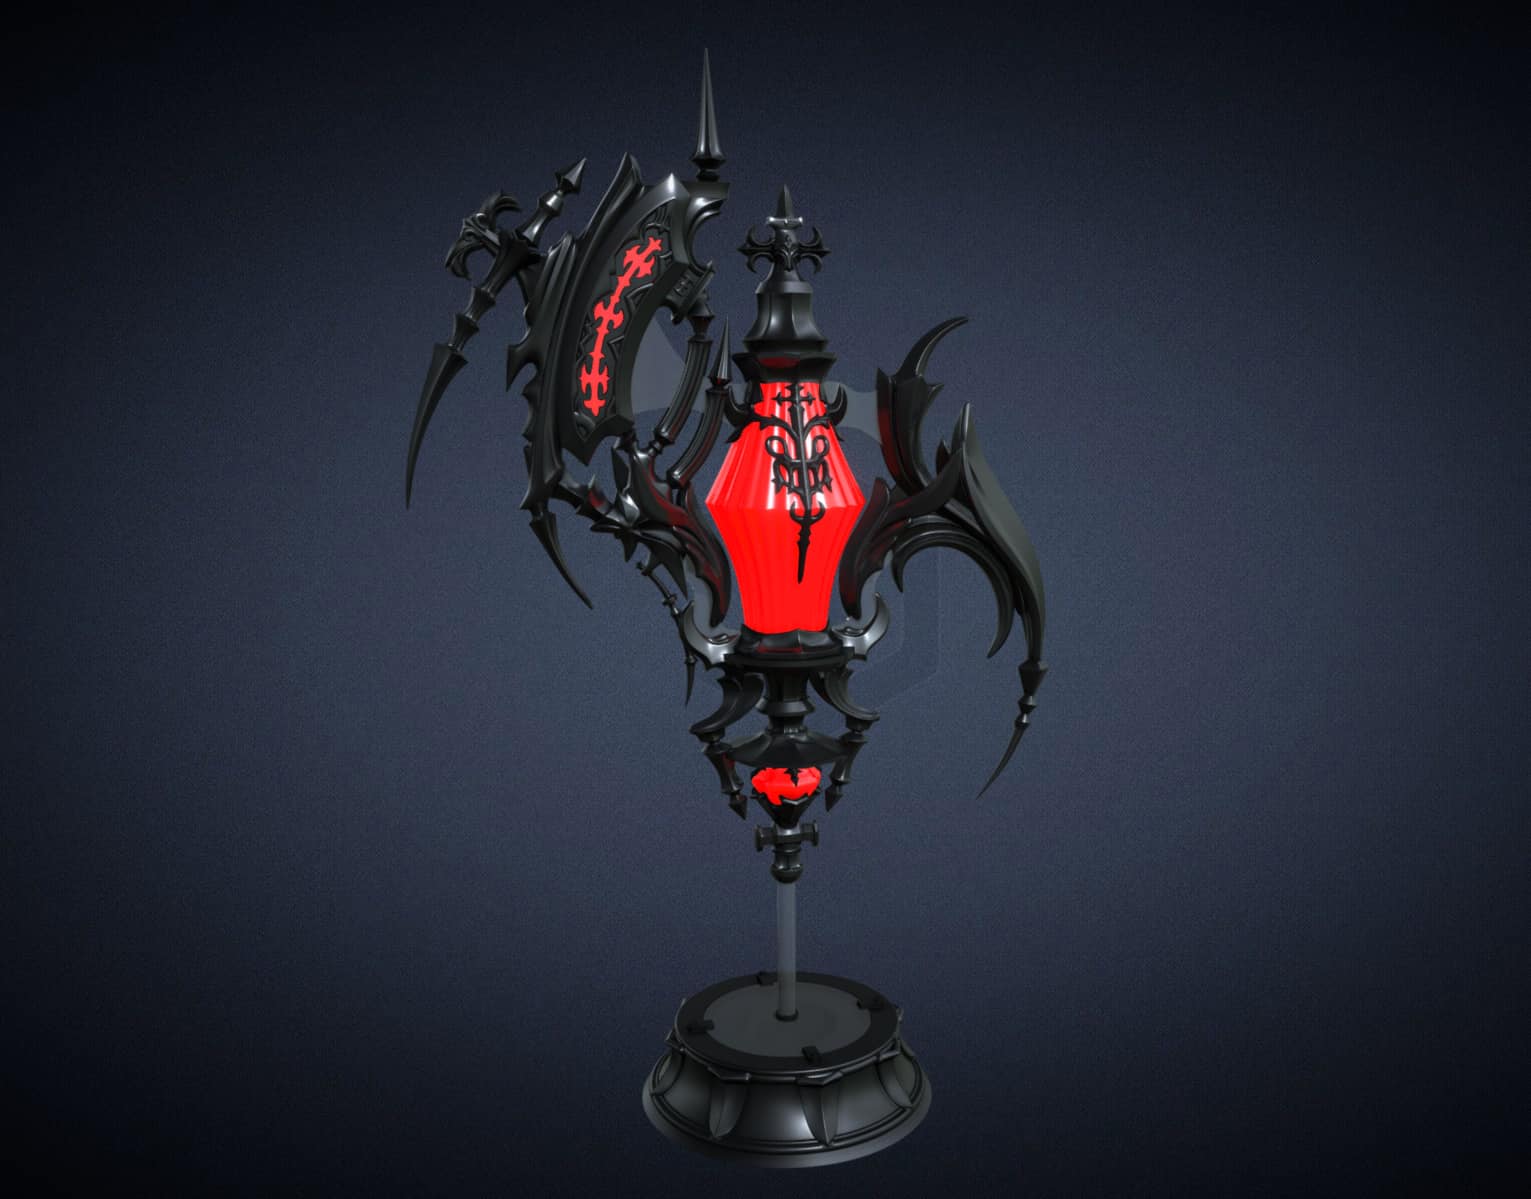
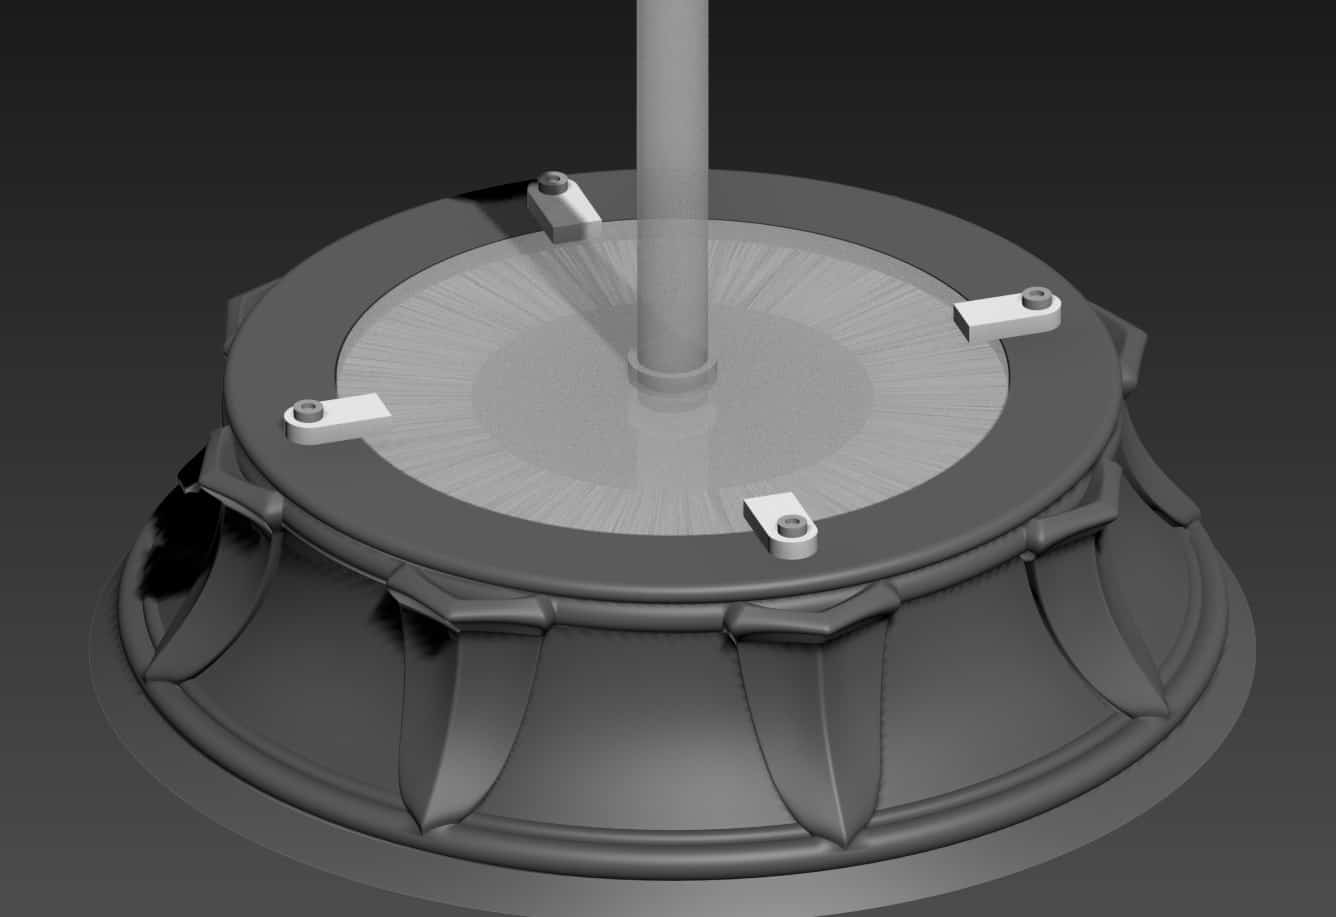
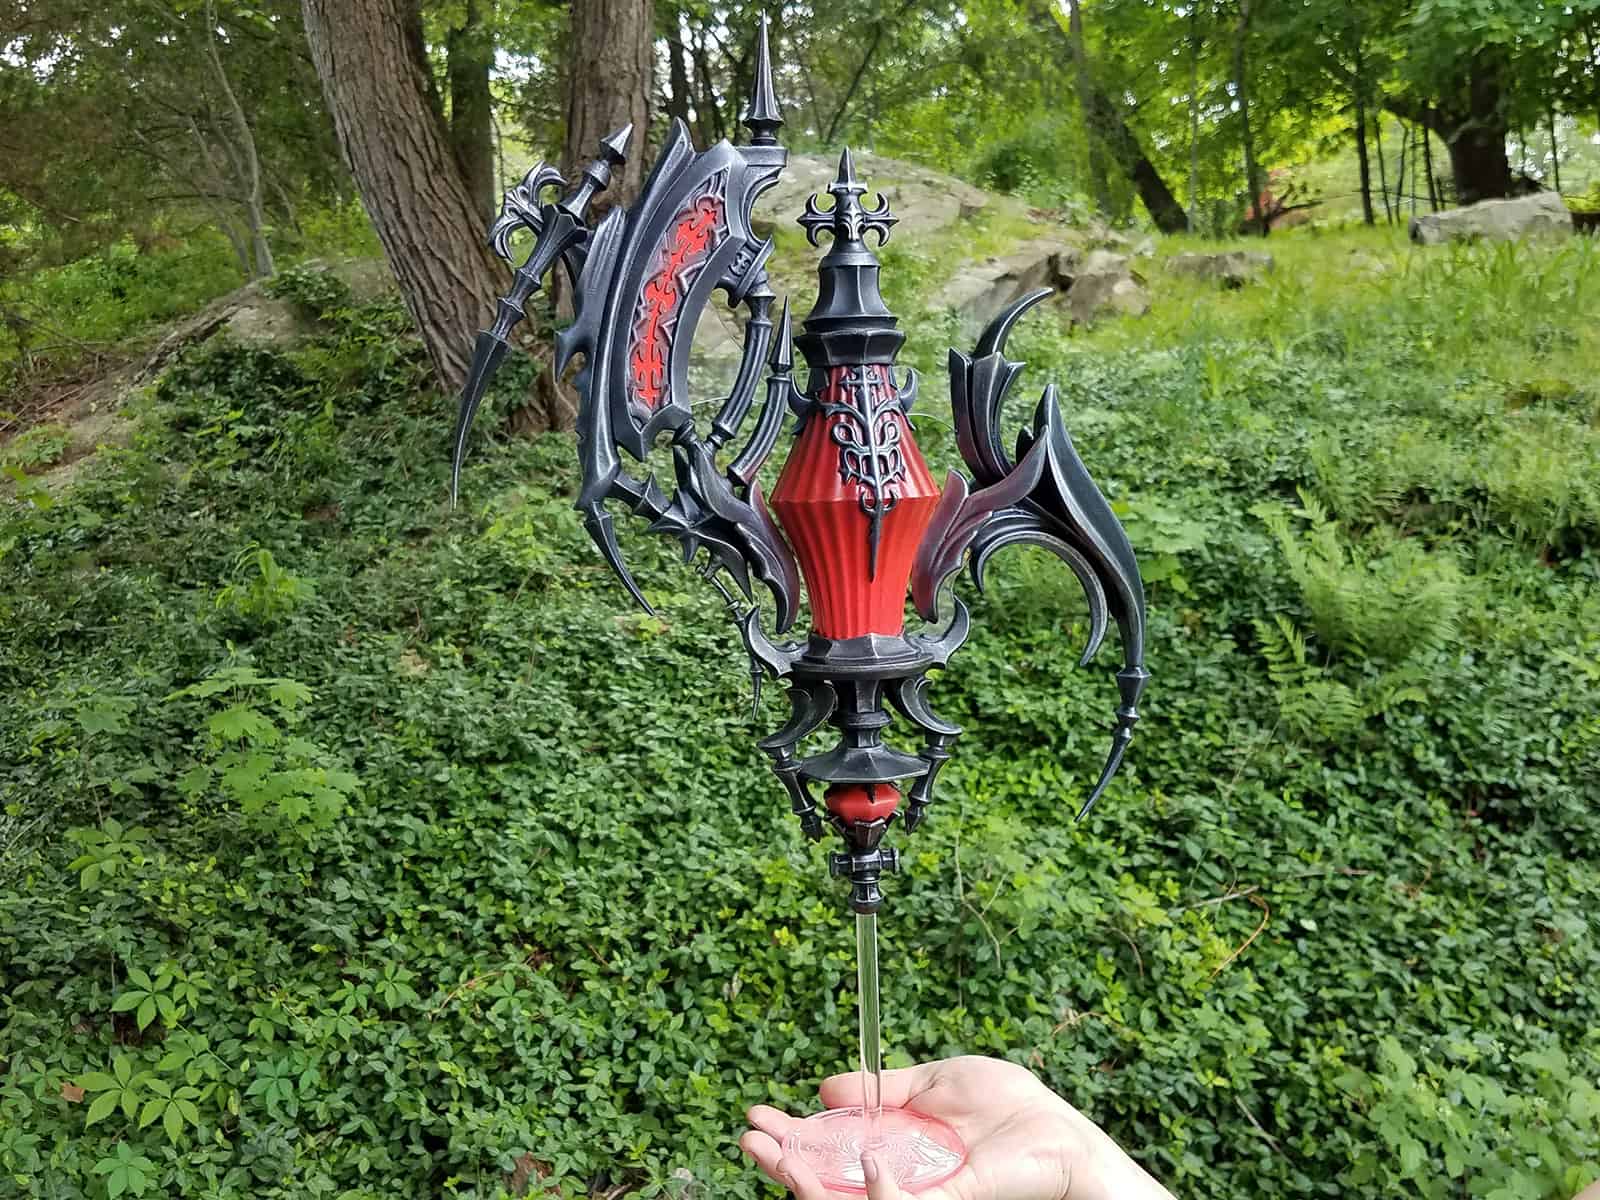
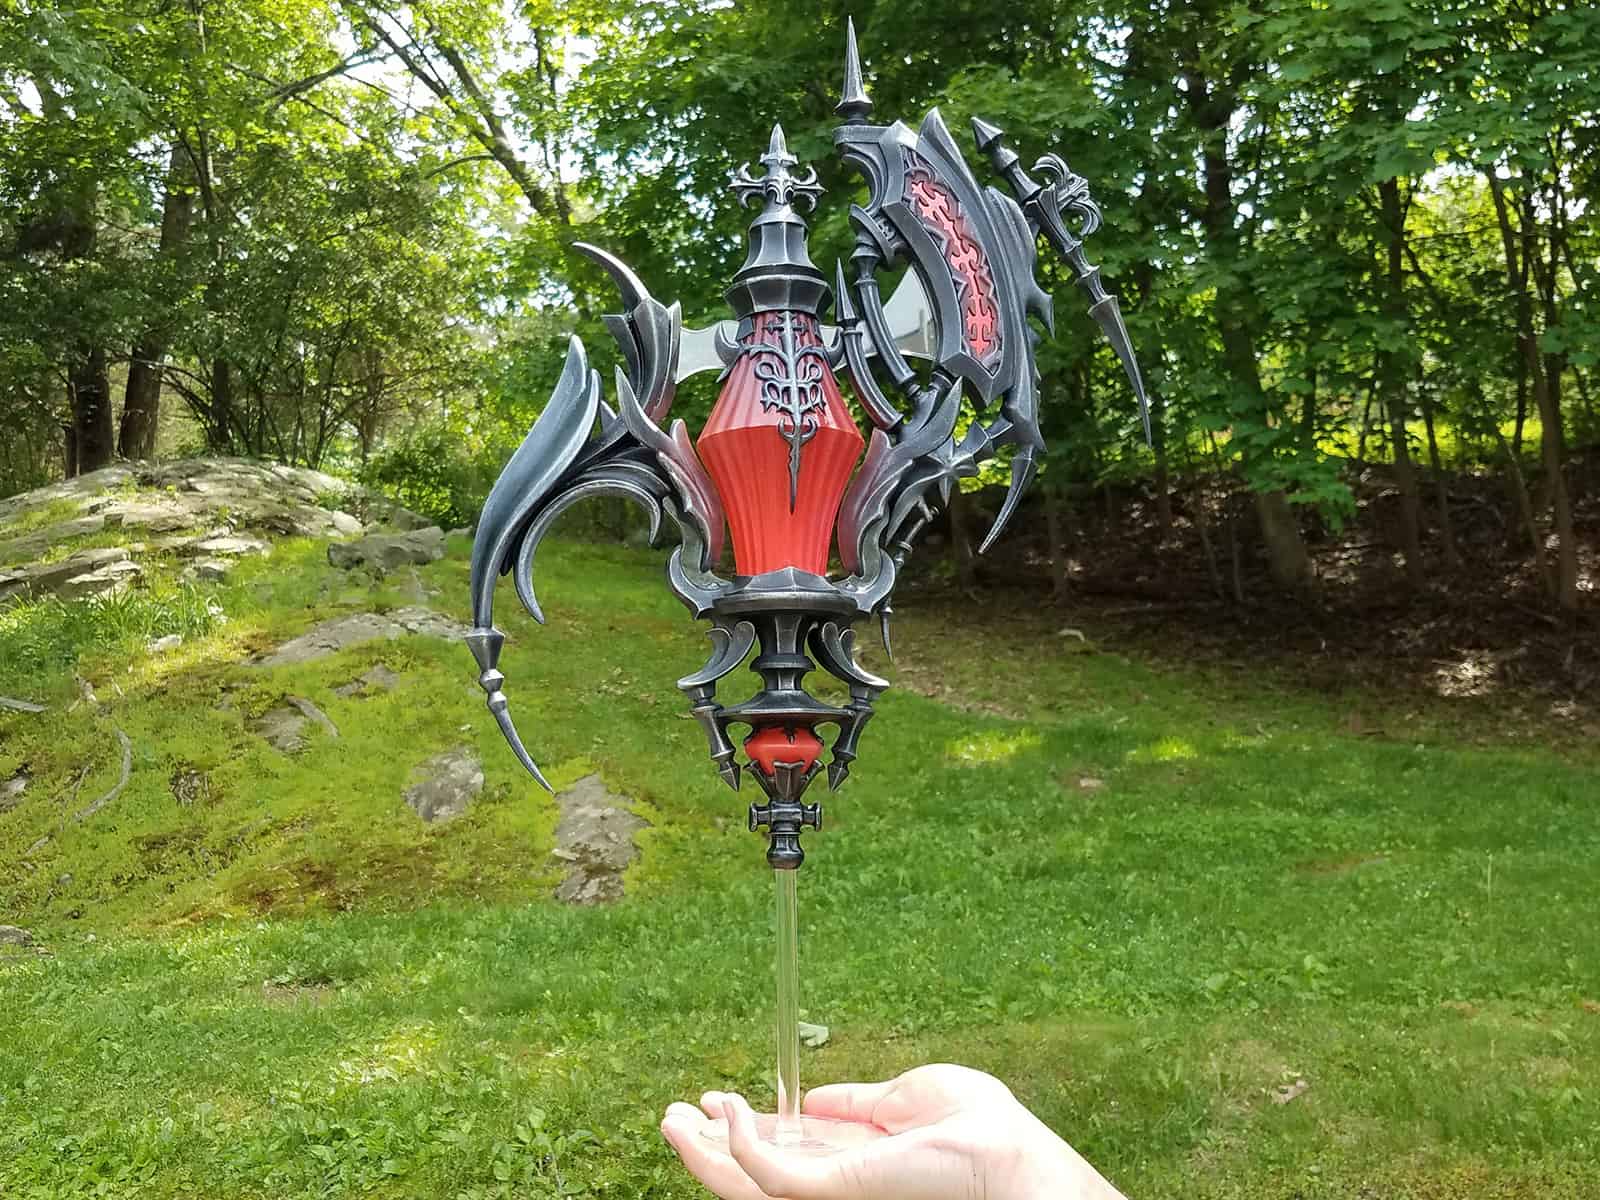
With the hand-hold done, I also went ahead and designed a display base that could socket the whole assembly and hold the focus upright in a floating position.
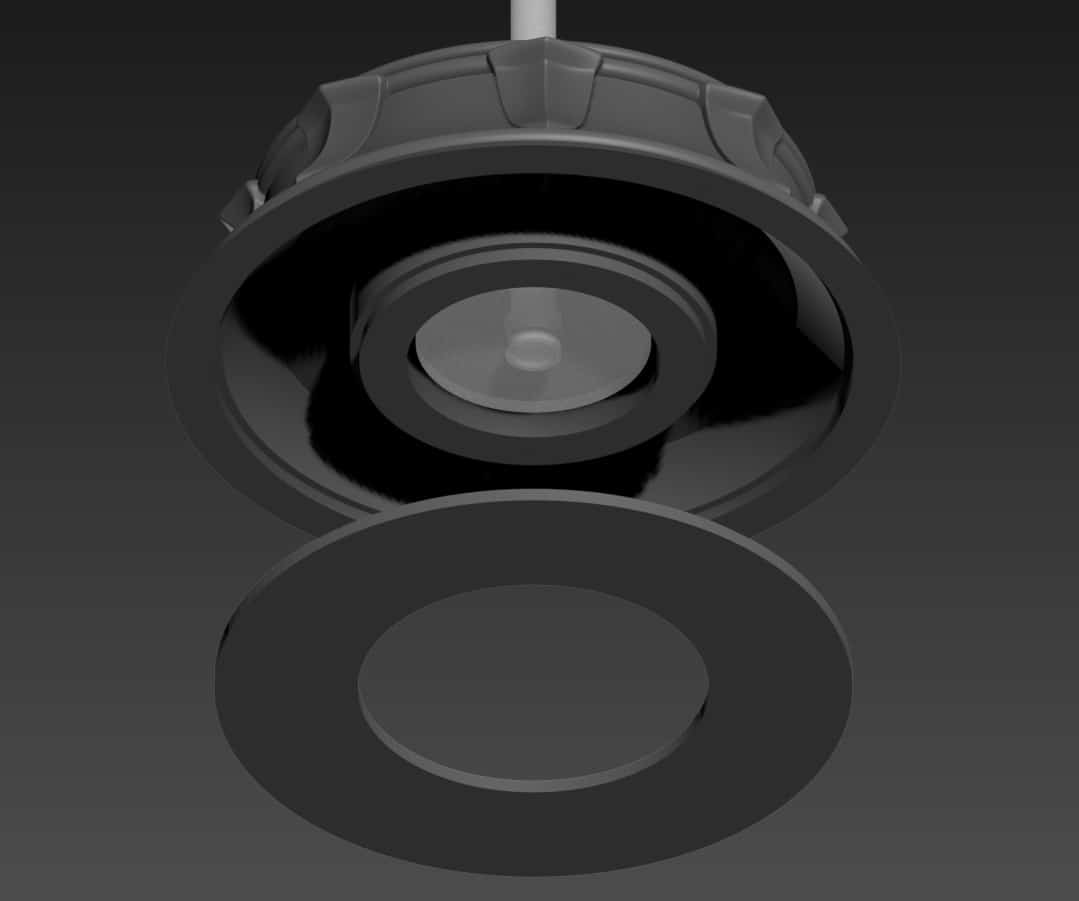
A set of tabs on the top of the base pivot 90 degrees to lock the engraved top disc down securely. I also made the bottom of the base a separate piece so that I could fill the 3D printed part in with something like lead shot to help make it heavier and weigh the base down.
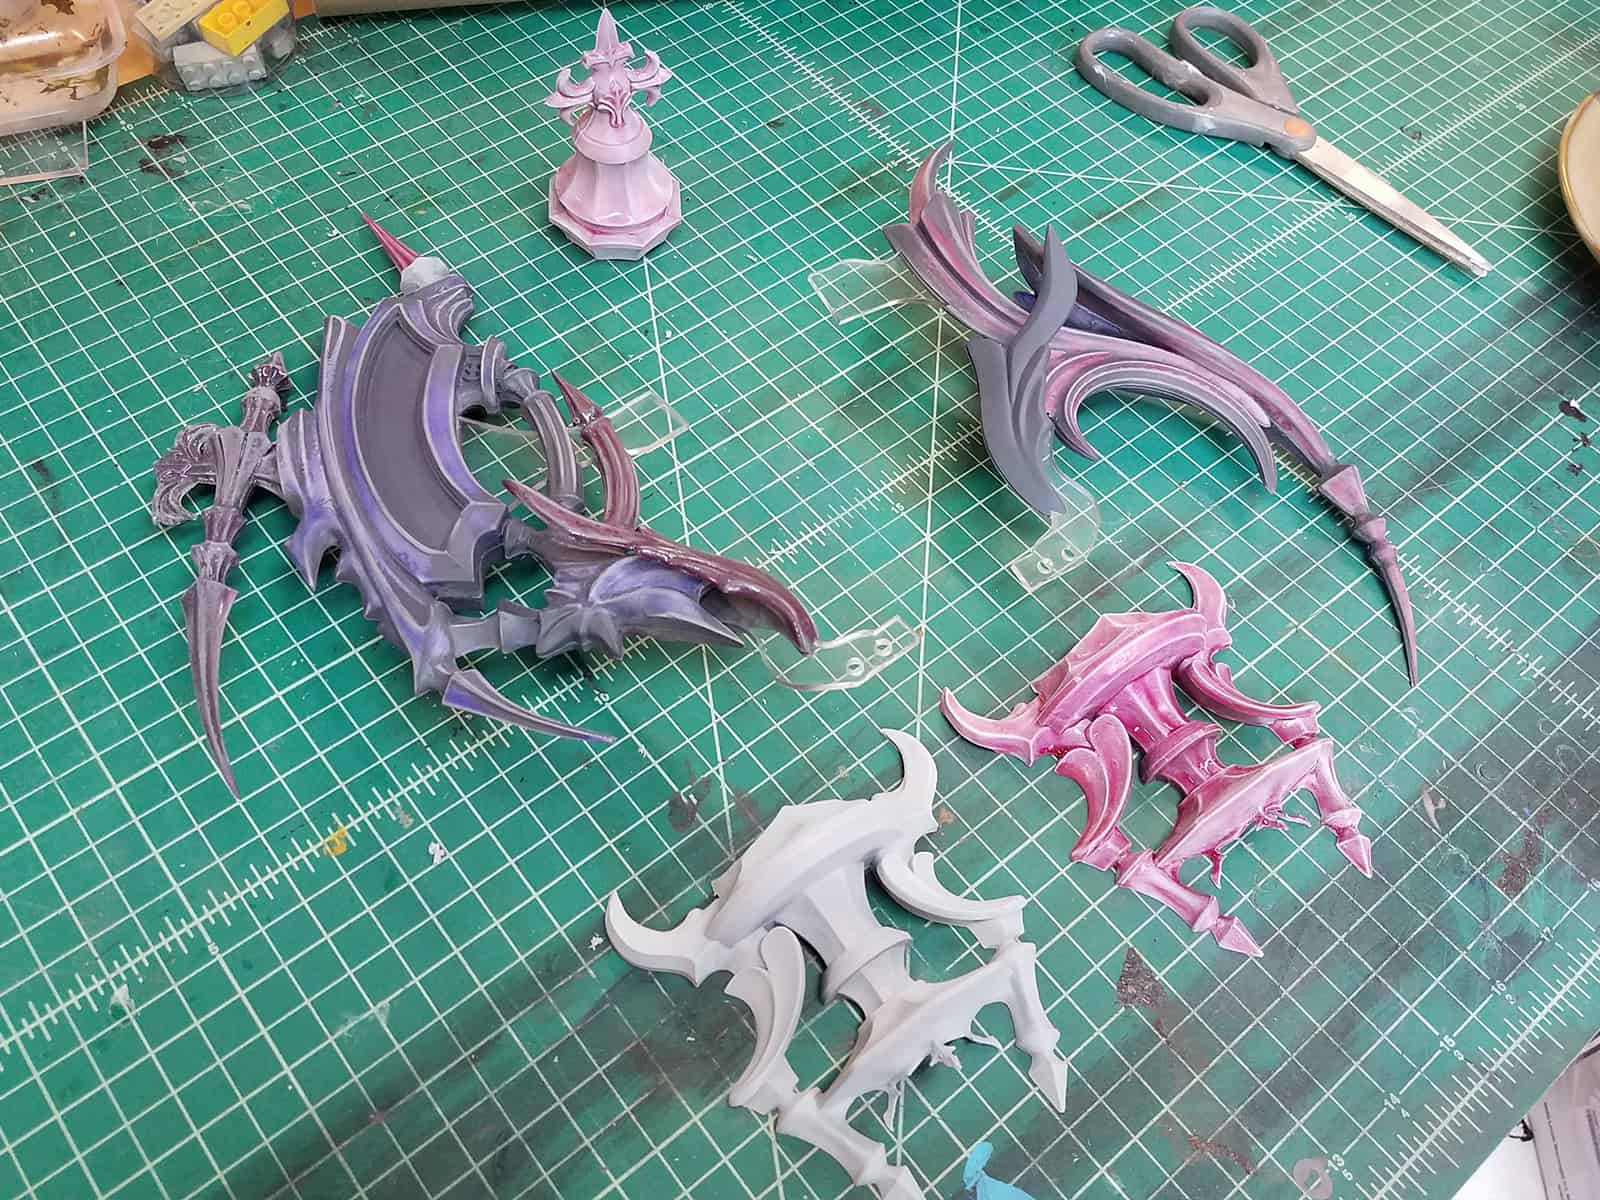
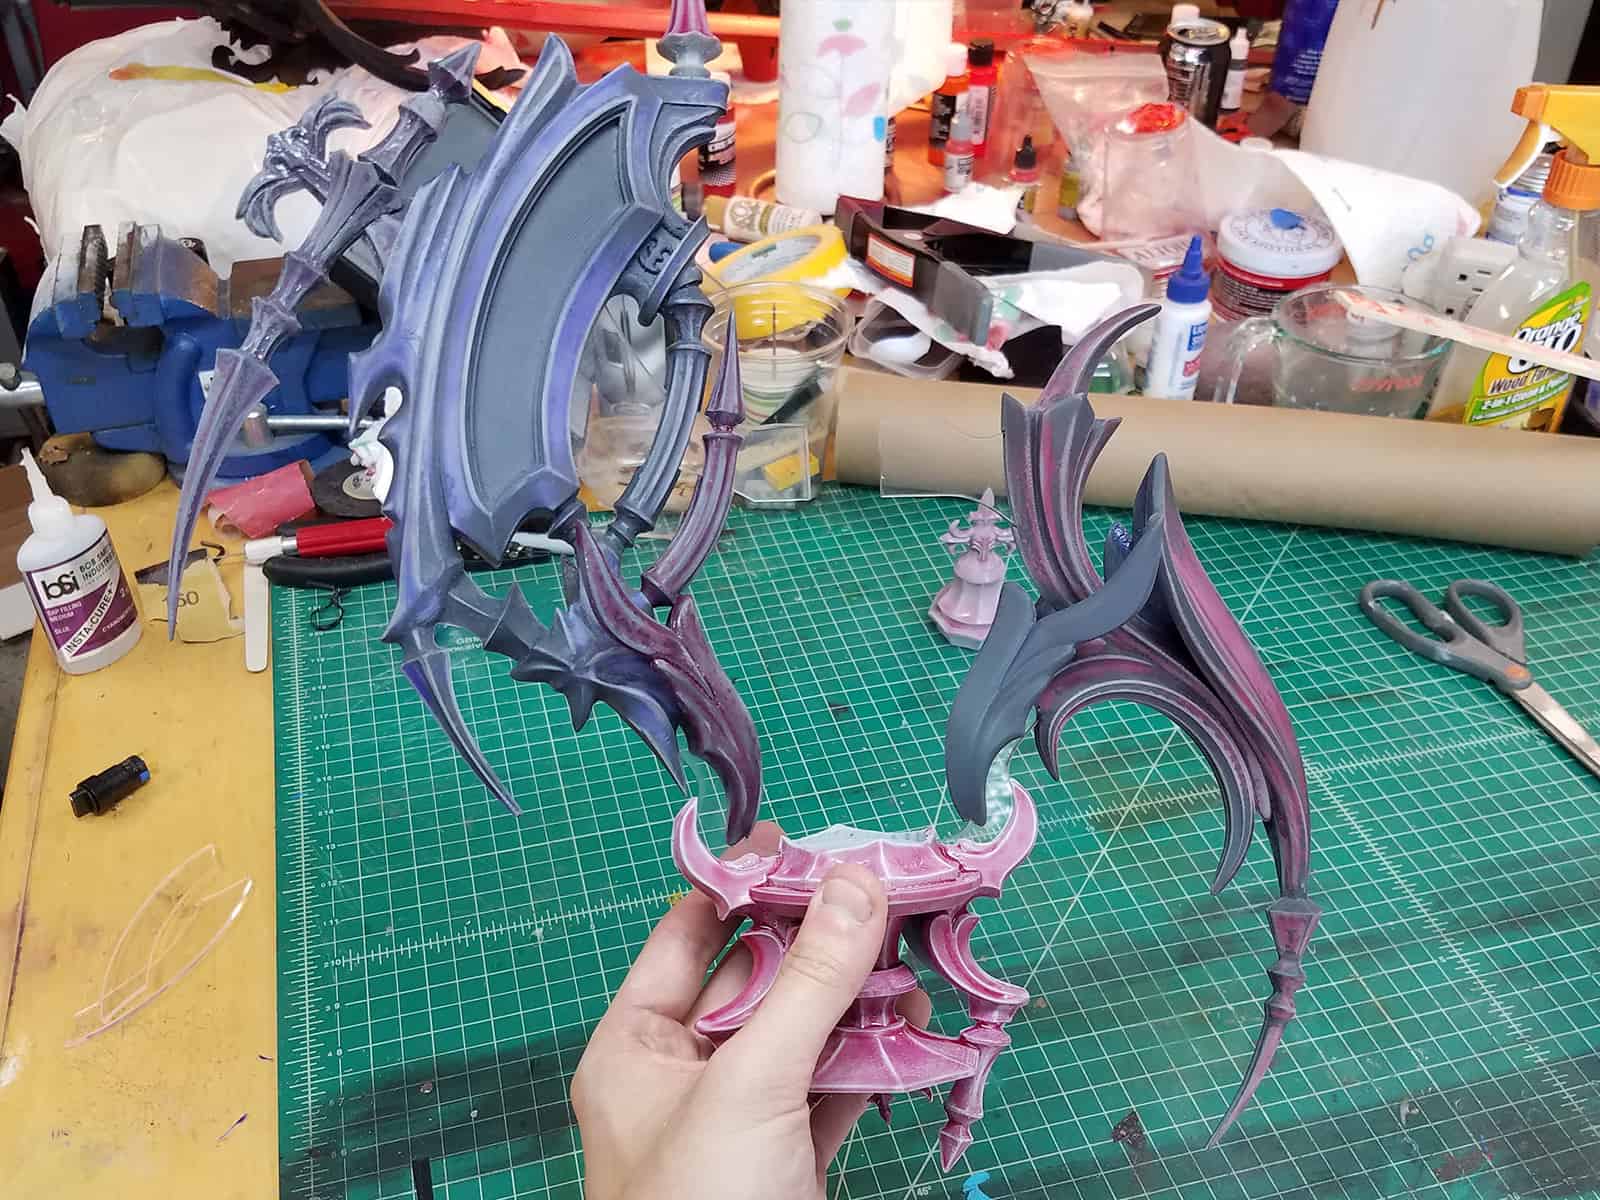
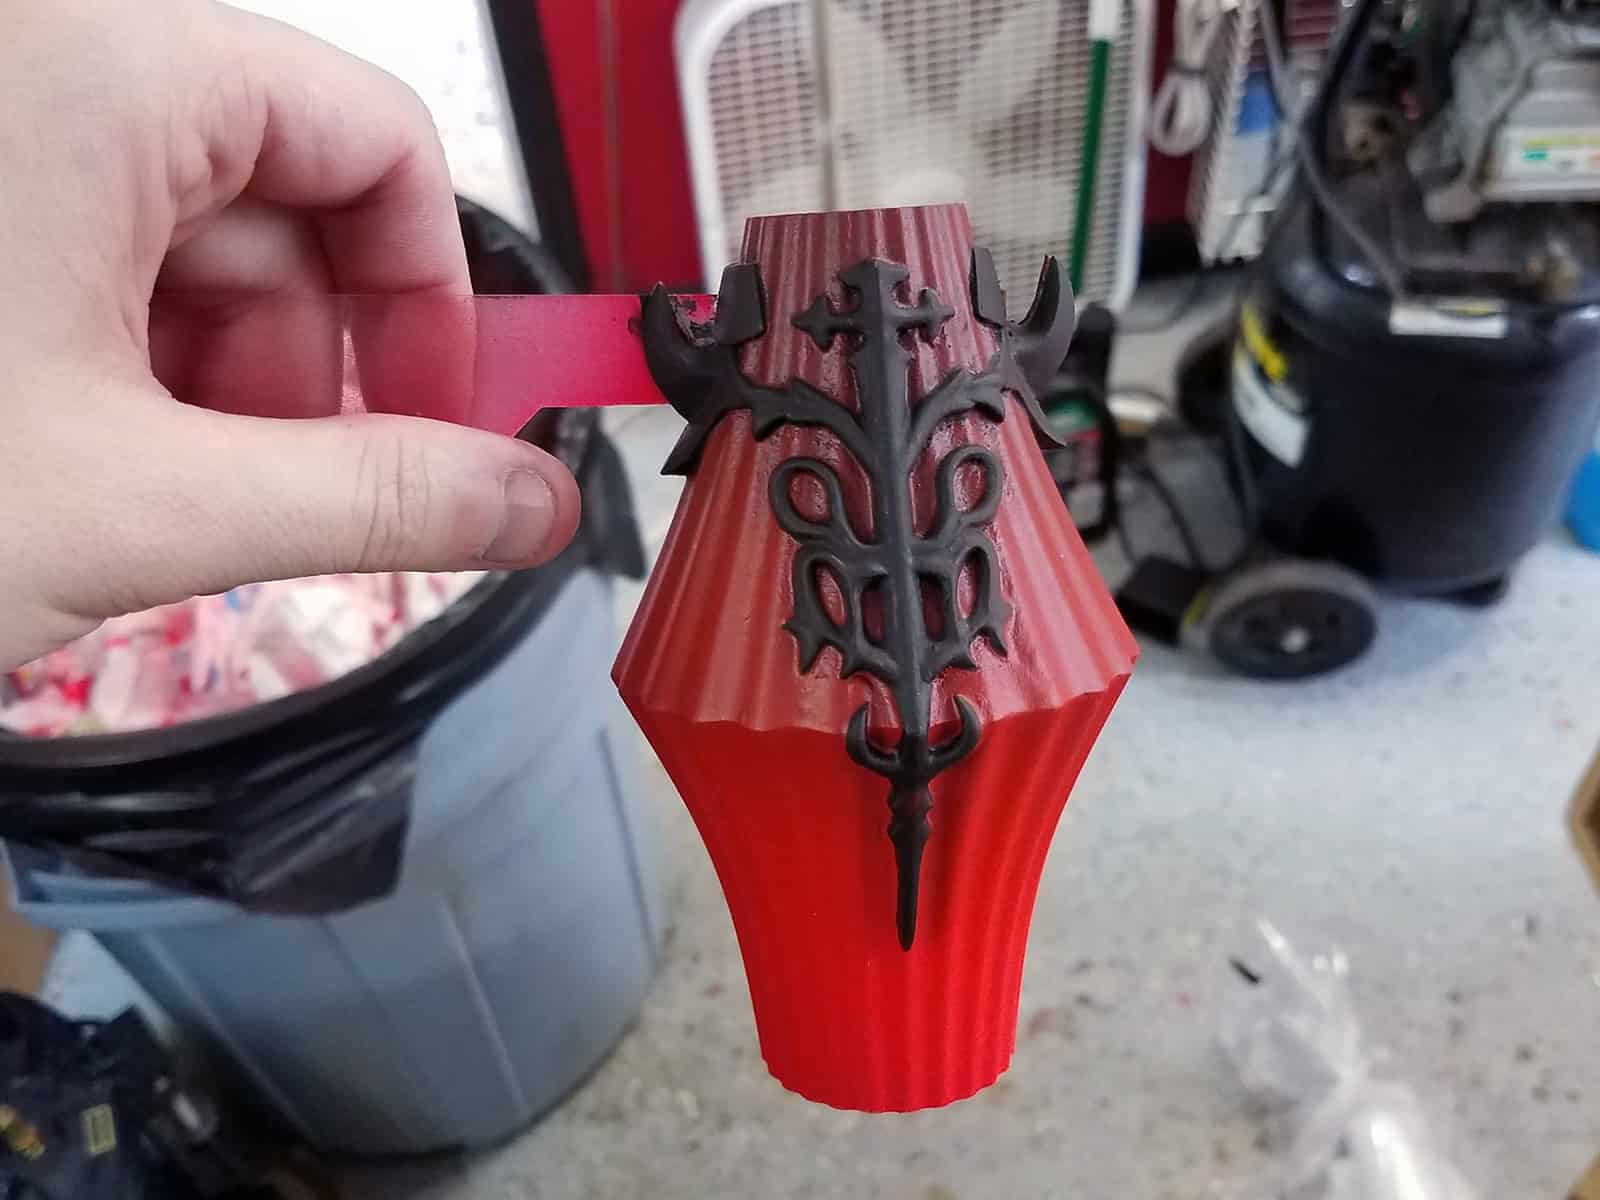
Painting the piece was pretty similar to the process of painting the Murgleis Sword. The center of the orb was airbrushed separately to get the red gradient from top-to-bottom, and then I went back in with a fine brush and painted black over all of the details on the filigree on the sides of the crystal.
The finished piece ended up looking pretty sharp, if I say so myself.
