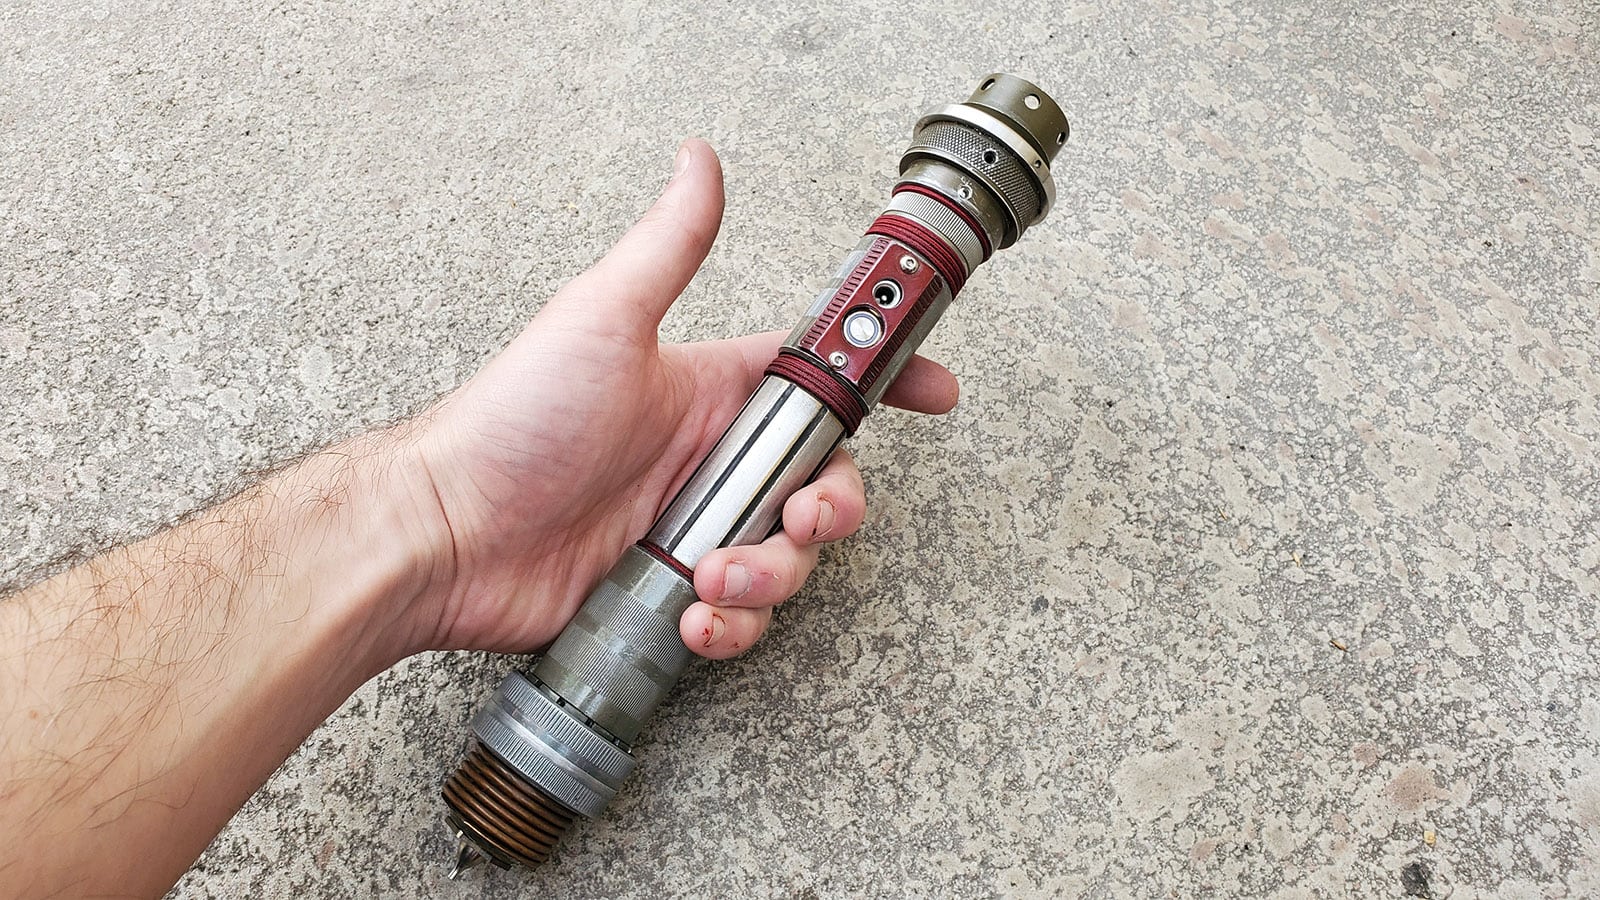
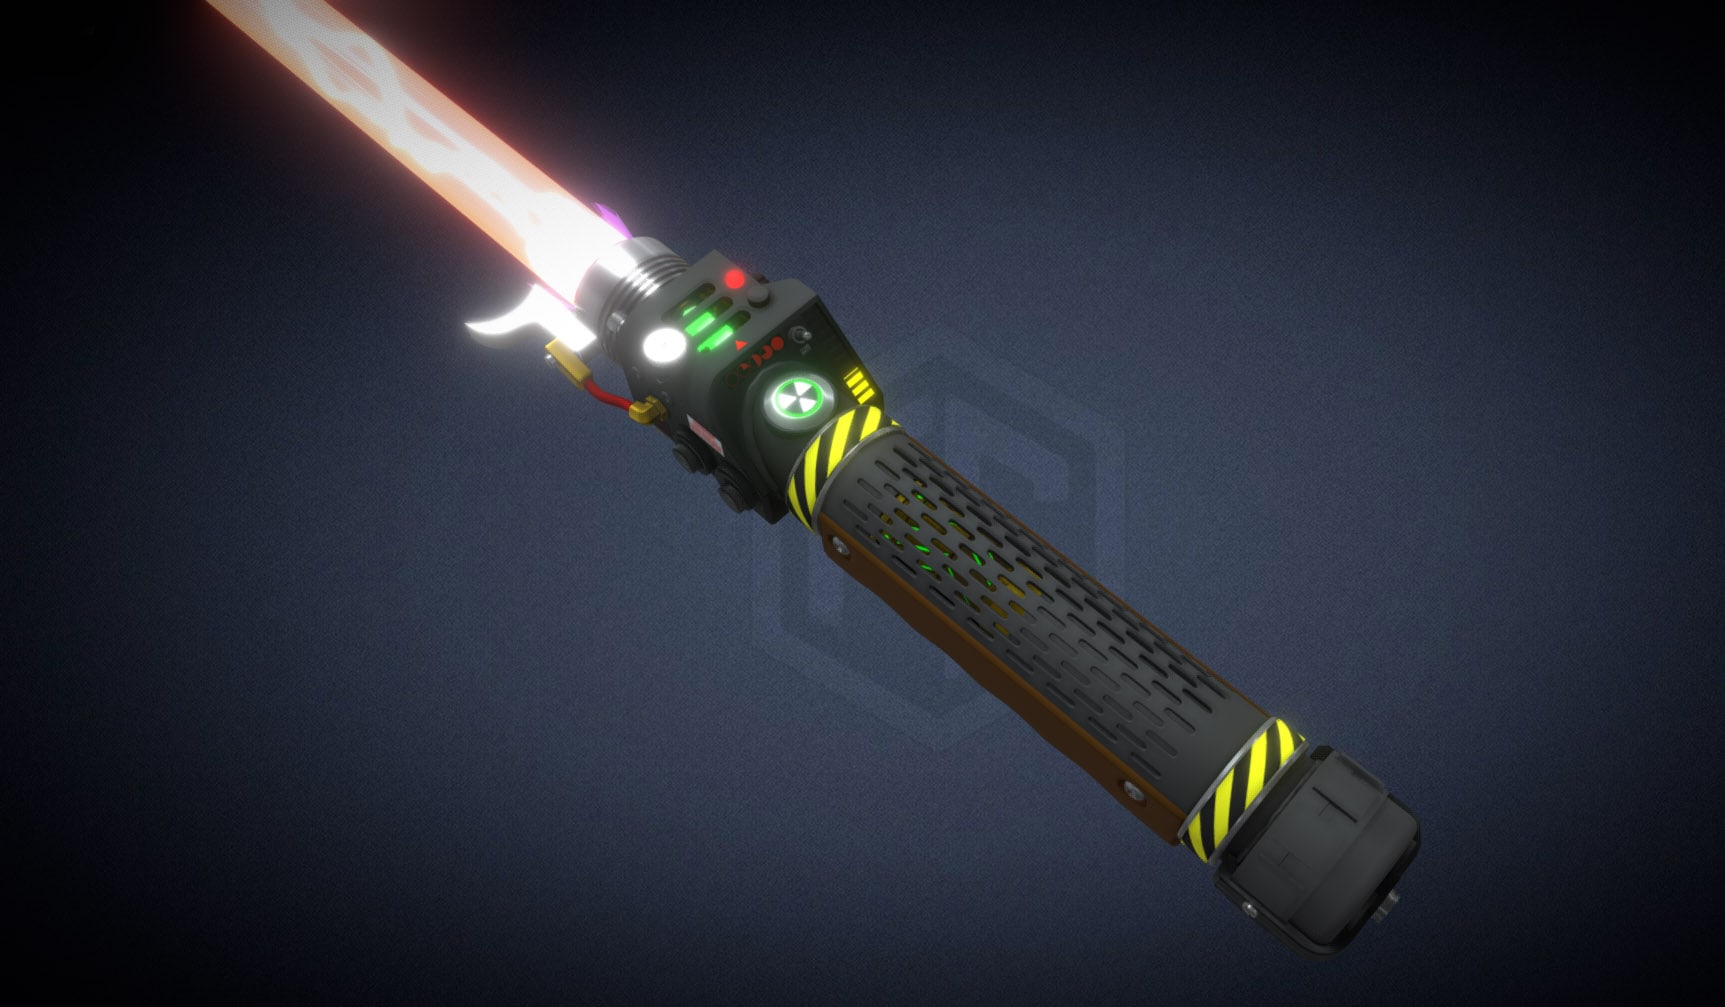
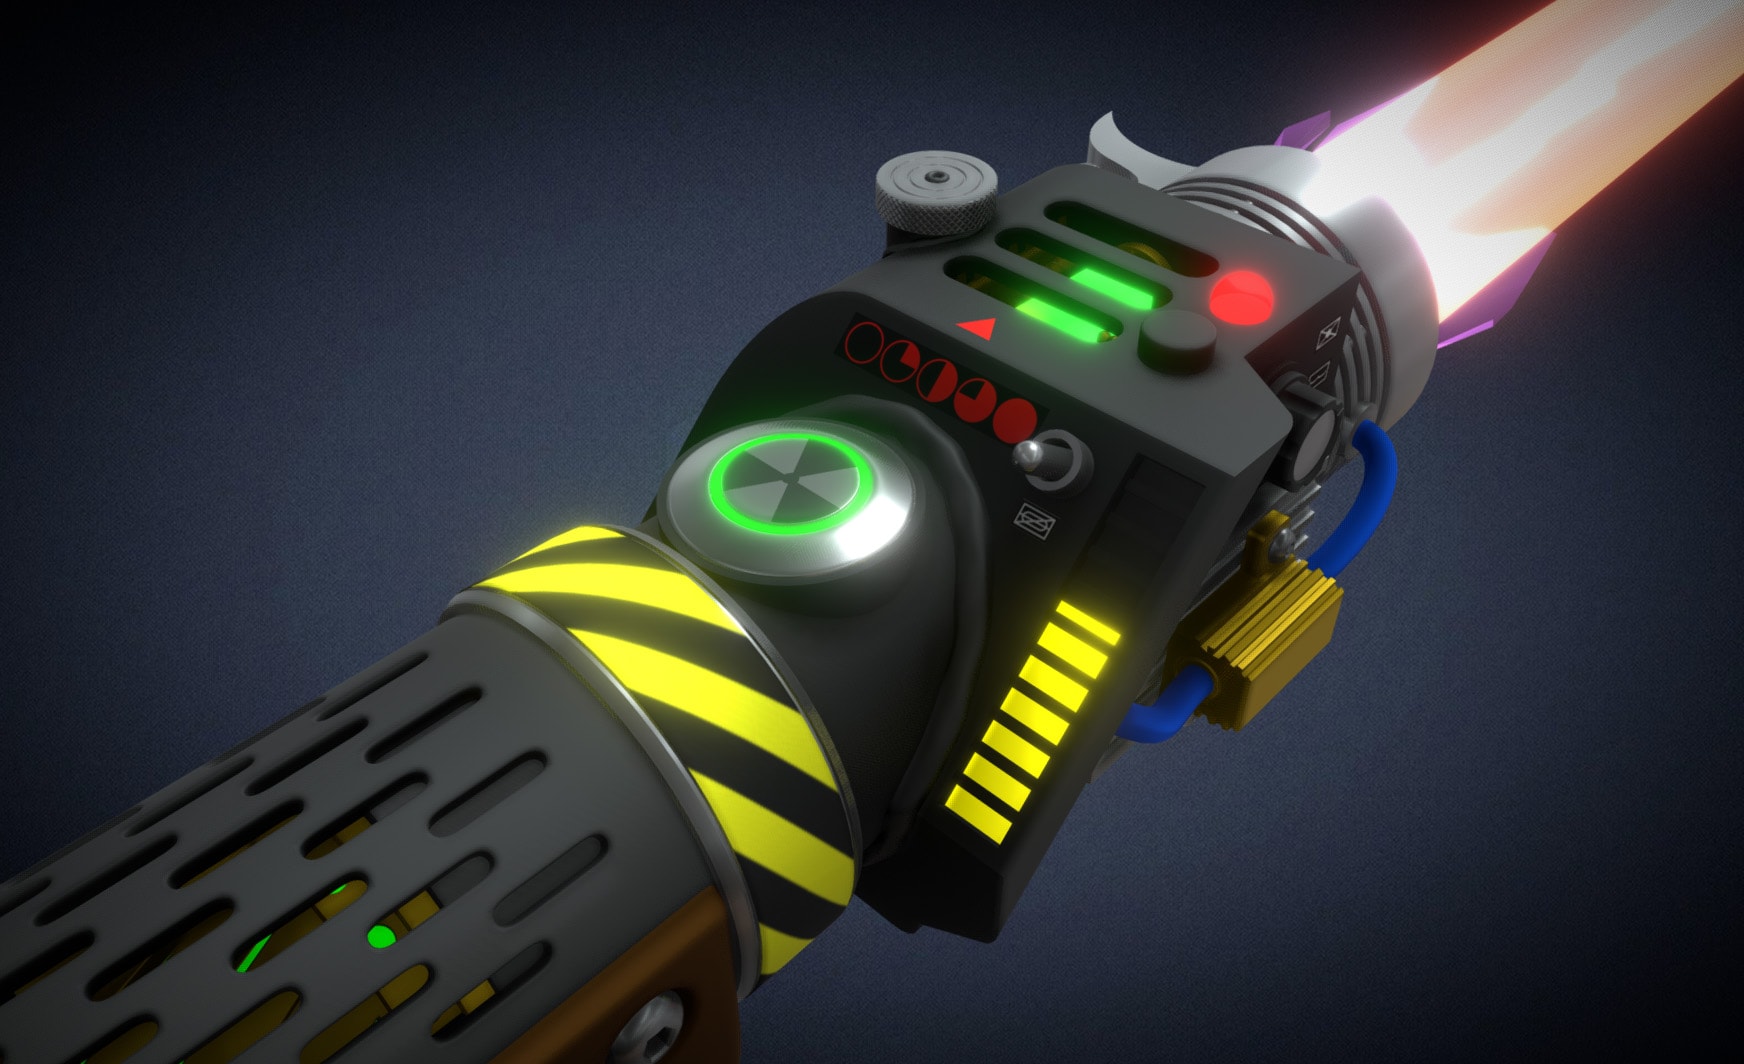
One of the details on the Ghostbusters Proton Saber I dreamt up was a bar graph that would animate on the emitter end of the handle. I initially figured I could find LED strip lighting that could make that element work, but once I started getting into the nuts and bolts of designing the handle I realized there just wasn’t enough space. Even the most densely-packed LED strip lighting would only be able to get 3 or 4 LEDs into that space, and even then it was a bit too tight. I looked long and hard for an off-the-shelf solution, but nothing was really a good fit.
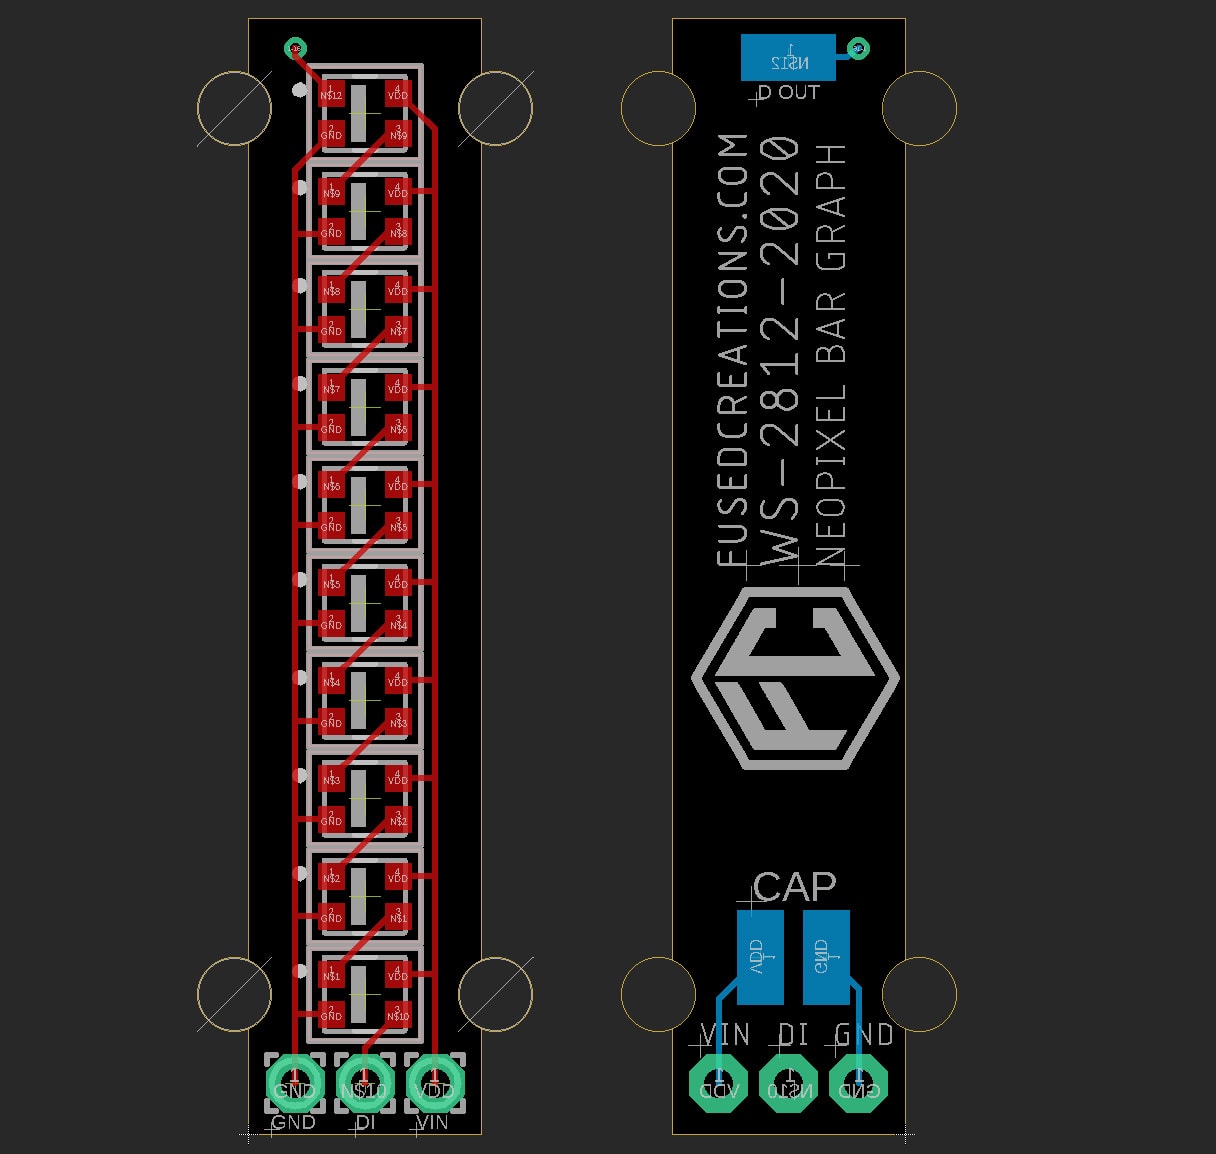
Fortunately, I worked out a bit of a solution once I discovered that the WS2812 LEDs (aka Neopixels) that reside on those strips have an even smaller cousin – the WS2812-2020. These things are super tiny, clocking in at 2mm x 2mm, which is perfect for when you’re trying to fit ten LEDs into about an inch worth of space. Most importantly, they’re still addressable, which means I don’t have to do any kind of complicated Charlieplexing to turn them on in sequence.
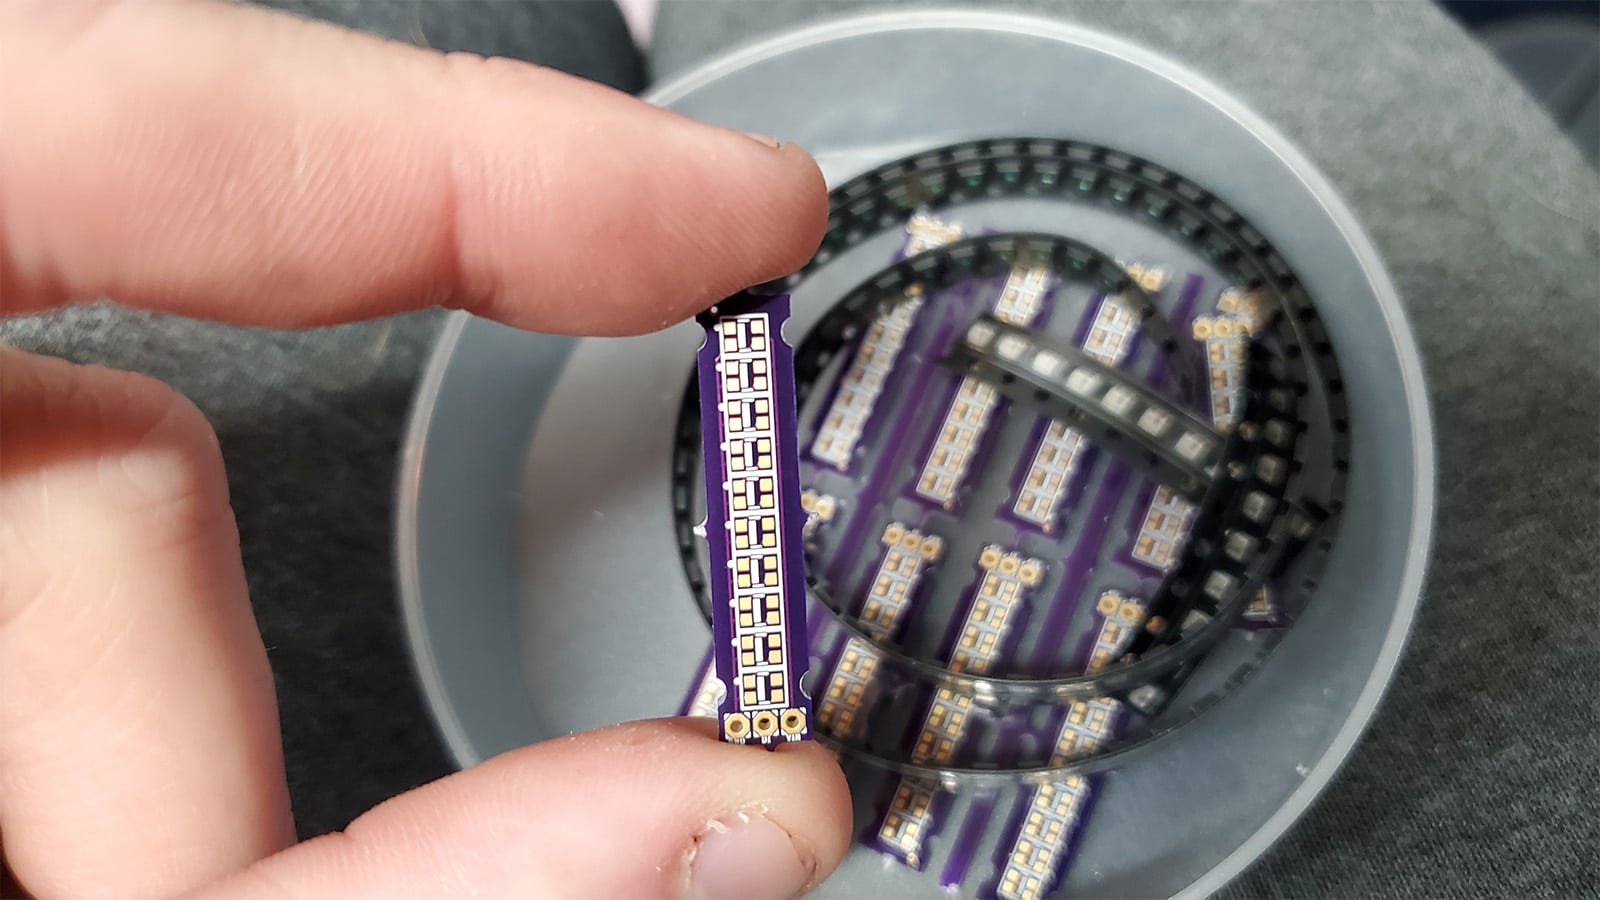
The downside to this solution is that I was going to have to make my own circuit boards (PCBs) to mount them on if I really wanted to get anywhere with them. The last project I really did that for was my Blade Runner Voight-Kampff Scanner, but fortunately this is a much more basic design. After a bit of time working with Eagle, I whipped up a board that looked promising.
I added footprints for 10 of the WS2812-2020 LEDs and made sure that the data-in/data-out pins were chained down the length of the board so they’d be addressable just as your standard Neopixel strip is. On the back, I put solder pads for a capacitor just in case I found it was necessary – it probably won’t make much of a difference, but it’s recommended under best practices, so I figured it couldn’t hurt. I also added a solder pad on the back at the top end that was hooked into the data-out pin of the last LED just in case I ever wanted to chain these or use them in another project. I also drilled some small arcs out on the empty sides of the board design so I could line it up to matching posts on my design, which means I can put the PCB exactly where I want it on my model.
For actually getting the boards produced, I went to OSH Park, which has been reliably awesome every time I’ve used it. You can pick this board design up from them if you find it useful – it’s super cheap at 3 boards for $2.15! I ordered myself a dozen just to play around with.
The boards arrived in pretty good time and I got to work putting the LEDs on. Because the 2020s are so tiny, you don’t really want to fuss about hand-soldering them on… it’s no doubt doable, but it’d be a nightmare. Instead, I broke out my hot air station.
- Use a flux pen to mark the solder pads on the surface you’re about to put components on. The flux helps ensure that the solder goes only onto the pads, where you want it, and helps keep connections from getting bridged.
- Carefully apply solder paste onto the pads. A little mess is inevitable, but you want to try your best to keep the paste from overlapping multiple pads.
- Position the LEDs on the board. I used a pair of tweezers for this. Note that the LEDs need to be placed in the correct direction – the stripe on the back of the LED should sit on the silk-screened stripe on the board if you’ve got it the right way around.
- Hit the board with the hot air gun. Make sure you don’t have the airflow set too high, or you’ll blow your LEDs around and make a mess of things. After a few seconds, you should see the solder paste turn to liquid, and then the parts will ‘tighten’ into place as the flux pulls them onto the solder pads.
I soldered the positive, ground, and data wires to the holes on the board and then whipped up a really quick Arduino sketch just to test and make sure everything was working. In addition to the Neopixel library, I also brought in EasingLib to give me some more natural transitions from value-to-value. I also added the ElapsedMillis library, which I rather like for its ability to keep time and easily reset timers without blocking other code from running.
#include "Adafruit_NeoPixel.h"
#include "EasingLib.h"
#include "ElapsedMillis.h"

#define PIN     6
#define N_LEDS 10

// Default constructor (EASE_IN_OUT_CUBIC, 1000ms)
Easing easing;
int newValue = 1;

elapsedMillis blinkTimer;

Adafruit_NeoPixel strip = Adafruit_NeoPixel(N_LEDS, PIN, NEO_GRB + NEO_KHZ800);

void setup() {
  strip.begin();
  chase(strip.Color(255, 0, 0)); // Red
  chase(strip.Color(0, 255, 0)); // Green
  chase(strip.Color(0, 0, 255)); // Blue
  chase(strip.Color(255, 0, 0)); // Red
  chase(strip.Color(0, 255, 0)); // Green
  chase(strip.Color(0, 0, 255)); // Blue
  newPoint();
  blinkTimer = 0;
}

void loop() {
  updateBar();
}

static void chase(uint32_t c) {
  for(uint16_t i=0; i<strip.numPixels()+4; i++) {
      strip.setPixelColor(i  , c); // Draw new pixel
      strip.setPixelColor(i-4, 0); // Erase pixel a few steps back
      strip.show();
      delay(25);
  }
}

void newPoint(){
  newValue = random(1,1000);
  int newInterval = random(300,1000);
  easing = newValue;
  easing.SetMillisInterval(newInterval);
}

void updateBar(){
  int barValue = easing.GetValue();
  drawBarGraph(barValue);
  if(barValue == newValue){
    newPoint();
  }
  if(blinkTimer > 50){
    strip.setPixelColor(9, 0, 0, 0);
    strip.show();
  }
  if(blinkTimer > 100){
    blinkTimer = 0;
  }
}

void drawBarGraph(int barValue){
  // Number between 1 and 1000
  int ledValue = map(barValue, 1, 1000, 1, 10);
  for(int i = 0; i < N_LEDS; i++){
    if(i <= ledValue){
      barColorPicker(i);
    } else {
      strip.setPixelColor(i, 0, 0, 0);
    }
  }
  strip.show();
}

void barColorPicker(int index){
  if(index < 3){
    strip.setPixelColor(index, 0, 125, 0);
  }
  if(index >= 3 && index < 6){
    strip.setPixelColor(index, 125, 125, 0);
  }
  if(index >= 6 && index < 9){
    strip.setPixelColor(index, 125, 0, 0);
  }
  if(index >=9){
    strip.setPixelColor(index,125,125,125);
  }
}
Final results – a working, very small bar graph! This video demonstrates what it looks like when it’s up and running.